Strawberries & Pineapple Candy Hack You’ll Want to Make on Repeat! 🍓🍍
Introduction
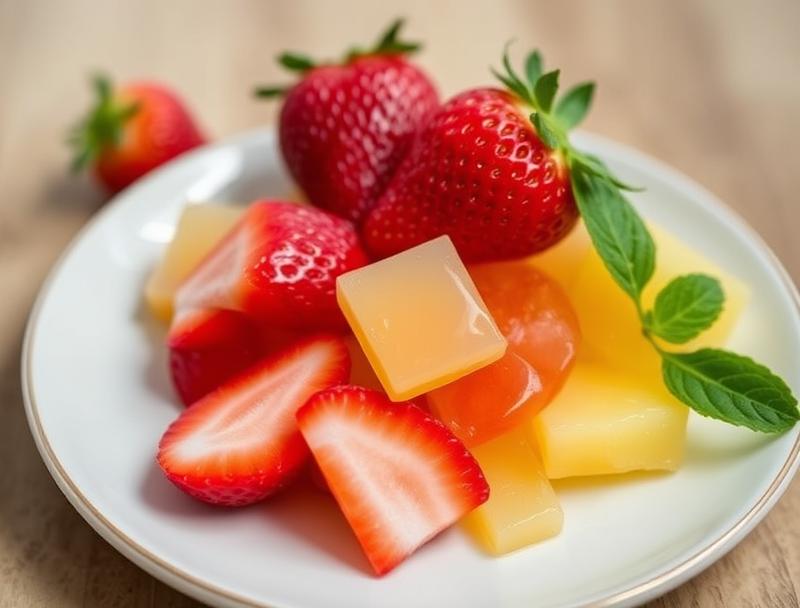
Imagine sinking your teeth into a sweet and tangy treat that combines the freshness of strawberries and the tropical flavor of pineapple, all wrapped up in a delightful candy package. This strawberries and pineapple candy hack is not only easy to make but also bursting with flavor, using everyday ingredients that you might already have in your pantry. The best part? It’s incredibly versatile and can be adapted to suit any occasion, whether you’re looking for a quick snack, a dessert to impress your friends, or a fun project to enjoy with the kids. The creativity and simplicity of this recipe make it a must-try for anyone with a sweet tooth and a penchant for experimenting with new flavors and textures.
Why This Works
- Flavor balance and ingredient accessibility: The combination of strawberries and pineapple creates a perfect balance of sweet and tangy, while using readily available ingredients makes this hack accessible to everyone.
- Ease of preparation: With a minimal number of steps and no need for specialized equipment, this candy hack is quick and easy to prepare, even for those who are new to candy making.
- Impressive results with minimal effort: Despite its simplicity, the end result is impressive and delicious, making it perfect for surprising friends and family or as a unique gift idea.
Ingredients
- 1 cup granulated sugar
- 1/2 cup light corn syrup
- 1/2 cup water
- 1 tablespoon unflavored gelatin
- 1 cup fresh strawberry puree
- 1/2 cup fresh pineapple juice
- Food coloring (optional)
- Confectioners’ sugar, for dusting
Instructions
- Step 1: Begin by preparing your strawberry and pineapple components. Puree the strawberries in a blender until smooth, and mix the pineapple juice with a little water if it’s too concentrated. Set both aside.
- Step 2: In a small bowl, sprinkle the gelatin over 1/4 cup of cold water and let it soften for about 5 minutes. This step is crucial for giving your candy its texture.
- Step 3: Combine the sugar, corn syrup, and 1/2 cup of water in a saucepan. Place the saucepan over medium heat and stir until the sugar has dissolved. Bring the mixture to a boil, then reduce the heat to medium-low and simmer for about 10 minutes, or until the mixture reaches 300°F on a candy thermometer.
- Step 4: Remove the saucepan from the heat and carefully add the softened gelatin, stirring until it’s fully dissolved. Then, add the strawberry puree and pineapple juice, stirring well to combine. If desired, add a few drops of food coloring to tint your candy.
- Step 5: Pour the mixture onto a silicone mat or a greased parchment paper. Let it cool and set at room temperature. This might take a few hours, depending on the humidity and temperature of your environment.
- Step 6: Once set, use a sharp knife or cookie cutters to cut the candy into desired shapes. Dust the candies with confectioners’ sugar to prevent sticking.
Handy Tips
- For a clearer candy, make sure to skim off any foam that forms during the cooking process. Additionally, avoid stirring the mixture too much, as this can introduce air bubbles.
- Experiment with different fruit purees and juices to create unique flavor combinations. Just remember to adjust the amount of sugar according to the sweetness of the fruits you’re using.
- If you find that your candy is too sticky, it might be due to the humidity. Try drying it out a bit longer or adding a small amount of cornstarch to absorb excess moisture.
Heat Control
Heat control is crucial when making candy, as it directly affects the texture and consistency of the final product. Ideally, you want to reach the hard-ball stage (300°F) for a firm, non-sticky candy. If you don’t have a candy thermometer, you can test the mixture by dropping a small amount of it into cold water. If it forms a hard ball that doesn’t flatten when removed from the water, it’s ready. Be cautious not to overheat, as this can lead to a dark, caramelized flavor and a brittle texture.
Crunch Factor
The crunch factor in this strawberries and pineapple candy hack comes from the texture of the candy itself once it’s set. To achieve a nice crunch, it’s essential to not overcook the mixture and to let it set properly. If you prefer a chewier candy, you can cook the mixture to a slightly lower temperature (around 290°F). However, keep in mind that the candy might be more prone to sticking together.
Pro Kitchen Tricks
- Use a silicone mat for easier cleanup and to prevent the candy from sticking. If you don’t have a silicone mat, greased parchment paper works well too.
- Work quickly when pouring the hot candy mixture onto the prepared surface, as it starts to set fast. Having all your tools and surfaces ready beforehand can save you a lot of hassle.
- For a professional look, consider adding a layer of melted chocolate or a sprinkle of edible glitter on top of your candies before they fully set.
Storage Tips
- Store your candies in an airtight container at room temperature for up to 2 weeks. Make sure to dust them with confectioners’ sugar to prevent sticking.
- For longer storage, consider keeping them in the refrigerator. However, be aware that the humidity might affect the texture, making the candies slightly softer.
- Avoid exposing the candies to direct sunlight or high humidity, as this can cause them to become sticky or develop off-flavors.
Gift Packaging Ideas
This strawberries and pineapple candy hack makes for a wonderful gift, especially when packaged in decorative jars, bags, or boxes. Consider adding a personal touch with a handmade card or a ribbon around the gift. You can also customize the packaging based on the occasion, such as using Christmas-themed bags for holiday gifts or pastel colors for Easter. For a more rustic look, fill a mason jar with the candies and tie a twine around the lid. Whatever packaging you choose, make sure it’s airtight to keep the candies fresh.
Flavor Variations
- Different spices: Add a pinch of cinnamon, nutmeg, or ginger to give your candies a unique twist. These spices pair particularly well with the sweetness of the strawberries and pineapple.
- Creative toppings: Before the candies set, sprinkle them with chopped nuts, shredded coconut, or even popping bobas for added texture and fun.
- Ingredient swaps: Experiment with other types of fruit purees or juices, such as raspberry, mango, or peach, to create entirely new flavor profiles.
Troubleshooting
- Texture problems: If your candies turn out too hard, it might be because the mixture was overheated. Conversely, if they’re too soft, it could be due to underheating or high humidity. Adjusting the cooking time and temperature can help achieve the perfect texture.
- Ingredient replacements: If you’re out of a particular ingredient, consider what you can use as a substitute. For example, honey or maple syrup can replace corn syrup in some recipes, though they will affect the flavor.
- Over/undercooking signs: Keep an eye on the color and consistency of your candy mixture. If it’s turning too dark, it’s likely overcooking. If it doesn’t set properly, it might be undercooked.
FAQs
- Can I freeze it? Yes, you can freeze the candies for up to 3 months. However, freezing can affect the texture, making the candies slightly softer when thawed.
- Is it gluten-free? This recipe is naturally gluten-free, making it a伟 option for those with gluten intolerance or sensitivity.
- Can I double the recipe? Yes, you can easily double or triple this recipe if you’re making it for a larger crowd. Just ensure you have a large enough saucepan to accommodate the increased volume and adjust the cooking time slightly if necessary.
Conclusion
Making your own strawberries and pineapple candy at home is not only fun but also rewarding, allowing you to customize the flavors and textures to your liking. With its perfect balance of sweet and tangy, this candy hack is sure to become a favorite among both kids and adults. Don’t be afraid to experiment with different flavors and ingredients to make the recipe your own, and consider sharing your creations with friends and family as a thoughtful and unique gift. Happy cooking, and enjoy the delightful world of homemade candies!