Easy Mini Cherry Pies with Flaky Crust – Perfect for Summer Parties!
Introduction
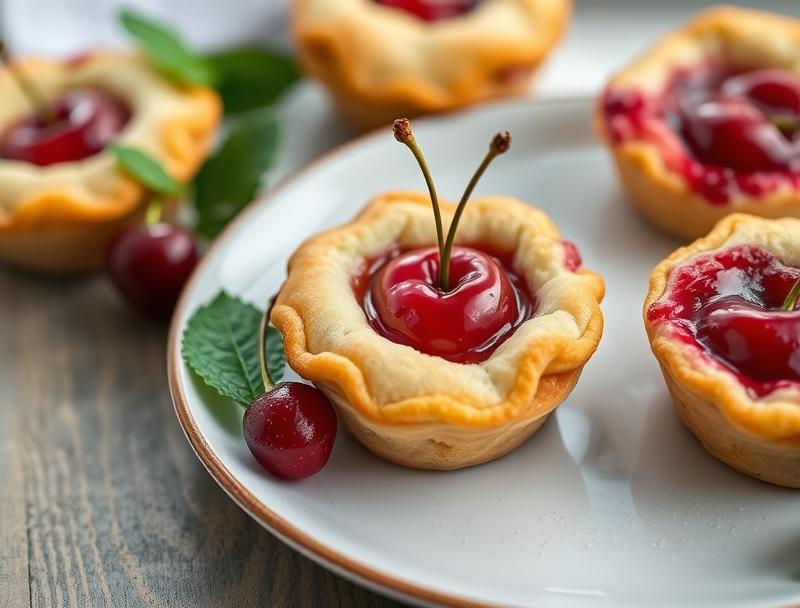
Imagine the warm sunshine of summer, the joy of outdoor gatherings, and the delight of biting into a sweet, flaky pastry filled with the luscious taste of cherries. Our Easy Mini Cherry Pies with Flaky Crust are the perfect dessert for your summer parties, combining ease of preparation, stunning presentation, and an explosion of flavors that will leave your guests in awe. Using everyday ingredients and requiring minimal effort, these mini pies are a creative way to enjoy the sweetness of cherries in a unique and impressive form. Whether you’re hosting a backyard BBQ, a garden party, or just a casual get-together with friends and family, these bite-sized treats are sure to be a hit.
Why This Works
- Flavor balance and ingredient accessibility: The combination of tart cherries and sweet, flaky pastry creates a perfect balance of flavors, and all the ingredients are easily found in most supermarkets, making this recipe highly accessible.
- Ease of preparation: Despite the impressive results, these mini pies are surprisingly easy to make. The pastry can be prepared ahead of time, and the filling is simple to assemble, making the overall process quick and stress-free.
- Impressive results with minimal effort: The presentation of these mini pies is adorable and professional-looking, perfect for impressing your guests without requiring a lot of complicated steps or specialized equipment.
Ingredients
- 2 cups of fresh or frozen cherries, pitted
- 1 cup of granulated sugar
- 2 tablespoons of cornstarch
- 1 tablespoon of lemon juice
- 1/4 teaspoon of salt
- 1/2 cup of cold unsalted butter, cut into small pieces
- 1 1/2 cups of all-purpose flour
- 1/4 cup of ice water
- 1 egg, beaten (for egg wash)
- Confectioners’ sugar (for dusting)
Instructions
- Step 1: Begin by making the cherry filling. In a medium bowl, mix together the cherries, granulated sugar, cornstarch, lemon juice, and salt. Let it sit for about 15 minutes, until the cherries start to release their juice and the mixture becomes syrupy.
- Step 2: To make the flaky crust, combine the flour and cold butter in a large bowl. Use a pastry blender or your fingertips to work the butter into the flour until the mixture resembles coarse crumbs. Gradually add the ice water, stirring with a fork until the dough comes together in a ball. Wrap the dough in plastic wrap and refrigerate for at least 30 minutes.
- Step 3: On a lightly floured surface, roll out the chilled dough to a thickness of about 1/8 inch. Use a cookie cutter or the rim of a glass to cut out circles of dough. You should be able to get about 12 circles.
- Step 4: Spoon a small amount of the cherry filling onto one half of each dough circle, leaving a 1/2 inch border around the edges. Brush the edges with the beaten egg for a golden glaze, then fold the other half of the dough circle over the filling to form a half-moon shape. Press the edges together to seal the pie. Use a fork to crimp the edges and create a decorative border.
- Step 5: Place the mini pies on a baking sheet lined with parchment paper, leaving about 1 inch of space between each pie. Brush the tops with the remaining egg wash and cut a small slit in the top of each pie to allow steam to escape. Bake in a preheated oven at 375°F (190°C) for about 20-25 minutes, or until the pastry is golden brown.
Handy Tips
- Make sure to keep the butter cold, as this will help to create a flaky crust. If the butter starts to soften, refrigerate the dough for a few minutes to firm it up again.
- Don’t overfill the pies, as the filling will bubble up during baking and could spill out. Leave a little room for expansion.
- For an extra-flaky crust, try folding and re-rolling the dough a couple of times before cutting out the circles. This will help to create layers in the pastry.
Heat Control
To achieve the perfect golden brown color on your mini pies, it’s crucial to control the heat. Bake them in a preheated oven at 375°F (190°C) for about 20-25 minutes. Keep an eye on them after 15 minutes, as the baking time may vary depending on the size of your pies and your oven’s performance. The pies are done when the pastry is golden brown, and the filling is bubbly and slightly thickened.
Crunch Factor
The crunch factor in these mini pies comes from the flaky pastry crust. To achieve this, make sure to keep the butter cold and handle the dough gently to avoid developing the gluten in the flour. Also, don’t overwork the dough when rolling it out, as this can make the pastry tough. A light touch and gentle folding will help to preserve the delicate layers in the pastry, resulting in a beautifully flaky and crunchy crust.
Pro Kitchen Tricks
- For an easy way to ensure your pies are evenly sized, use a cookie cutter or a ring mold to cut out the dough circles. This will also help you to get a consistent size and shape.
- To prevent the pies from opening up during baking, make sure the edges are sealed tightly. You can also use a little bit of water to help the edges stick together.
- Experiment with different types of fruit fillings to create unique flavor combinations. Blueberries, raspberries, or even a combination of fruits can add a fun twist to the traditional cherry pie.
Storage Tips
- These mini pies are best served fresh, but they can be stored in an airtight container at room temperature for up to 2 days.
- For longer storage, consider freezing the pies before baking. Place them on a baking sheet lined with parchment paper and put it in the freezer until the pies are frozen solid. Then, transfer them to a freezer-safe bag or container for up to 2 months. Bake frozen pies for an additional 5-10 minutes, or until golden brown.
- When reheating, place the pies in a preheated oven at 350°F (180°C) for about 5-7 minutes, or until warmed through.
Gift Packaging Ideas
These mini pies are perfect for gifting, especially during the summer season. Consider packaging them in cute paper bags or boxes, tied with a ribbon or twine. You can also add a personal touch by including a handwritten note or a small jar of whipped cream or vanilla ice cream. For a more rustic look, place the pies in a wicker basket or a wooden crate, lined with parchment paper or a linen cloth. This will add a charming and homemade touch to your gift.
Flavor Variations
- Different spices: Try adding a pinch of cinnamon, nutmeg, or cardamom to the cherry filling for a unique twist on the traditional flavor.
- Creative toppings: Top your mini pies with a dollop of whipped cream, a sprinkle of powdered sugar, or a few fresh cherries for added flavor and texture.
- Ingredient swaps: Substitute the cherries with other types of fruit, such as blueberries or raspberries, or use a combination of fruits for a mixed berry pie.
Troubleshooting
- Texture problems: If the crust is too tough, it may be due to overworking the dough. Try to handle the dough gently and avoid over-rolling it. If the filling is too runny, it may be due to not cooking it long enough. Try baking the pies for a few more minutes to thicken the filling.
- Ingredient replacements: If you don’t have cherries, you can substitute them with other types of fruit. If you don’t have all-purpose flour, you can try using a combination of cake flour and cornstarch to achieve a similar texture.
- Over/undercooking signs: Keep an eye on the pies while they’re baking, as the baking time may vary. If the crust is golden brown and the filling is bubbly, the pies are done. If the crust is too dark or the filling is too thick, the pies may be overcooked.
FAQs
- Can I freeze it? Yes, you can freeze the mini pies before baking. Place them on a baking sheet lined with parchment paper and put it in the freezer until the pies are frozen solid. Then, transfer them to a freezer-safe bag or container for up to 2 months.
- Is it gluten-free? No, this recipe contains all-purpose flour, which contains gluten. However, you can try substituting the flour with a gluten-free flour blend to make a gluten-free version.
- Can I double the recipe? Yes, you can easily double or triple the recipe to make more mini pies. Just keep in mind that you may need to adjust the baking time slightly, depending on the size of your pies and your oven’s performance.
Conclusion
With these Easy Mini Cherry Pies with Flaky Crust, you’ll be the star of your summer parties and gatherings. The combination of sweet and tart flavors, along with the adorable presentation, is sure to impress your guests and leave them wanting more. Don’t be afraid to experiment with different flavors and toppings to make the recipe your own, and don’t hesitate to reach out if you have any questions or need further assistance. Happy baking, and enjoy the sweet taste of summer!
Easy Mini Cherry Pies with Flaky Crust – Perfect for Summer Parties!
A simple and delicious recipe for mini cherry pies with a flaky crust, perfect for summer parties and gatherings.
🥘 Ingredients
👩🍳 Instructions
-
1Make the cherry filling by mixing together the cherries, granulated sugar, cornstarch, lemon juice, and salt.
-
2Make the flaky crust by combining the flour and cold butter, then gradually adding the ice water.
-
3Roll out the dough and cut out circles using a cookie cutter or the rim of a glass.
-
4Spoon a small amount of the cherry filling onto one half of each dough circle, leaving a 1/2 inch border around the edges.
-
5Fold the other half of the dough circle over the filling to form a half-moon shape, pressing the edges together to seal the pie.
-
6Brush the tops with the beaten egg for a golden glaze, then cut a small slit in the top of each pie to allow steam to escape.
-
7Bake the pies in a preheated oven at 375°F (190°C) for about 20-25 minutes, or until the pastry is golden brown.