No-Bake Oreo Ice Cream Cake (So Easy & Crazy Good!)
Introduction
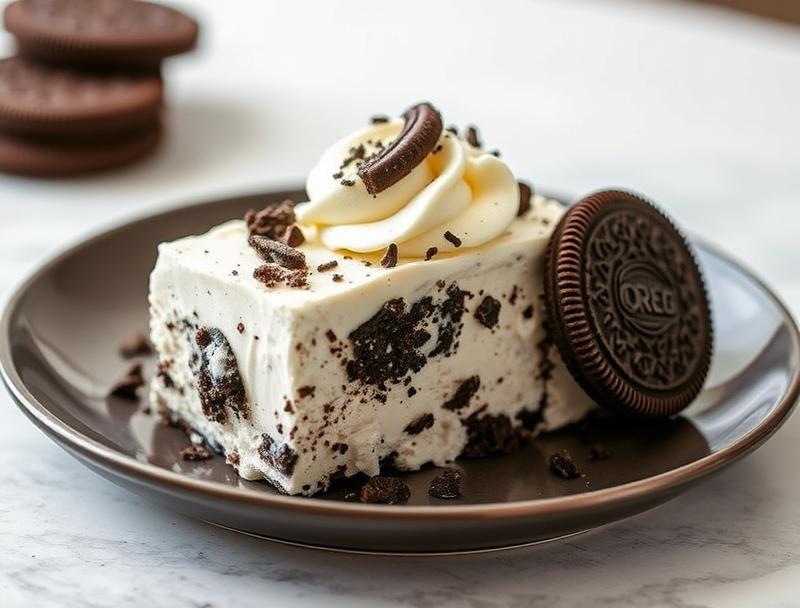
Imagine a dessert that combines the creamy richness of ice cream with the crunch and flavor of Oreos, all without requiring any baking. This No-Bake Oreo Ice Cream Cake is not only incredibly easy to make, but it’s also a masterpiece of flavors and textures that will leave your family and friends in awe. The best part? It’s made with everyday ingredients that you might already have in your pantry, making it a creative and accessible dessert option for anyone looking to impress without the fuss.
Why This Works
- The balance of flavors between the Oreos and the ice cream creates a perfect harmony that is both familiar and exciting.
- The ease of preparation is unparalleled, as it requires no baking and can be assembled in a matter of minutes.
- Despite the minimal effort, the end result is an impressive dessert that looks and tastes like it was made by a professional, making it perfect for special occasions or everyday treats.
Ingredients
- 1 1/2 quarts of your favorite ice cream (we recommend a neutral flavor like vanilla or cookies and cream to let the Oreos shine)
- 1 package of Oreo cookies (for the crust and decoration)
- 1/4 cup of melted butter (to help the Oreo crust stick together)
- 1 can of whipped cream (for topping)
- Optional: additional Oreos for crumbling on top, chocolate sauce for drizzling
Instructions
- Step 1: Start by preparing your Oreo crust. In a blender or food processor, crush about 25-30 Oreos until they are finely ground. Mix the crushed Oreos with the melted butter until well combined. Press this mixture into the bottom of a 9-inch springform pan. Place the pan in the freezer for about 10 minutes to set the crust.
- Step 2: Remove the ice cream from the freezer and let it sit at room temperature for a few minutes to soften slightly. This will make it easier to spread evenly over the Oreo crust. Once the ice cream is slightly softened, use a spatula or spoon to spread it over the crust, making sure to cover the entire surface. Return the pan to the freezer for at least 30 minutes to allow the ice cream to firm up again.
- Step 3: After the ice cream has firmed up, remove the pan from the freezer. If desired, top the ice cream with a layer of whipped cream. You can also crumble additional Oreos on top for extra texture and flavor. If you’re feeling extra fancy, drizzle some chocolate sauce over the top.
- Step 4: Return the cake to the freezer for another 10-15 minutes to allow the whipped cream to set. Once set, remove the cake from the freezer and use a knife to loosen the edges from the springform pan. Release the spring and carefully transfer the cake to a serving plate. Slice and serve immediately.
Handy Tips
- For a firmer ice cream cake, make sure to freeze the cake for at least an hour before serving. This will also help the flavors to meld together nicely.
- Consider using different flavors of ice cream or Oreos to create unique variations. For example, mint chocolate chip ice cream with Oreos could make for a refreshing twist.
- If you find that your Oreo crust is too crumbly, you can try adding a little more melted butter. Conversely, if it’s too wet, add a few more crushed Oreos.
Heat Control
This recipe is no-bake, meaning you don’t have to worry about heat control. However, keeping your ingredients and the finished cake at the right temperature is crucial. Make sure your ice cream is firm but not rock hard, and your whipped cream is chilled but still spreadable.
Crunch Factor
The crunch in this dessert comes from the Oreo crust and any additional Oreos you might crumble on top. To achieve the perfect crunch, make sure your Oreos are finely ground for the crust, and consider chilling them in the freezer for a few minutes before crushing to prevent them from becoming too fine or powdery.
Pro Kitchen Tricks
- To ensure that your ice cream cake slices cleanly and evenly, dip your knife in warm water before cutting. This will help the knife glide through the cake without causing it to crumble or tear.
- For an extra professional touch, consider using a blowtorch to slightly caramelize the top layer of whipped cream or to melt any chocolate drizzle, creating a beautiful, glossy finish.
Storage Tips
- This cake is best served fresh, but it can be stored in the freezer for up to 3 days. Make sure to cover it tightly with plastic wrap or aluminum foil to prevent freezer burn.
- If you’re planning to serve the cake at a later time, consider assembling it up to the point of adding the whipped cream and then freezing. Add the whipped cream just before serving for the best texture and appearance.
Gift Packaging Ideas
This cake can make a wonderful gift, especially for birthdays or special occasions. Consider packaging it in a decorative tin or cake box and adding a ribbon or gift tag. If you’re giving it as a gift to be served at a later time, include a card with serving instructions and any necessary storage tips.
Flavor Variations
- Try using different flavors of ice cream, such as strawberry, chocolate, or cookie dough, to create unique variations of the cake.
- Experiment with different types of cookies for the crust, such as chocolate sandwich cookies, peanut butter cookies, or even wafers.
- Add some extra flavor to your whipped cream by mixing in a teaspoon of vanilla extract, a pinch of salt, or even a spoonful of caramel sauce.
Troubleshooting
- If your Oreo crust turns out too crumbly, it might be because it wasn’t pressed firmly enough into the pan. Try pressing down on it with the back of a spoon or your fingers to compact it more.
- If your ice cream is too soft, it might be because it wasn’t frozen long enough. Give it a bit more time in the freezer before assembling the cake.
- If your whipped cream is too runny, it might be because it was over-mixed. Try mixing it a bit less next time, or chilling it in the fridge for about 10 minutes to firm it up before using.
FAQs
- Can I freeze it? Yes, this cake can be frozen for up to 3 days. It’s actually best served straight from the freezer.
- Is it gluten-free? Depending on the type of ice cream and cookies used, this cake can be gluten-free. Just make sure to choose gluten-free alternatives.
- Can I double the recipe? Yes, you can easily double this recipe to make a larger cake. Just keep in mind that you’ll need a larger pan and possibly more freezing time.
Conclusion
Making a No-Bake Oreo Ice Cream Cake is a fun and rewarding process that yields a dessert that’s sure to please both kids and adults. With its simplicity, versatility, and impressive presentation, it’s the perfect choice for any occasion. Feel free to experiment with different flavors and toppings! The most important thing is to enjoy the process and share the joy of this delicious dessert with your loved ones.
No-Bake Oreo Ice Cream Cake (So Easy & Crazy Good!)
A no-bake ice cream cake made with Oreos and your favorite ice cream, perfect for hot summer days and special occasions.
🥘 Ingredients
👩🍳 Instructions
-
1Prepare the Oreo crust by crushing 25-30 Oreos and mixing with melted butter. Press into a 9-inch springform pan and freeze for 10 minutes.
-
2Soften the ice cream at room temperature for a few minutes, then spread over the Oreo crust. Return to the freezer for at least 30 minutes.
-
3Top the ice cream with whipped cream and additional Oreos if desired. Drizzle with chocolate sauce for an extra touch.
-
4Freeze for an additional 10-15 minutes, then slice and serve immediately.