Puff Pastry Danish Recipes | Easy & Flaky Cheese Danish
Introduction
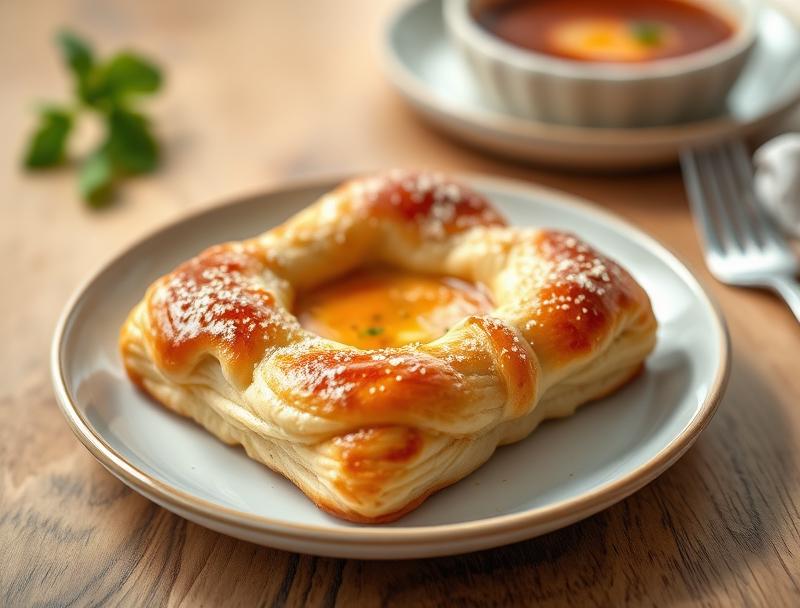
Imagine waking up to the aroma of freshly baked pastries, the flaky layers of puff pastry giving way to a rich, creamy cheese filling. With our easy and flaky cheese Danish recipe, you can create this delightful breakfast or brunch treat in the comfort of your own home. Using everyday ingredients and a straightforward method, this recipe is perfect for beginners and experienced bakers alike. The best part? It’s incredibly versatile, allowing you to experiment with different types of cheese, fruits, and nuts to create a variety of delicious flavor combinations.
Why This Works
- The balance of flavors between the buttery puff pastry and the tangy cheese filling creates a delightful taste experience that’s both familiar and exciting.
- The ease of preparation makes this recipe accessible to anyone, regardless of their baking experience. Simply thaw the puff pastry, prepare the cheese filling, and assemble the Danish.
- The impressive results you’ll achieve with minimal effort make this recipe perfect for special occasions or everyday treats. Your family and friends will be amazed by the flaky, cheesy goodness you’ve created.
Ingredients
- 1 package of puff pastry, thawed
- 1 cup of cream cheese, softened
- 1/2 cup of granulated sugar
- 1/2 cup of chopped fresh fruit (such as strawberries or blueberries)
- 1/4 cup of chopped nuts (such as almonds or walnuts)
- 1 egg, beaten (for egg wash)
- 1 tablespoon of water
- Salt and pepper, to taste
- Confectioners’ sugar, for dusting (optional)
Instructions
- Step 1: Preheat your oven to 400°F (200°C). Line a baking sheet with parchment paper or a silicone mat.
- Step 2: Roll out the puff pastry on a lightly floured surface to a thickness of about 1/8 inch. Transfer the pastry to the prepared baking sheet.
- Step 3: In a medium bowl, beat the cream cheese until smooth. Add the granulated sugar, chopped fruit, and chopped nuts, and mix until well combined.
- Step 4: Spread the cheese filling over the center of the pastry, leaving a 1-inch border on either side. Fold the pastry over the filling, pressing gently to seal.
- Step 5: Brush the egg wash over the pastry to give it a golden brown color. Cut a few slits in the top of the pastry to allow steam to escape.
- Step 6: Bake the Danish for 25-30 minutes, or until the pastry is golden brown and the filling is set. Allow the Danish to cool on a wire rack for 10-15 minutes before serving.
Handy Tips
- Make sure to thaw the puff pastry according to the package instructions to ensure it’s pliable and easy to work with.
- Don’t overfill the pastry, as this can cause it to burst open during baking. Leave a little room for the filling to expand.
- Experiment with different types of cheese, fruits, and nuts to create unique flavor combinations. Some ideas include using goat cheese and fig jam, or adding some chopped ham or bacon to the filling.
Heat Control
To achieve the perfect golden brown color on your Danish, make sure to bake it in a hot oven (400°F or 200°C) for the recommended amount of time. Keep an eye on the pastry during the last 10 minutes of baking, as it can quickly go from golden brown to burnt. If you notice the pastry starting to brown too quickly, cover it with foil to prevent overcooking.
Crunch Factor
The key to achieving a flaky, crunchy pastry is to keep the puff pastry cold and handle it gently. Avoid overworking the dough, as this can cause it to become tough and dense. Also, make sure to bake the Danish in a hot oven, as this will help the pastry to puff up and create a crispy, golden brown crust.
Pro Kitchen Tricks
- To ensure the pastry stays flaky and tender, avoid overmixing the cheese filling. Stop mixing as soon as the ingredients are combined, and don’t overfill the pastry.
- Use a pastry brush to apply the egg wash, as this will help to create a smooth, even coat. You can also use a little bit of water to thin out the egg wash if it’s too thick.
- To add some extra flavor to your Danish, try sprinkling a little bit of granulated sugar or cinnamon over the pastry before baking. This will create a sweet and sticky glaze that’s perfect for breakfast or brunch.
Storage Tips
- Store any leftover Danish in an airtight container at room temperature for up to 2 days. You can also freeze the Danish for up to 2 months and thaw it at room temperature or in the fridge.
- To reheat the Danish, simply bake it in a preheated oven at 350°F (180°C) for 5-10 minutes, or until warmed through. You can also microwave the Danish for 20-30 seconds, but be careful not to overheat it.
- When storing the Danish, make sure to keep it away from direct sunlight and heat sources, as this can cause the pastry to become soggy or stale.
Gift Packaging Ideas
If you want to give your Danish as a gift, consider packaging it in a decorative tin or basket. You can also wrap the Danish in plastic wrap or aluminum foil and tie it with a ribbon or twine. Add a few fresh flowers or a sprinkle of powdered sugar to make the gift even more special. Some other ideas include packaging the Danish in a mason jar or a paper bag, or creating a gift basket filled with other breakfast or brunch treats.
Flavor Variations
- Try using different types of cheese, such as goat cheese or feta, to create a unique flavor profile.
- Add some chopped ham or bacon to the filling for a savory twist.
- Use different types of fruit, such as blueberries or raspberries, to create a sweet and tangy filling.
- Experiment with different spices, such as cinnamon or nutmeg, to add some extra flavor to the pastry.
Troubleshooting
- If your pastry is too dense or tough, try checking the temperature of your oven and making sure you’re not overworking the dough.
- If your filling is too runny, try adding a little bit more cream cheese or powdered sugar to thicken it up.
- If your Danish is too brown or burnt, try covering it with foil during the last 10 minutes of baking to prevent overcooking.
FAQs
- Can I freeze the Danish? Yes, you can freeze the Danish for up to 2 months and thaw it at room temperature or in the fridge.
- Is the Danish gluten-free? No, the Danish contains gluten due to the puff pastry. However, you can try using gluten-free puff pastry to make a gluten-free version.
- Can I double the recipe? Yes, you can double the recipe to make a larger Danish. Just keep in mind that you may need to adjust the baking time accordingly.
Conclusion
With this easy and flaky cheese Danish recipe, you’ll be able to create a delicious breakfast or brunch treat that’s sure to impress your family and friends. Whether you’re a beginner or an experienced baker, this recipe is perfect for anyone looking to try something new and exciting. So go ahead, get creative with your fillings and toppings, and enjoy the delightful taste and texture of this puff pastry Danish. Happy baking!
Puff Pastry Danish Recipes | Easy & Flaky Cheese Danish
A delicious and easy-to-make cheese Danish recipe using puff pastry, perfect for breakfast or brunch.
🥘 Ingredients
👩🍳 Instructions
-
1Preheat the oven to 400°F (200°C).
-
2Roll out the puff pastry on a lightly floured surface to a thickness of about 1/8 inch.
-
3Spread the cheese filling over the center of the pastry, leaving a 1-inch border on either side.
-
4Fold the pastry over the filling, pressing gently to seal.
-
5Brush the egg wash over the pastry and cut a few slits in the top to allow steam to escape.
-
6Bake the Danish for 25-30 minutes, or until the pastry is golden brown and the filling is set.