Chimichanga Recipe: Crispy Beef & Cheese Perfection
Introduction
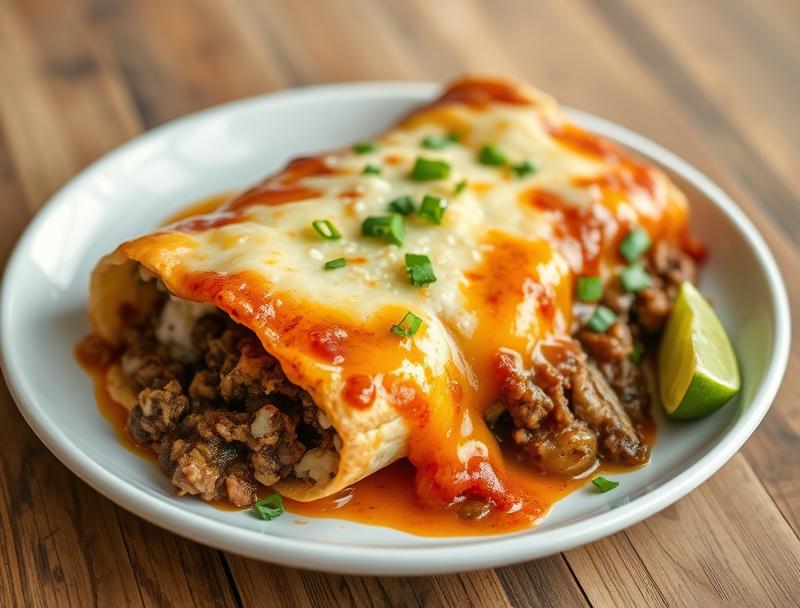
Imagine a dish that combines the richness of beef, the creaminess of cheese, and the crunch of a perfectly fried tortilla. Welcome to the world of chimichangas, a Mexican-inspired delight that is easier to make than you think. With everyday ingredients and a bit of creativity, you can create a culinary masterpiece that will impress your family and friends. In this recipe, we’ll guide you through the process of making crispy beef and cheese chimichangas that are sure to become a favorite.
Why This Works
- Flavor balance and ingredient accessibility: This recipe strikes a perfect balance between the savory flavor of beef, the meltiness of cheese, and the crunch of the tortilla, all using ingredients that are easily found in most supermarkets.
- Ease of preparation: Despite its impressive outcome, this dish is surprisingly simple to prepare. It requires basic cooking skills and can be ready in under an hour.
- Impressive results with minimal effort: The combination of crispy exterior and soft, cheesy interior, along with the flavorful beef filling, makes for a dish that looks and tastes like it came from a professional kitchen, but with minimal fuss.
Ingredients
- 1 pound ground beef
- 1 medium onion, diced
- 2 cloves garlic, minced
- 1 packet of taco seasoning
- 8 large tortillas
- 2 cups shredded cheese (Cheddar or Monterey Jack work well)
- 1 can of enchilada sauce
- Vegetable oil for frying
- Salt and pepper, to taste
- Optional toppings: diced tomatoes, shredded lettuce, sour cream, salsa
Instructions
- Step 1: Begin by preparing the beef filling. In a large skillet, heat a couple of tablespoons of oil over medium-high heat. Add the diced onion and cook until it starts to soften, then add the minced garlic and cook for another minute.
- Step 2: Add the ground beef to the skillet, breaking it up with a spoon as it cooks. Once the beef is browned, add the taco seasoning and follow the package instructions for preparation. Set the filling aside to cool.
- Step 3: To assemble the chimichangas, lay a tortilla flat and spoon some of the beef filling onto the center of the tortilla. Top the filling with a sprinkle of cheese. Fold the bottom edge of the tortilla up over the filling, then fold in the sides and roll the tortilla into a tight cylinder. Repeat with the remaining tortillas and filling.
- Step 4: Heat about half an inch of vegetable oil in a large skillet over medium-high heat until it reaches 350°F. Carefully place a couple of the chimichangas into the hot oil and fry until they are golden brown and crispy, about 2-3 minutes on each side. Drain the chimichangas on paper towels. For an alternative baking method, preheat your oven to 400°F (200°C) and bake the chimichangas for about 15-20 minutes, or until crispy and golden.
Handy Tips
- For an extra crispy exterior, you can chill the assembled chimichangas in the refrigerator for 30 minutes before frying. This helps the tortilla hold its shape and crisp up better.
- Don’t overfill the chimichangas, as this can make them difficult to roll and can lead to them opening up during frying.
- Experiment with different types of cheese and fillings to find your favorite combination. Chicken, steak, and roasted vegetables all make great alternatives to beef.
Heat Control
Maintaining the right temperature is crucial for achieving that perfect crisp. If frying, use a thermometer to ensure the oil reaches 350°F. If the oil is too hot, the chimichangas can burn before they’re fully cooked; if it’s too cool, they’ll absorb too much oil. For baking, keep an eye on them after 10 minutes, as the cooking time can vary depending on your oven and the size of your chimichangas.
Crunch Factor
The crunch of a chimichanga comes from the fried tortilla. To enhance this, make sure the oil is at the right temperature before frying, and don’t overcrowd the skillet. For baked chimichangas, brushing them with a little bit of oil before baking can help achieve a crispy exterior. The key is to not overcook them, as this can lead to a tough, rather than crunchy, texture.
Pro Kitchen Tricks
- Use high-quality tortillas that are fresh and pliable. This will make them easier to roll and less likely to crack.
- Don’t be afraid to experiment with spices and seasonings in your beef filling to give it an extra boost of flavor.
- For a quicker cleanup, line your baking sheet with parchment paper before baking the chimichangas.
Storage Tips
- Leftover chimichangas can be stored in an airtight container in the refrigerator for up to 3 days. Reheat them in the oven or microwave until crispy and hot.
- For longer storage, chimichangas can be frozen before frying or baking. Simply assemble them, place them on a baking sheet lined with parchment paper, and put the sheet in the freezer until they’re frozen solid. Then, transfer them to a freezer-safe bag or container for up to 2 months. Cook frozen chimichangas in the oven or fry them in hot oil until crispy and cooked through.
Gift Packaging Ideas
Chimichangas can be a fun and unique gift, especially when packaged with some of your favorite toppings or sauces. Consider wrapping them individually in foil or parchment paper and placing them in a gift basket with salsa, sour cream, and shredded cheese. You could also include a side of Mexican rice or beans for a complete meal.
Flavor Variations
- Different spices: Add some heat with diced jalapenos or flavor with cumin and chili powder.
- Creative toppings: Try using diced tomatoes, avocado, sour cream, or a sprinkle of queso fresco.
- Ingredient swaps: Use chicken or steak instead of beef, or add some sautéed onions and bell peppers to the filling.
Troubleshooting
- Texture problems: If your chimichangas are turning out too greasy, try baking them instead of frying. If they’re not crispy enough, ensure the oil is at the right temperature or brush them with a little oil before baking.
- Ingredient replacements: Don’t have ground beef? Use ground turkey, chicken, or beans as a substitute. Out of tortillas? Use large lettuce leaves as a low-carb alternative.
- Over/undercooking signs: If the chimichangas are not crispy and golden, they may not be cooked enough. If they’re too dark or smell burnt, they’re overcooked.
FAQs
- Can I freeze it? Yes, chimichangas can be frozen before or after cooking. If freezing before cooking, it’s best to freeze them without frying or baking first, then cook them from frozen.
- Is it gluten-free? Traditional tortillas are made from corn and are gluten-free, but check the ingredients of your taco seasoning and cheese to ensure they are gluten-free as well.
- Can I double the recipe? Absolutely. Simply double all the ingredients and adjust the cooking time if necessary, especially if baking.
Conclusion
Making crispy beef and cheese chimichangas is a fun and rewarding cooking project that yields delicious results with minimal effort. Whether you’re a seasoned chef or a beginner in the kitchen, this recipe is adaptable and sure to please. Don’t be afraid to experiment with different fillings and toppings to make the dish your own, and enjoy the process of creating something truly special. Happy cooking!
Chimichanga Recipe: Crispy Beef & Cheese Perfection
A Mexican-inspired dish featuring crispy tortillas filled with savory beef and melted cheese, perfect for a quick and flavorful meal.
🥘 Ingredients
👩🍳 Instructions
-
1Prepare the beef filling by cooking the ground beef with onion and garlic, then adding taco seasoning.
-
2Assemble the chimichangas by filling tortillas with the beef mixture and cheese, then rolling them up.
-
3Fry the chimichangas in hot oil until crispy and golden, or bake them in the oven as an alternative.
-
4Serve the chimichangas hot with your choice of toppings, such as enchilada sauce, sour cream, and shredded cheese.