Sopapilla Cheesecake Bars – A Sweet Hispanic Heritage Treat
Introduction
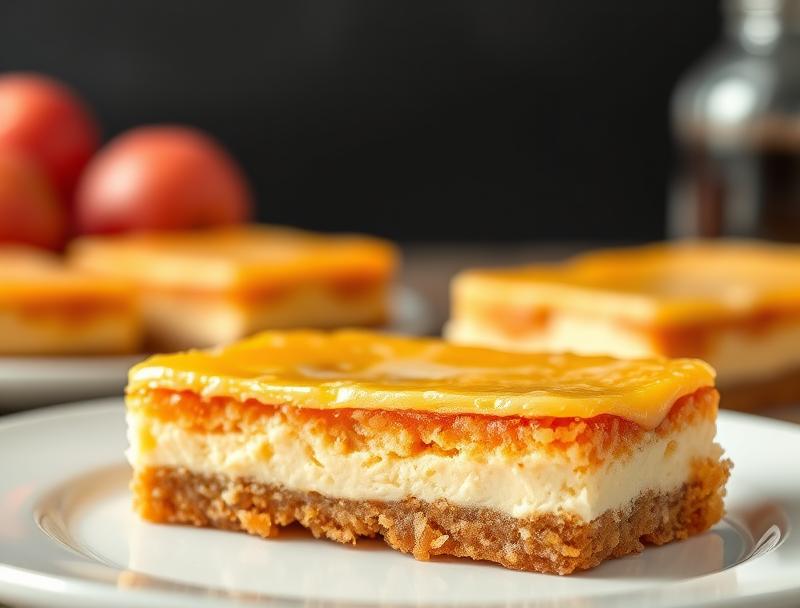
Imagine a dessert that combines the crispy, sugary goodness of sopapillas with the creamy richness of cheesecake. Sopapilla Cheesecake Bars are a creative twist on traditional Hispanic sweets, offering an exciting flavor experience that’s both familiar and new. These bars are surprisingly easy to make, requiring minimal special ingredients and effort, making them perfect for anyone looking to impress with a unique dessert. The best part? They’re incredibly versatile, allowing you to experiment with different flavors and toppings to make them your own. Whether you’re celebrating Hispanic Heritage Month or just looking for a new dessert to add to your repertoire, Sopapilla Cheesecake Bars are sure to become a favorite.
Why This Works
- The combination of the crunchy sopapilla-inspired crust with the smooth cheesecake filling creates a delightful texture contrast that elevates the dessert.
- The use of everyday ingredients like flour, sugar, and cream cheese makes this recipe accessible to anyone, regardless of their baking experience.
- The simplicity of the preparation process belies the complexity of flavors and textures, making it an impressive dessert to serve to guests with minimal fuss.
Ingredients
- 1 1/2 cups all-purpose flour
- 1/2 cup granulated sugar
- 1/4 cup packed brown sugar
- 1/2 teaspoon salt
- 1/4 teaspoon ground cinnamon
- 1/4 teaspoon baking powder
- 1/2 cup unsalted butter, melted
- 2 large eggs
- 2 teaspoons vanilla extract
- 16 ounces cream cheese, softened
- 1/2 cup granulated sugar
- 2 large eggs
- 1 teaspoon vanilla extract
- Powdered sugar, for dusting
- Honey or caramel sauce, for serving (optional)
Instructions
- Step 1: Preheat your oven to 350°F (180°C). Line an 8-inch square baking dish with parchment paper or aluminum foil, leaving some overhang for easy removal.
- Step 2: In a medium bowl, whisk together the flour, granulated sugar, brown sugar, salt, cinnamon, and baking powder. Stir in the melted butter until the mixture forms a crumbly dough. Press this dough evenly into the prepared baking dish.
- Step 3: Bake the crust for 20-25 minutes, or until it is lightly browned. Let it cool completely.
- Step 4: For the cheesecake layer, beat the cream cheese until smooth. Add the granulated sugar and beat until combined. Beat in the eggs one at a time, followed by the vanilla extract.
- Step 5: Pour the cheesecake batter over the cooled crust. Bake for an additional 25-30 minutes, or until the edges are set and the center is just slightly jiggly.
- Step 6: Let the bars cool completely in the pan. Once cooled, refrigerate for at least 4 hours or overnight. Cut into bars and dust with powdered sugar. Serve with honey or caramel sauce, if desired.
Handy Tips
- To ensure the crust doesn’t become too dark, keep an eye on it during the baking time and cover the edges with foil if necessary.
- For a crispy sopapilla-like topping, after the cheesecake has baked and cooled, broil the bars for 1-2 minutes, watching closely to prevent burning.
- Experiment with different flavors by adding a teaspoon of cinnamon, nutmeg, or citrus zest to the cheesecake batter.
Heat Control
Maintaining the right oven temperature is crucial. Ensure your oven is at 350°F (180°C) for both the crust and cheesecake baking. For the broiling step, keep an eye on the bars to achieve the perfect golden brown without burning.
Crunch Factor
Achieving the right crunch is key to these bars. The sopapilla-inspired crust should be crispy, while the cheesecake remains smooth. If you choose to broil the top, this will add an extra layer of crunch and a caramelized flavor.
Pro Kitchen Tricks
- Use room temperature ingredients for the cheesecake batter to ensure it mixes smoothly and evenly.
- A water bath can help the cheesecake cook more evenly and prevent cracking, but it’s not necessary for this recipe.
- Let the bars cool and set properly before slicing to get clean cuts and to prevent the cheesecake from breaking.
Storage Tips
- Store the bars in an airtight container in the refrigerator for up to 5 days.
- These bars can be frozen for up to 2 months. Thaw overnight in the refrigerator before serving.
- For the best texture, serve the bars chilled but not straight from the refrigerator. Let them sit at room temperature for about 30 minutes before serving.
Gift Packaging Ideas
These bars are perfect for gifting, especially during holidays or special occasions. Consider packaging them in decorative tins, jars, or wrapped in colorful paper or cellophane bags. Adding a ribbon or a gift tag with a personal message can make the gift even more special.
Flavor Variations
- Try adding different spices like nutmeg, cardamom, or a pinch of cayenne pepper to the cheesecake batter for unique flavors.
- Use various toppings such as caramel sauce, chocolate shavings, or toasted nuts to add texture and flavor contrast.
- Swap the cream cheese with mascarpone or ricotta for a different cheesecake texture and flavor profile.
Troubleshooting
- If the crust becomes too dark, it may be due to overheating. Check your oven temperature and cover the edges with foil if baking further.
- Cracks in the cheesecake can be due to overmixing the batter or sudden temperature changes. Minimize mixing and ensure the bars cool slowly and evenly.
- If the bars are too soft, they may not have baked long enough. Check for doneness by slightly jiggling the pan; the edges should be set, and the center just slightly jiggly.
FAQs
- Can I freeze it? Yes, these bars can be frozen for up to 2 months. Thaw overnight in the refrigerator before serving.
- Is it gluten-free? The recipe as given contains gluten due to the all-purpose flour. However, you can experiment with gluten-free flours to make a gluten-free version.
- Can I double the recipe? Yes, you can double the recipe, but you’ll need to adjust the baking time accordingly. Keep an eye on the bars to ensure they don’t overcook.
Conclusion
Sopapilla Cheesecake Bars are a delightful fusion of Hispanic heritage and creamy cheesecake, offering a unique dessert experience that’s both easy to make and impressive to serve. With their combination of crunchy and smooth textures, these bars are perfect for any occasion, from casual gatherings to special celebrations. Feel free to experiment with the recipe, adding your own favorite flavors and toppings to make it truly yours. Whether you’re a seasoned baker or just starting out, these bars are sure to become a favorite, and their ease of preparation and versatility make them a great addition to any dessert repertoire.
Sopapilla Cheesecake Bars – A Sweet Hispanic Heritage Treat
A creative dessert combining the crunch of sopapillas with the richness of cheesecake, perfect for celebrating Hispanic heritage or any occasion.
🥘 Ingredients
👩🍳 Instructions
-
1Preheat oven to 350°F (180°C).
-
2Prepare the crust by mixing flour, sugars, salt, cinnamon, and baking powder, then stirring in melted butter.
-
3Press the crust mixture into a prepared 8-inch square baking dish and bake for 20-25 minutes.
-
4Prepare the cheesecake batter by beating cream cheese, granulated sugar, eggs, and vanilla extract.
-
5Pour the cheesecake batter over the cooled crust and bake for an additional 25-30 minutes.
-
6Let cool completely, then refrigerate for at least 4 hours or overnight before cutting into bars.
-
7Dust with powdered sugar and serve, optionally with honey or caramel sauce.