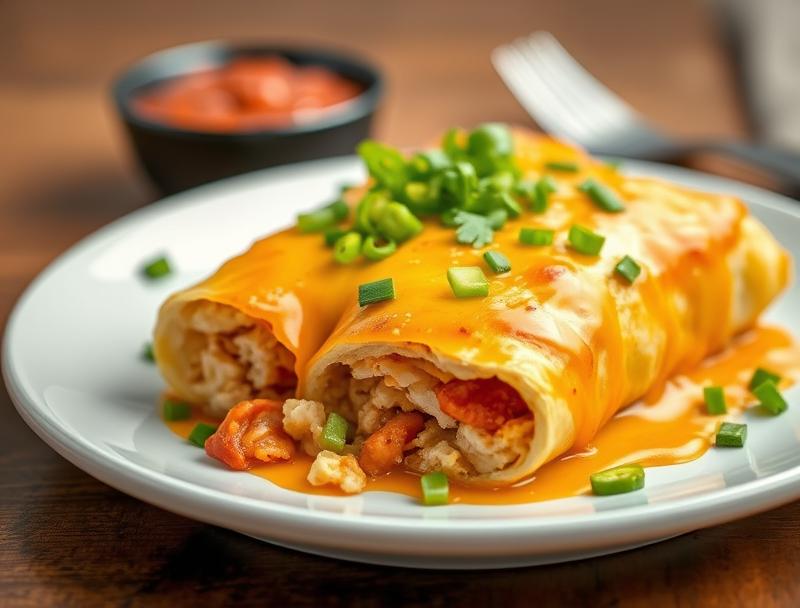
Cheesy Baked Chicken Chimichangas
Introduction
Imagine a dish that combines the creamy richness of cheese, the savory flavor of chicken, and the satisfying crunch of a perfectly baked tortilla. Look no further than these Cheesy Baked Chicken Chimichangas, a recipe that embodies the perfect blend of ease, flavor, and creativity, all using everyday ingredients that you likely have on hand. This dish is a masterclass in comfort food, elevated to new heights by the simplicity of its preparation and the depth of its flavors. Whether you’re a seasoned chef or a beginner in the kitchen, this recipe is sure to delight, offering a versatile and delicious meal option that can be tailored to suit any taste or occasion.
Why This Works
- Flavor balance and ingredient accessibility: The beauty of this recipe lies in its balance of flavors, from the tender chicken and melted cheese to the crunch of the baked tortilla, all of which can be achieved with easily accessible ingredients.
- Ease of preparation: Despite its impressive results, this dish is remarkably easy to prepare, requiring minimal effort for maximum flavor and satisfaction.
- Impressive results with minimal effort: The combination of baked chicken, cheese, and tortilla creates a dish that is not only delicious but also visually appealing, making it perfect for both family dinners and special occasions.
Ingredients
- 1 pound boneless, skinless chicken breasts, cut into small pieces
- 1/2 cup shredded cheese (Cheddar or Monterey Jack work well)
- 1/4 cup chopped onion
- 1/4 cup chopped bell pepper
- 2 cloves garlic, minced
- 1 tablespoon olive oil
- 4 large tortillas
- 1 teaspoon cumin
- 1/2 teaspoon paprika
- Salt and pepper, to taste
- Optional toppings: diced tomatoes, shredded lettuce, sour cream, salsa
Instructions
- Step 1: Preheat your oven to 400°F (200°C). In a large skillet, heat the olive oil over medium-high heat. Add the chicken and cook until browned and cooked through, about 5-7 minutes. Remove the chicken from the skillet and set aside.
- Step 2: In the same skillet, add the chopped onion and bell pepper. Cook until they are tender, about 3-4 minutes. Add the garlic and cook for an additional minute.
- Step 3: In a large bowl, combine the cooked chicken, onion and bell pepper mixture, cumin, paprika, salt, and pepper. Mix well to combine.
- Step 4: To assemble the chimichangas, lay a tortilla flat and spoon about 1/4 of the chicken mixture onto the center of the tortilla. Sprinkle with shredded cheese. Fold the bottom edge of the tortilla up over the filling, then fold in the sides and roll the tortilla into a tight cylinder. Repeat with the remaining tortillas and filling.
- Step 5: Place the chimichangas seam-side down in a baking dish and cover with aluminum foil. Bake for 20 minutes, then remove the foil and continue baking for an additional 5-10 minutes, or until the tortillas are crispy and the cheese is melted.
- Step 6: Remove the chimichangas from the oven and let them cool for a few minutes before serving. Serve hot with your choice of toppings.
Handy Tips
- To add some extra flavor, you can sprinkle some diced tomatoes or chopped cilantro on top of the chimichangas before baking.
- If you prefer a crisper tortilla, you can brush the chimichangas with a little bit of oil before baking.
- For a spicy kick, add some diced jalapeños to the chicken mixture.
Heat Control
To achieve the perfect bake, make sure your oven is preheated to the correct temperature. The ideal internal temperature for cooked chicken is 165°F (74°C). Also, keep an eye on the chimichangas during the last 10 minutes of baking to ensure the tortillas don’t become too brown.
Crunch Factor
The crunch of the baked tortilla is a key element of this dish. To achieve the perfect crunch, make sure to bake the chimichangas for the full 5-10 minutes after removing the foil. You can also brush the tortillas with a little bit of oil before baking to help them crisp up.
Pro Kitchen Tricks
- To make the recipe more efficient, you can prepare the chicken mixture ahead of time and store it in the refrigerator until you’re ready to assemble the chimichangas.
- For an extra crispy tortilla, you can try baking the chimichangas in a skillet on the stovetop for a few minutes on each side before finishing them in the oven.
Storage Tips
- Leftover chimichangas can be stored in an airtight container in the refrigerator for up to 3 days. To reheat, simply bake in the oven at 350°F (180°C) for about 10-15 minutes, or until heated through.
- You can also freeze the chimichangas for up to 2 months. Simply assemble the chimichangas and place them on a baking sheet lined with parchment paper. Freeze until solid, then transfer to a freezer-safe bag or container. To reheat, bake in the oven at 400°F (200°C) for about 20-25 minutes, or until heated through.
Gift Packaging Ideas
If you’re looking to give these chimichangas as a gift, consider packaging them in a decorative tin or basket with some of your favorite toppings, such as salsa, sour cream, and shredded cheese. You could also include a side of Mexican rice or beans for a complete meal.
Flavor Variations
- Different spices: Try adding some cumin, chili powder, or smoked paprika to the chicken mixture for a unique flavor.
- Creative toppings: Consider adding some diced avocado, sliced black olives, or chopped cilantro to the chimichangas for extra flavor and texture.
- Ingredient swaps: You can swap out the chicken for beef, pork, or vegetables for a different twist on the recipe.
Troubleshooting
- Texture problems: If the tortillas are too dry or brittle, try brushing them with a little bit of oil before baking. If the filling is too wet, try adding some extra cheese or beans to absorb the moisture.
- Ingredient replacements: If you don’t have any chicken, you can try using beef, pork, or vegetables as a substitute. If you don’t have any cheese, you can try using beans or salsa as a filling instead.
- Over/undercooking signs: If the chimichangas are undercooked, they may be soft and pale. If they are overcooked, they may be dry and brown. Keep an eye on the chimichangas during the last 10 minutes of baking to ensure they are cooked to perfection.
FAQs
- Can I freeze it? Yes, you can freeze the chimichangas for up to 2 months. Simply assemble the chimichangas and place them on a baking sheet lined with parchment paper. Freeze until solid, then transfer to a freezer-safe bag or container.
- Is it gluten-free? Yes, this recipe is gluten-free, making it a great option for those with dietary restrictions.
- Can I double the recipe? Yes, you can easily double or triple the recipe to feed a larger crowd. Simply multiply the ingredients and adjust the baking time as needed.
Conclusion
In conclusion, these Cheesy Baked Chicken Chimichangas are a delicious and easy-to-make dish that is perfect for any occasion. With their crispy tortillas, flavorful filling, and melted cheese, they are sure to be a hit with anyone who tries them. Whether you’re a seasoned chef or a beginner in the kitchen, this recipe is a great option for a quick and satisfying meal. So go ahead, give it a try, and enjoy the delicious flavors and textures of these amazing chimichangas!