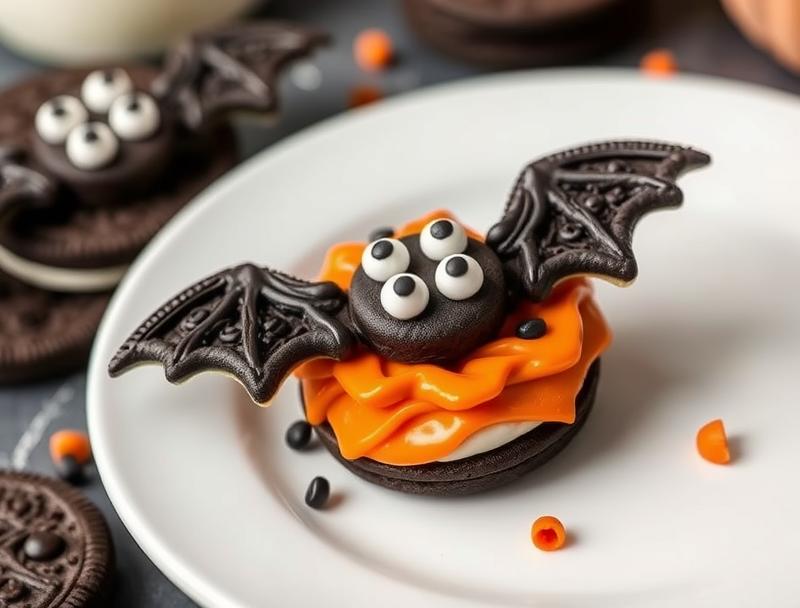
Spook-tacular Fun: Easy Bat Oreos Recipe
Introduction
Welcome to the spookiest and most delicious time of the year! With Halloween just around the corner, we’re excited to share a fun and easy recipe that’s perfect for the occasion: Bat Oreos. These adorable treats are made with everyday ingredients and require minimal effort, making them a great activity for kids and adults alike. In this recipe, we’ll show you how to transform regular Oreos into bat-shaped masterpieces that are sure to impress your friends and family. So, grab your apron and let’s get started on this spook-tacular adventure!
Why This Works
- The combination of Oreos, white chocolate, and black gel icing creates a perfect balance of flavors and textures that will leave you wanting more.
- This recipe is incredibly easy to prepare, requiring only a few ingredients and some basic kitchen tools.
- The result is an impressive and adorable treat that’s sure to be a hit at any Halloween party or gathering.
Ingredients
- 1 package of Oreos
- 1 cup of white chocolate chips
- 1/4 cup of black gel icing
- 1/4 cup of orange or yellow gel icing (optional)
- 1 tablespoon of shortening (optional)
- Parchment paper or a silicone mat
Instructions
- Step 1: Prepare the Oreos – Twist apart the Oreos and separate the wafers from the cream filling. You’ll need the wafers for this recipe, so set the cream filling aside for another use.
- Step 2: Melt the White Chocolate – In a double boiler or a microwave-safe bowl, melt the white chocolate chips. If using a microwave, heat in 30-second increments, stirring between each interval, until smooth.
- Step 3: Dip the Oreos – Dip each Oreo wafer into the melted white chocolate, coating completely. Tap off any excess chocolate by gently tapping the fork or dipping tool against the side of the bowl.
- Step 4: Create the Bat Wings – Use the black gel icing to draw the bat wings on each Oreo. You can also use a toothpick or a small knife to create the wing details.
- Step 5: Add the Eyes and Mouth – Use the black gel icing to draw the eyes and mouth on each bat Oreo. If desired, use orange or yellow gel icing to add a nose or other details.
- Step 6: Let Them Set – Place the bat Oreos on parchment paper or a silicone mat and let them set at room temperature for at least 30 minutes or until the chocolate is hard.
Handy Tips
- To ensure the white chocolate sets properly, make sure the Oreos are completely dry before dipping them in the chocolate.
- If the black gel icing is too thick, you can thin it out with a small amount of shortening.
- To make the bat Oreos more durable, you can add a second layer of white chocolate after the first layer has set.
Heat Control
When melting the white chocolate, make sure to heat it gently and stir frequently to avoid burning or seizing the chocolate. If using a microwave, heat in short intervals and stir between each interval until smooth.
Crunch Factor
The bat Oreos should have a crunchy exterior from the white chocolate and a soft interior from the Oreo wafer. To achieve this, make sure the white chocolate is set properly and the Oreos are fresh.
Pro Kitchen Tricks
- To make the bat Oreos more efficient to make, you can dip multiple Oreos in the white chocolate at once and then place them on parchment paper or a silicone mat to set.
- To clean up any spills or messes, use a damp cloth or paper towel to wipe away any excess chocolate or icing.
Storage Tips
- The bat Oreos can be stored in an airtight container at room temperature for up to 3 days.
- To keep the bat Oreos fresh for a longer period, you can store them in the refrigerator for up to 5 days.
- To freeze the bat Oreos, place them in a single layer on a baking sheet and freeze until hard. Then, transfer them to an airtight container or freezer bag for up to 2 months.
Gift Packaging Ideas
The bat Oreos make a great gift for friends and family, especially during the Halloween season. You can package them in cellophane bags, paper bags, or even create a bat-themed gift box. Add some decorative ribbons, stickers, or labels to make it a more personalized gift.
Flavor Variations
- You can use different flavors of Oreos, such as mint or peanut butter, to create unique flavor combinations.
- Add some creative toppings, such as sprinkles, chopped nuts, or shredded coconut, to give the bat Oreos a more festive look.
- Swap out the white chocolate for milk chocolate or dark chocolate to create a different flavor profile.
Troubleshooting
- If the white chocolate is too thick, try thinning it out with a small amount of shortening.
- If the black gel icing is too runny, try refrigerating it for a few minutes to firm it up.
- If the bat Oreos are not setting properly, try placing them in the refrigerator for a few minutes to speed up the setting process.
FAQs
- Can I freeze the bat Oreos? Yes, you can freeze the bat Oreos for up to 2 months. Simply place them in a single layer on a baking sheet and freeze until hard. Then, transfer them to an airtight container or freezer bag.
- Are the bat Oreos gluten-free? No, the bat Oreos are not gluten-free because they contain Oreos, which contain wheat. However, you can try using gluten-free Oreos or alternative cookies to make a gluten-free version.
- Can I double the recipe? Yes, you can double the recipe to make more bat Oreos. Simply multiply the ingredients and follow the same instructions.
Conclusion
We hope you’ve enjoyed this spook-tacular recipe for bat Oreos! With these easy-to-follow instructions and helpful tips, you’ll be creating adorable bat Oreos in no time. Don’t be afraid to get creative and experiment with different flavors and toppings to make the recipe your own. Happy baking and happy Halloween!
Spook-tacular Fun: Easy Bat Oreos Recipe
A fun and easy recipe for bat-shaped Oreos made with white chocolate and black gel icing. Perfect for Halloween parties and gatherings.
🥘 Ingredients
👩🍳 Instructions
-
1Twist apart the Oreos and separate the wafers from the cream filling.
-
2Melt the white chocolate chips in a double boiler or microwave-safe bowl.
-
3Dip each Oreo wafer into the melted white chocolate, coating completely.
-
4Use the black gel icing to draw the bat wings on each Oreo.
-
5Add the eyes and mouth using the black gel icing.
-
6Let the bat Oreos set at room temperature for at least 30 minutes or until the chocolate is hard.