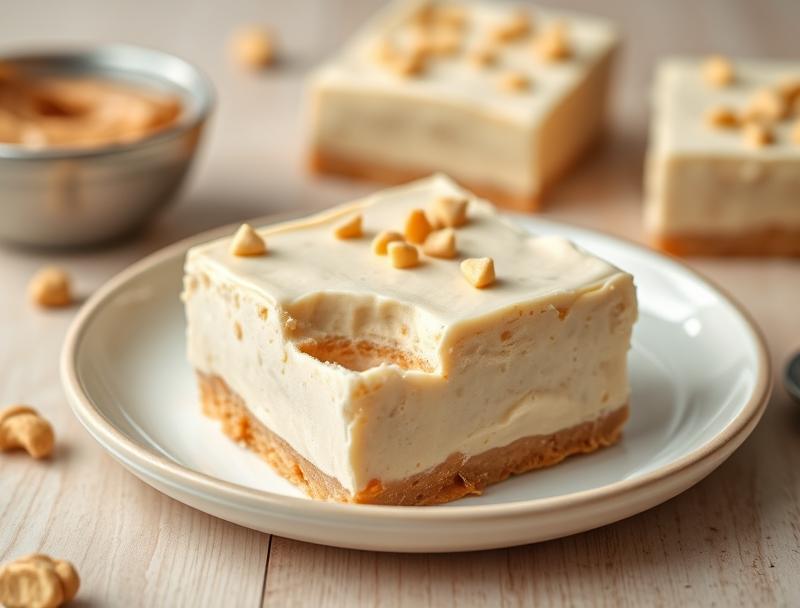
Creamy Peanut Butter Frozen Yogurt Bars
Introduction
Imagine a dessert that combines the richness of peanut butter with the refreshing coolness of frozen yogurt, all in a bar that’s as easy to make as it is to devour. The Creamy Peanut Butter Frozen Yogurt Bars are a game-changer for anyone looking to beat the heat with a sweet treat that’s both healthy and indulgent. Using everyday ingredients and requiring minimal effort, these bars are perfect for a quick dessert or a healthy snack. The best part? They’re incredibly versatile, allowing you to get creative with toppings and mix-ins to suit any taste or dietary preference.
Why This Works
- The balance of creamy peanut butter and tangy frozen yogurt creates a flavor profile that’s both decadent and refreshing, appealing to a wide range of palates.
- The ease of preparation is a significant advantage, as these bars require no cooking and can be mixed and frozen in under 30 minutes, making them perfect for last-minute desserts or snacks.
- The impressive results belay the minimal effort required, as the combination of textures and flavors presents beautifully and tastes like a high-end dessert, despite being made with accessible ingredients.
Ingredients
- 1 1/2 cups plain Greek yogurt
- 1/2 cup creamy peanut butter
- 1/4 cup honey or maple syrup
- 1/4 cup chopped peanuts for garnish
- 1/4 teaspoon salt
- 1 tablespoon vanilla extract
- 1 cup mixed berries (optional, for topping)
- 1/2 cup granola or crushed nuts (optional, for topping)
- Parchment paper or aluminum foil for lining the pan
Instructions
- Step 1: Line an 8×8 inch baking dish with parchment paper or aluminum foil, leaving some overhang for easy removal. This step is crucial for preventing the bars from sticking to the pan.
- Step 2: In a medium-sized bowl, whisk together the Greek yogurt, peanut butter, honey or maple syrup, salt, and vanilla extract until smooth and creamy. This mixture is the base of your frozen yogurt bars, so ensure it’s well combined.
- Step 3: Pour the yogurt mixture into the prepared baking dish and smooth out the top. If using, sprinkle chopped peanuts, mixed berries, or granola over the top for added texture and flavor.
- Step 4: Cover the dish with plastic wrap or aluminum foil and place it in the freezer. Every 30 minutes, remove the dish from the freezer and use a fork to scrape the mixture and break up any ice crystals that have formed. This process, known as “tempering,” will help create a smooth and even texture. Repeat this process for 2-3 hours, or until the desired consistency is reached.
Handy Tips
- For a creamier texture, ensure you temper the mixture every 30 minutes as it freezes. This step is crucial for the smoothness of the final product.
- If you find the peanut butter too thick, you can thin it out with a little bit of milk or yogurt before mixing it with the other ingredients.
- Experiment with different toppings and mix-ins, such as chocolate chips, caramel sauce, or diced fruit, to create unique flavor combinations.
Heat Control
Since these bars are frozen, there’s no need to worry about heat control in the traditional sense. However, be mindful of the freezer temperature, ensuring it’s set at 0°F (-18°C) or below to freeze the mixture properly.
Crunch Factor
The crunch factor in these bars comes from the peanuts or granola used as toppings. To achieve the perfect crunch, sprinkle these toppings just before freezing the final layer, so they retain their texture. If you’re using other toppings like mixed berries, they’ll add natural sweetness and a pop of color but won’t contribute to the crunch factor.
Pro Kitchen Tricks
- To prevent the bars from becoming too icy, make sure to temper the mixture as it freezes. This step is often overlooked but is crucial for achieving a smooth, creamy texture.
- For cleaner cuts, remove the bars from the freezer about 10-15 minutes before serving to let them soften slightly. Use a sharp knife to cut into bars, and serve immediately.
Storage Tips
- Once frozen, these bars can be stored in an airtight container in the freezer for up to 3 months. It’s a good idea to wrap each bar individually in plastic wrap or aluminum foil for easy grab-and-go snacks.
- If you’re planning to serve the bars at a later time, you can also store them in the refrigerator for up to 24 hours before freezing. However, freezing as soon as possible will help retain the texture and freshness.
Gift Packaging Ideas
If you’re looking to give these bars as a gift, consider packaging them in decorative tins or jars filled with the bars and topped with a layer of peanuts or granola. You can also wrap individual bars in colorful paper or bags and tie with a ribbon for a more personalized touch. Adding a handwritten note with serving suggestions or the ingredients used can also make the gift more special and appreciated.
Flavor Variations
- Try using different types of nut butter, like almond or cashew butter, for a unique twist on the classic peanut butter flavor.
- Add a handful of chocolate chips or caramel bits to the yogurt mixture for an indulgent treat.
- Experiment with spices like cinnamon or nutmeg to add a warm, aromatic flavor to the bars.
Troubleshooting
- If your bars turn out too icy, it might be because they weren’t tempered properly during the freezing process. Try re-tempering the mixture and re-freezing.
- If the peanut butter flavor is too strong, you can balance it out by adding a bit more yogurt or honey to the mixture.
- If you’re having trouble getting clean cuts, try letting the bars soften for a few minutes before cutting, or use a sharp, heated knife to cut through the frozen mixture.
FAQs
- Can I freeze it? Yes, these bars are designed to be frozen. In fact, freezing is what gives them their signature texture and helps preserve them for later use.
- Is it gluten-free? Yes, the ingredients used in this recipe are naturally gluten-free, making it a great option for those with gluten intolerance or sensitivity.
- Can I double the recipe? Absolutely! Simply double all the ingredients and use a larger baking dish. Keep in mind that freezing time might be slightly longer for a larger batch.
Conclusion
Making Creamy Peanut Butter Frozen Yogurt Bars is a fun and rewarding process that yields a delicious and healthy dessert perfect for any time of the year. With their smooth, creamy texture and rich peanut butter flavor, these bars are sure to become a favorite. Don’t be afraid to experiment with different toppings and mix-ins to make the recipe your own, and enjoy the process of creating something truly special. Whether you’re a seasoned baker or a beginner in the kitchen, this recipe is a great way to explore the world of desserts without feeling overwhelmed. So go ahead, get creative, and indulge in the creamy, dreamy goodness of these peanut butter frozen yogurt bars!
Creamy Peanut Butter Frozen Yogurt Bars
A refreshing dessert combining creamy peanut butter with frozen yogurt, perfect for hot summer days or as a healthy snack any time of the year.
🥘 Ingredients
👩🍳 Instructions
-
1Line an 8x8 inch baking dish with parchment paper or aluminum foil.
-
2Whisk together the Greek yogurt, peanut butter, honey or maple syrup, salt, and vanilla extract until smooth.
-
3Pour the yogurt mixture into the prepared baking dish and smooth out the top.
-
4Freeze for 2-3 hours, tempering the mixture every 30 minutes until the desired consistency is reached.