Irresistible French Toast Roll-Ups
Introduction
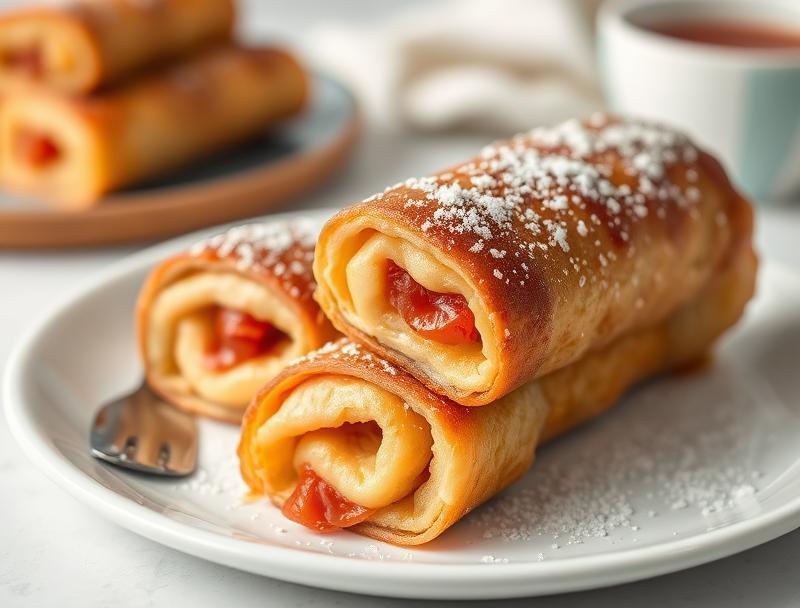
Imagine waking up to a breakfast that’s not only delicious but also visually stunning. Irresistible French Toast Roll-Ups are the perfect dish to impress your family and friends with minimal effort. Using everyday ingredients like bread, eggs, and your choice of fillings, you can create a mouth-watering breakfast or brunch that’s both easy to make and packed with flavor. The best part? It’s incredibly versatile, allowing you to get creative with various fillings and toppings to suit any taste or dietary preference.
Why This Works
- Flavor balance and ingredient accessibility: The combination of soft bread, creamy fillings, and the slight crispness of the French toast exterior creates a perfect harmony of textures and flavors. Plus, all the ingredients are easily found in most supermarkets.
- Ease of preparation: Despite looking elaborate, French Toast Roll-Ups are surprisingly simple to prepare. The process involves basic steps like preparing the filling, rolling the bread, and cooking the rolls in a pan.
- Impressive results with minimal effort: The roll-up design makes for a beautiful presentation, perfect for special occasions or even a regular weekend breakfast. The effort-to-impress ratio is remarkably low, making it an ideal choice for busy mornings.
Ingredients
- 4 slices of white bread (preferably a day-old bread)
- 2 large eggs
- 1/2 cup of milk
- 1/4 cup of granulated sugar
- 1/4 teaspoon of salt
- 2 tablespoons of unsalted butter, melted
- Fillings of your choice (e.g., strawberry jam, Nutella, cream cheese, banana slices)
- Cinnamon or cocoa powder for dusting (optional)
- Maple syrup or honey for serving (optional)
Instructions
- Step 1: Prepare the Filling – Choose your desired filling and prepare it according to your needs. For example, if using jam, simply open the jar. If using bananas, slice them.
- Step 2: Prepare the Bread – Lay the slices of bread flat and using a rolling pin, flatten each slice slightly to make it easier to roll.
- Step 3: Assemble the Roll-Ups – Place about 1-2 teaspoons of your chosen filling at one end of each bread slice. Roll each slice into a tight cylinder. Repeat with the remaining slices and filling.
- Step 4: Prepare the French Toast Mixture – In a shallow dish, whisk together the eggs, milk, sugar, and salt until well combined.
- Step 5: Cook the French Toast Roll-Ups – Heat a non-stick pan over medium heat. Dip each bread roll into the egg mixture, coating it evenly, then place it in the pan. Cook the rolls until they’re golden brown on all sides, about 3-4 minutes per side. You may need to do this in batches depending on the size of your pan.
- Step 6: Serve – Once cooked, place the French Toast Roll-Ups on a serving plate. Dust with cinnamon or cocoa powder if desired, and serve with maple syrup or honey for drizzling.
Handy Tips
- For an extra crispy exterior, chill the rolled bread slices in the refrigerator for about 30 minutes before dipping them in the egg mixture and cooking.
- Don’t overfill the bread slices, as this can make them difficult to roll and may cause them to unroll during cooking.
- Experiment with different fillings and toppings to find your favorite combinations.
Heat Control
When cooking the French Toast Roll-Ups, it’s essential to maintain a medium heat. If the heat is too high, the outside will burn before the inside is fully cooked. Ideally, you want to achieve a golden brown color on all sides, which should take about 3-4 minutes per side. Adjust the heat as necessary to prevent burning.
Crunch Factor
The crunch factor in French Toast Roll-Ups comes from the toasted exterior, which provides a nice contrast to the soft interior. To enhance the crunch, ensure that the rolls are cooked long enough to achieve a golden brown color. Additionally, letting the rolls cool for a minute or two after cooking can help retain their shape and crunch.
Pro Kitchen Tricks
- Use a variety of bread types, like brioche or challah, for a richer flavor.
- Soak the bread slices in the egg mixture for a few seconds on each side for an extra moist interior.
- Keep the cooked French Toast Roll-Ups warm in a low-temperature oven (around 200°F) while cooking the remaining rolls.
Storage Tips
- Leftovers can be stored in an airtight container in the refrigerator for up to 2 days.
- To reheat, place the rolls in the microwave for about 20-30 seconds or in a toaster oven at 300°F for a few minutes.
- For longer storage, consider freezing the uncooked, rolled bread slices. Simply thaw and cook as needed.
Gift Packaging Ideas
If you’re considering gifting French Toast Roll-Ups, they can be beautifully packaged in a variety of ways. Place a few rolls in a decorative tin or airtight container, add some fresh fruit or a drizzle of syrup, and finish with a ribbon or gift tag. Alternatively, wrap individual rolls in plastic wrap or aluminum foil and place them in a gift basket filled with other breakfast treats.
Flavor Variations
- Different spices: Add a pinch of cinnamon, nutmeg, or cardamom to the egg mixture for unique flavor twists.
- Creative toppings: Try using fresh fruits, whipped cream, powdered sugar, or even caramel sauce as toppings.
- Ingredient swaps: Use almond milk instead of regular milk for a dairy-free version, or substitute the granulated sugar with honey or maple syrup for a different sweetness profile.
Troubleshooting
- Texture problems: If your French Toast Roll-Ups turn out too dense, it might be because the bread was too dense or the rolls were overcooked. If they’re too soggy, the bread might have been too fresh or the egg mixture wasn’t cooked long enough.
- Ingredient replacements: Don’t have milk? You can substitute it with any non-dairy milk. Out of eggs? Flax eggs or mashed banana can work as binders in a pinch.
- Over/undercooking signs: Keep an eye on the color and texture. If the rolls are too pale, they might not be cooked enough. If they’re too dark, they’re likely overcooked.
FAQs
- Can I freeze it? Yes, you can freeze the uncooked, assembled rolls for up to 2 months. Simply thaw overnight in the fridge and cook as instructed.
- Is it gluten-free? Not unless you use gluten-free bread. However, this is a great option for those looking to adapt the recipe to gluten-free dietary needs.
- Can I double the recipe? Absolutely. Just remember to adjust the cooking time slightly if you’re cooking a larger batch at once.
Conclusion
Irresistible French Toast Roll-Ups are a game-changer for any breakfast or brunch gathering. With their unique presentation, customizable fillings, and surprisingly simple preparation, they’re sure to become a favorite. Don’t be afraid to experiment with different ingredients and toppings to make the recipe your own. Whether you’re a seasoned chef or a beginner in the kitchen, this dish is sure to impress and delight. So go ahead, give it a try, and start your day off right with a delicious and visually appealing meal that’s sure to bring smiles to the table.
Irresistible French Toast Roll-Ups
A delicious breakfast dish made with rolled bread, filled with your choice of ingredients, dipped in a French toast mixture, and cooked to a golden brown perfection.
🥘 Ingredients
👩🍳 Instructions
-
1Prepare the filling by choosing and preparing your desired ingredients.
-
2Flatten the bread slices using a rolling pin.
-
3Assemble the roll-ups by placing the filling at one end of each bread slice and rolling them into tight cylinders.
-
4Prepare the French toast mixture by whisking together eggs, milk, sugar, and salt.
-
5Dip each roll into the French toast mixture and cook in a non-stick pan over medium heat until golden brown on all sides.
-
6Serve warm, dust with cinnamon or cocoa powder if desired, and drizzle with maple syrup or honey.