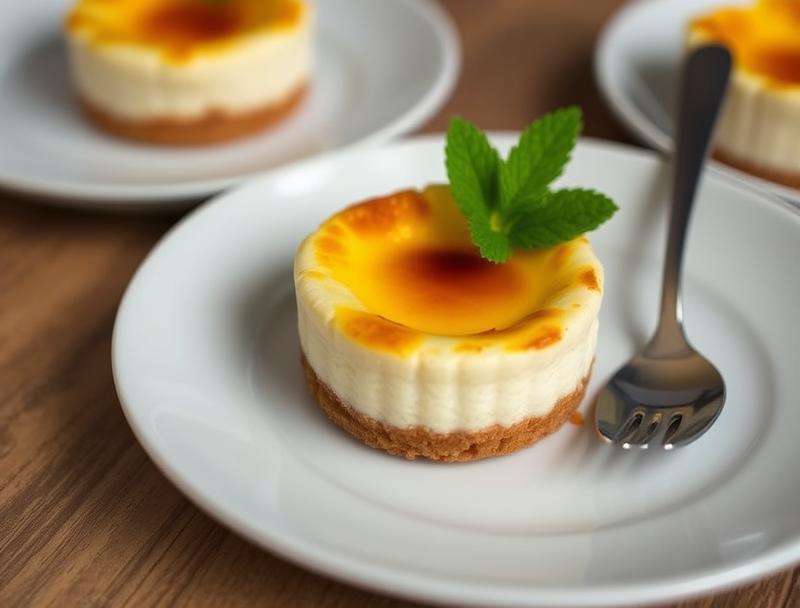
Mini Crème Brûlée Cheesecakes with Graham Cracker Crust
Introduction
Indulge in the richness of crème brûlée and the creaminess of cheesecake, all in one adorable mini dessert. These Mini Crème Brûlée Cheesecakes with Graham Cracker Crust are not only a treat for the taste buds but also a delight to the eyes. With everyday ingredients and a straightforward preparation process, you can create these stunning desserts that are perfect for any occasion, from dinner parties to casual gatherings. The combination of the crunchy graham cracker crust, the smooth cheesecake, and the caramelized sugar on top is a match made in heaven, offering a delightful contrast of textures and flavors in each bite.
Why This Works
- Flavor balance and ingredient accessibility: The recipe combines classic flavors like vanilla and caramel with easily accessible ingredients, making it a practical choice for anyone looking to impress without the fuss.
- Ease of preparation: Despite the impressive outcome, these mini cheesecakes are surprisingly easy to make. The steps are straightforward, and the ingredients are simple to work with.
- Impressive results with minimal effort: The caramelized sugar on top adds a professional touch that belies the simplicity of the preparation process, making these cheesecakes perfect for special occasions or as a unique dessert for everyday enjoyment.
Ingredients
- 1 1/2 cups graham cracker crumbs
- 1/4 cup granulated sugar
- 6 tablespoons (3/4 stick) unsalted butter, melted
- 12 ounces cream cheese, softened
- 1/2 cup granulated sugar
- 2 large eggs
- 1 teaspoon vanilla extract
- 1 cup sour cream
- Sugar (for caramelizing)
Instructions
- Step 1: Preheat your oven to 325°F (160°C). Prepare a mini muffin tin with paper liners. In a medium bowl, mix together the graham cracker crumbs and sugar. Pour in the melted butter, and stir until the crumbs are evenly moistened. Press about 1 tablespoon of the crumb mixture into the bottom of each muffin cup.
- Step 2: Bake the crusts for about 5 minutes, or until they are lightly browned. Let them cool completely in the pan.
- Step 3: In a large mixing bowl, beat the cream cheese until smooth. Add the granulated sugar and beat until combined. Beat in the eggs one at a time, followed by the vanilla extract. Stir in the sour cream until well combined.
- Step 4: Divide the cheesecake batter evenly among the muffin cups. Bake for about 18-20 minutes, or until the edges are set and the centers are just slightly jiggly. Let the cheesecakes cool completely in the pan, then refrigerate them for at least 4 hours or overnight.
- Step 5: Just before serving, sprinkle a thin layer of granulated sugar over the top of each chilled cheesecake. Caramelize the sugar with a kitchen torch or under the broiler for a few seconds, watching carefully to avoid burning.
Handy Tips
- For a water bath, place the muffin tin in a larger baking dish and add hot water to come halfway up the sides of the tin. This helps in cooking the cheesecakes more evenly and prevents cracking.
- Don’t overmix the batter, as this can cause the cheesecakes to crack.
- Let the cheesecakes cool completely before refrigerating them to prevent cracking.
Heat Control
When caramelizing the sugar on top of the cheesecakes, it’s crucial to control the heat. If using a kitchen torch, move it slowly and steadily back and forth to achieve an even caramelization. If using the broiler, place the cheesecakes under the broiler for just a few seconds, checking frequently to avoid burning. The ideal caramelized sugar should be golden brown and crispy.
Crunch Factor
The crunch factor in these mini cheesecakes comes from the graham cracker crust and the caramelized sugar on top. To achieve the perfect crunch, ensure that the crust is baked until lightly browned and that the sugar is caramelized to a golden brown. This contrast in textures adds to the dessert’s appeal and enjoyment.
Pro Kitchen Tricks
- Use high-quality ingredients, especially the cream cheese and vanilla extract, to ensure the best flavor.
- Don’t open the oven door during the baking time, as this can cause the cheesecakes to sink or crack.
- For a clean caramelization, sprinkle the sugar evenly and use a steady hand when applying heat.
Storage Tips
- These mini cheesecakes can be stored in the refrigerator for up to 3 days.
- For longer storage, they can be frozen for up to 2 months. Thaw frozen cheesecakes in the refrigerator overnight before serving.
- Caramelize the sugar just before serving, as it will start to dissolve if stored for too long after caramelization.
Gift Packaging Ideas
These mini cheesecakes are perfect for gifting, especially during holidays or special occasions. Consider packaging them in decorative muffin tin liners or small gift boxes. You can also wrap each cheesecake individually in plastic wrap or aluminum foil and place them in a larger gift basket filled with other sweet treats. Adding a ribbon or a gift tag with a personal message makes the gift even more special.
Flavor Variations
- Different spices: Add a pinch of cinnamon, nutmeg, or cardamom to the cheesecake batter for a unique twist.
- Creative toppings: Instead of caramelized sugar, top the cheesecakes with fresh fruits, nuts, or a drizzle of chocolate sauce.
- Ingredient swaps: Use different types of crackers for the crust, such as chocolate sandwich cookies for a chocolate crust, or substitute the sour cream with Greek yogurt for a tangier cheesecake.
Troubleshooting
- Texture problems: If the cheesecakes are too dense, it might be due to overmixing the batter. If they are too soft, they might not have been baked long enough.
- Ingredient replacements: Always try to use the ingredients as specified, but if you need to make substitutions, ensure that the replacement ingredients have similar properties and flavors.
- Over/undercooking signs: Check the cheesecakes frequently during the baking time. They are done when the edges are set, and the centers are just slightly jiggly. Overcooking will make them dry and cracked.
FAQs
- Can I freeze it? Yes, these mini cheesecakes can be frozen for up to 2 months. Thaw them in the refrigerator overnight before serving.
- Is it gluten-free? The graham cracker crust typically contains gluten. To make a gluten-free version, use gluten-free crackers or cookies for the crust.
- Can I double the recipe? Yes, you can double the recipe to make more mini cheesecakes. Just ensure that you have enough muffin tin space and adjust the baking time slightly if necessary.
Conclusion
Mini Crème Brûlée Cheesecakes with Graham Cracker Crust are a delightful dessert that combines the best of both worlds – the creamy richness of cheesecake and the caramelized sweetness of crème brûlée. With their adorable size and impressive presentation, they are perfect for any occasion. Whether you’re a seasoned baker or a beginner in the kitchen, this recipe is sure to impress your family and friends. So, don’t hesitate to give it a try, and enjoy the oohs and aahs as you present these stunning mini desserts.
Mini Crème Brûlée Cheesecakes with Graham Cracker Crust
A rich and creamy mini dessert combining the flavors of crème brûlée and cheesecake, with a crunchy graham cracker crust and caramelized sugar on top.
🥘 Ingredients
👩🍳 Instructions
-
1Preheat oven to 325°F (160°C). Prepare a mini muffin tin with paper liners.
-
2Mix graham cracker crumbs and sugar, then add melted butter and press into muffin cups.
-
3Bake crusts for 5 minutes, then let cool.
-
4Beat cream cheese until smooth, then add granulated sugar, eggs, vanilla extract, and sour cream.
-
5Divide cheesecake batter among muffin cups and bake for 18-20 minutes.
-
6Let cheesecakes cool, then refrigerate for at least 4 hours or overnight.
-
7Caramelize sugar on top of chilled cheesecakes just before serving.