Easy Philly Cheesesteak Sliders Recipe for Crowd Pleasers
Introduction
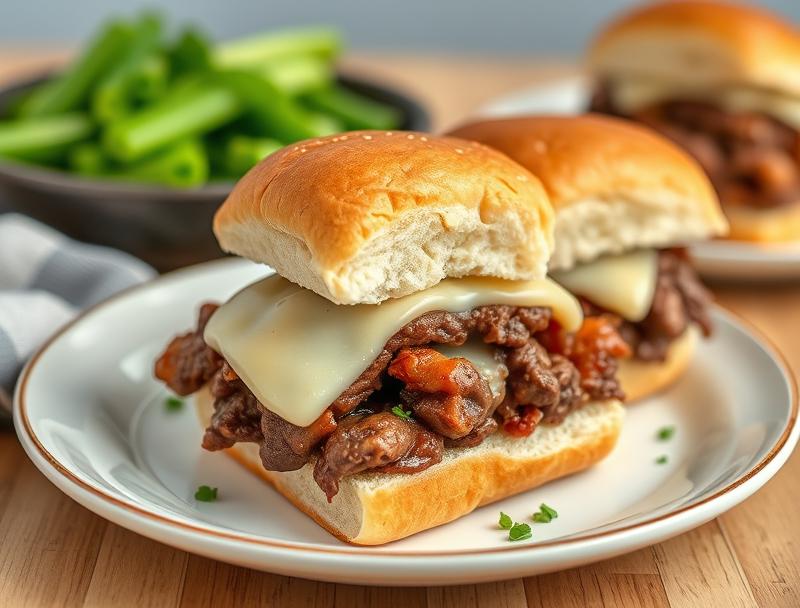
Imagine sinking your teeth into a tender, juicy, and flavorful Philly cheesesteak slider that’s so easy to make, you’ll wonder how you ever lived without this recipe. This dish is a masterclass in balance and simplicity, using everyday ingredients to create a culinary experience that will leave your guests begging for more. The beauty of this recipe lies in its accessibility and versatility, making it perfect for casual gatherings, parties, or even a quick weeknight dinner. With its rich, meaty flavor and gooey melted cheese, this easy Philly cheesesteak sliders recipe is sure to become a crowd-pleaser in your household.
Why This Works
- Flavor balance and ingredient accessibility: The combination of tender beef, melted cheese, and fresh vegetables creates a flavor profile that’s both comforting and exciting, all while using ingredients that are easily found in most supermarkets.
- Ease of preparation: This recipe simplifies the traditional Philly cheesesteak into bite-sized sliders that are quick to prepare and cook, making it ideal for those short on time but big on flavor.
- Impressive results with minimal effort: Despite its simplicity, the presentation and taste of these sliders are impressive enough to serve at any gathering, ensuring you receive compliments without having to spend hours in the kitchen.
Ingredients
- 1 pound thinly sliced ribeye or top round steak
- 4 small hoagie rolls or slider buns
- 4 slices of cheese (Cheez Whiz, provolone, or American work well)
- 1 large onion, thinly sliced
- 2 large bell peppers (any color), thinly sliced
- 2 cloves of garlic, minced
- 1 tablespoon olive oil
- Salt and pepper, to taste
- Optional: chopped fresh parsley or thyme for garnish
Instructions
- Step 1: Prepare the Ingredients – Slice the steak into thin strips and season with salt and pepper. Slice the onions and bell peppers into thin strips as well. Mince the garlic and set aside.
- Step 2: Sauté the Onions and Bell Peppers – Heat the olive oil in a large skillet over medium-high heat. Add the sliced onions and bell peppers and cook until they are tender and lightly browned, about 5-7 minutes. Add the minced garlic and cook for an additional minute.
- Step 3: Cook the Steak – In the same skillet, add the sliced steak and cook until browned, about 3-5 minutes. Remove from heat and set aside with the onions and bell peppers.
- Step 4: Assemble the Sliders – Slice the hoagie rolls in half and place them in the oven at 350°F for a few minutes to toast lightly. Assemble the sliders by placing a few slices of the steak onto each roll, followed by some of the sautéed onions and bell peppers, and finally a slice of cheese. Place the sliders under the broiler for a minute or until the cheese is melted and bubbly.
Handy Tips
- For an extra crispy roll, try grilling the hoagie rolls lightly before assembling the sliders.
- Substitute the cheese with your favorite or what you have on hand, but keep in mind that melted cheeses work best.
- Avoid overcooking the steak to keep the sliders tender and juicy.
Heat Control
When cooking the steak and sautéing the vegetables, it’s crucial to control the heat to achieve the perfect doneness. For the steak, medium-high heat is ideal for getting a nice sear, while medium heat is better suited for the vegetables to prevent burning. When melting the cheese under the broiler, keep an eye on the sliders to ensure the cheese doesn’t burn, ideally aiming for a golden, bubbly texture.
Crunch Factor
The crunch factor in these sliders comes from the toasted hoagie rolls and the slightly caramelized onions and bell peppers. To enhance the crunch, you can also add some crispy fried onions on top of the sliders before serving. The key is to achieve a balance between tender meat, gooey cheese, and crunchy textures for a satisfying bite.
Pro Kitchen Tricks
- Use a cast-iron skillet for cooking the steak and vegetables, as it retains heat well and can achieve a nice sear.
- Don’t overcrowd the skillet; cook the ingredients in batches if necessary, to ensure everything cooks evenly and doesn’t steam instead of sear.
- Keep the assembled sliders warm in a low-temperature oven (around 200°F) while preparing the rest, to keep everything ready to serve at the same time.
Storage Tips
- Leftover sliders can be stored in an airtight container in the refrigerator for up to a day. Reheat them in the oven at 350°F for a few minutes until the cheese is melted again.
- Consider preparing the components (steak, vegetables, cheese) ahead of time and assembling the sliders just before serving for the freshest flavor and texture.
- For longer storage, cook the steak and vegetables, then freeze them in separate containers. Assemble the sliders when you’re ready, using frozen components and fresh cheese and rolls.
Gift Packaging Ideas
If you’re considering gifting these sliders, perhaps for a party favor or a potluck, you can package them individually in small baskets or containers. Wrap each slider in parchment paper or aluminum foil and tie with a ribbon. Include a small card with heating instructions and a personal note for a thoughtful touch.
Flavor Variations
- Different spices: Add a sprinkle of paprika or chili flakes to the steak for an extra kick.
- Creative toppings: Consider adding sliced jalapeños, diced tomatoes, or a dollop of salsa to the sliders for added flavor and texture.
- Ingredient swaps: Use chicken or pork instead of steak for a different twist, or substitute the cheese with a dairy-free alternative for a vegan version.
Troubleshooting
- Texture problems: If the steak is too tough, it might have been overcooked. Try cooking it to a lower temperature next time. If the vegetables are too crunchy, they might not have cooked long enough; add a few more minutes to their cooking time.
- Ingredient replacements: If you can’t find ribeye or top round, other cuts of beef can work, though they might alter the flavor and texture slightly.
- Over/undercooking signs: Keep an eye on the color and texture of the ingredients. Steak should be browned on the outside and reach your desired level of doneness inside. Vegetables should be tender but still crisp.
FAQs
- Can I freeze it? Yes, you can freeze the cooked steak and vegetables for up to 3 months. Assemble the sliders when you’re ready to serve.
- Is it gluten-free? The recipe can be gluten-free if you use gluten-free hoagie rolls. Be sure to check the ingredients of the cheese and any seasonings used as well.
- Can I double the recipe? Absolutely, this recipe scales well. Simply double all the ingredients and cook in batches if necessary to prevent overcrowding the skillet.
Conclusion
In conclusion, this easy Philly cheesesteak sliders recipe is a game-changer for anyone looking to impress with minimal effort. With its perfect balance of flavors, ease of preparation, and versatility, it’s a dish that will quickly become a staple in your household. Feel free to experiment with different ingredients and toppings to make it your own, and don’t hesitate to share your creations with friends and family. The joy of cooking lies not just in the eating, but in the sharing, so go ahead and spread the love, one delicious slider at a time.
Easy Philly Cheesesteak Sliders Recipe for Crowd Pleasers
A simplified and delicious Philly cheesesteak recipe converted into easy-to-make sliders, perfect for gatherings and quick meals.
🥘 Ingredients
👩🍳 Instructions
-
1Prepare the ingredients by slicing the steak, onions, bell peppers, and mincing the garlic.
-
2Sauté the onions and bell peppers in olive oil until tender, then add the garlic and cook for an additional minute.
-
3Cook the sliced steak in the same skillet until browned, then set aside with the vegetables.
-
4Assemble the sliders by placing the cooked steak, onions, bell peppers, and a slice of cheese onto each hoagie roll, then place under the broiler until the cheese is melted and bubbly.