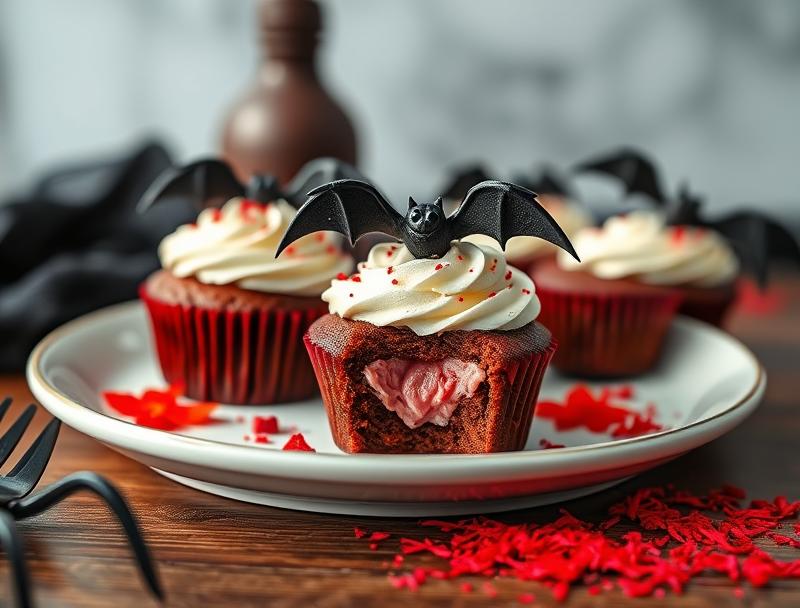
Vampire Bite Halloween Cupcakes with Creamy Red Filling
Introduction
As the spooky season approaches, there’s no better way to get into the Halloween spirit than with a batch of Vampire Bite Halloween Cupcakes, complete with a creamy red filling that’s sure to thrill both kids and adults alike. These cupcakes are not only delicious but also incredibly easy to make, requiring just a few everyday ingredients that you might already have in your pantry. The best part? They’re so creative and visually appealing, with their “bite” marks and red filling, that they’re sure to be the star of any Halloween party or gathering. Whether you’re a seasoned baker or a novice in the kitchen, these cupcakes are a must-try for anyone looking to add a little excitement to their Halloween celebrations.
Why This Works
- The flavor balance in these cupcakes is perfect, with the sweetness of the cake and the creaminess of the filling complemented by the tanginess of the red velvet flavor.
- The ingredients are easily accessible and won’t break the bank, making these cupcakes a great option for anyone looking to save a little money without sacrificing taste or quality.
- Despite their impressive appearance, these cupcakes are actually quite easy to prepare, requiring minimal effort and time in the kitchen.
Ingredients
- 1 1/2 cups all-purpose flour
- 1 cup granulated sugar
- 2 teaspoons baking powder
- 1/2 teaspoon salt
- 1/2 cup unsalted butter, at room temperature
- 2 large eggs
- 2 teaspoons red food coloring
- 1 teaspoon vanilla extract
- 1 cup creamy red filling (such as buttercream or cream cheese frosting)
- White chocolate chips or shavings, for garnish
- Edible blood (such as red gel or icing), for decoration
Instructions
- Step 1: Preheat your oven to 350°F (180°C). Line a 12-cup muffin tin with cupcake liners.
- Step 2: In a medium bowl, whisk together the flour, sugar, baking powder, and salt.
- Step 3: In a large bowl, using an electric mixer, beat the butter until it’s creamy. Add the eggs one at a time, beating well after each addition. Beat in the red food coloring and vanilla extract.
- Step 4: Gradually add the dry ingredients to the wet ingredients, beating until just combined.
- Step 5: Divide the batter evenly among the cupcake liners.
- Step 6: Bake for 18-20 minutes, or until a toothpick inserted into the center of a cupcake comes out clean.
- Step 7: Allow the cupcakes to cool completely in the pan.
- Step 8: Once the cupcakes are cool, use a small knife or a cupcake corer to remove a small circle from the center of each cupcake.
- Step 9: Fill the hole with a small amount of creamy red filling.
- Step 10: Top the cupcakes with additional creamy red filling, if desired, and garnish with white chocolate chips or shavings.
- Step 11: Use edible blood to create “bite” marks on the cupcakes, if desired.
Handy Tips
- To ensure that your cupcakes are evenly baked, make sure to rotate the muffin tin halfway through the baking time.
- If you don’t have red food coloring, you can use a combination of pink and yellow food coloring to create a similar shade.
- To make the cupcakes more stable, you can insert a toothpick into the center of each cupcake and use it to hold the filling in place.
Heat Control
When baking the cupcakes, it’s essential to keep an eye on the temperature and timing to ensure that they’re cooked to perfection. The ideal temperature for baking cupcakes is 350°F (180°C), and the baking time will depend on the size of the cupcakes and the temperature of your oven. As a general rule, cupcakes are done when a toothpick inserted into the center comes out clean. If you’re unsure, you can always check the cupcakes after 15 minutes and then every 2-3 minutes thereafter until they’re cooked to your liking.
Crunch Factor
The crunch factor in these cupcakes comes from the white chocolate chips or shavings on top, which add a nice textural element to the soft and creamy cake and filling. To achieve the perfect crunch, make sure to chop the white chocolate into small pieces before sprinkling it on top of the cupcakes. You can also use other toppings, such as chopped nuts or sprinkles, to add more texture and visual interest to the cupcakes.
Pro Kitchen Tricks
- To make the cupcakes more visually appealing, you can use a piping bag and tip to create a decorative border around the edges of the cupcakes.
- To ensure that the filling doesn’t ooze out of the cupcakes, you can insert a small amount of filling into the center of each cupcake and then top it with a dollop of whipped cream or additional filling.
- To make the cupcakes more stable, you can insert a toothpick into the center of each cupcake and use it to hold the filling in place.
Storage Tips
- The cupcakes can be stored in an airtight container at room temperature for up to 3 days.
- The cupcakes can also be frozen for up to 2 months. To freeze, place the cupcakes in a single layer in a freezer-safe bag or container and store in the freezer.
- To thaw frozen cupcakes, simply leave them at room temperature for a few hours or overnight in the refrigerator.
Gift Packaging Ideas
If you’re looking to give the cupcakes as a gift, you can package them in a variety of creative ways. One idea is to place the cupcakes in a decorative tin or box and wrap it in cellophane or a gift bag. You can also use cupcake wrappers or liners in Halloween-themed designs to add an extra touch of festivity to the gift. Another idea is to create a “vampire’s bite” kit, complete with a few cupcakes, some edible blood, and a set of fangs.
Flavor Variations
- To give the cupcakes a different flavor, you can try using different types of extract, such as almond or coconut, in place of the vanilla extract.
- You can also try using different types of filling, such as cream cheese or peanut butter, to give the cupcakes a unique flavor.
- Another idea is to add a few drops of food coloring to the batter to create cupcakes in different colors, such as pink or purple.
Troubleshooting
- If the cupcakes are too dense, it may be because the batter was overmixed. To avoid this, make sure to mix the batter just until the ingredients are combined.
- If the cupcakes are too dry, it may be because they were overbaked. To avoid this, make sure to check the cupcakes frequently while they’re baking and remove them from the oven when they’re done.
- If the filling is too runny, it may be because it was not chilled long enough. To avoid this, make sure to chill the filling in the refrigerator for at least 30 minutes before using it.
FAQs
- Can I freeze the cupcakes? Yes, the cupcakes can be frozen for up to 2 months. To freeze, place the cupcakes in a single layer in a freezer-safe bag or container and store in the freezer.
- Are the cupcakes gluten-free? No, the cupcakes contain gluten due to the presence of all-purpose flour. However, you can try substituting the flour with a gluten-free flour blend to make the cupcakes gluten-free.
- Can I double the recipe? Yes, the recipe can be doubled to make more cupcakes. Simply multiply all of the ingredients by two and proceed with the recipe as instructed.
Conclusion
In conclusion, the Vampire Bite Halloween Cupcakes with Creamy Red Filling are a must-try for anyone looking to add a little excitement to their Halloween celebrations. With their perfect balance of flavors, ease of preparation, and impressive appearance, these cupcakes are sure to be a hit with both kids and adults alike. Whether you’re a seasoned baker or a novice in the kitchen, these cupcakes are a great way to get into the Halloween spirit and create some unforgettable memories with your friends and family. So why not give them a try and see what you think? With a little creativity and some everyday ingredients, you can create a batch of cupcakes that are sure to thrill and delight.
Vampire Bite Halloween Cupcakes with Creamy Red Filling
Delicious and easy-to-make Halloween cupcakes with a creamy red filling, perfect for kids and adults alike.
🥘 Ingredients
👩🍳 Instructions
-
1Preheat the oven to 350°F (180°C). Line a 12-cup muffin tin with cupcake liners.
-
2In a medium bowl, whisk together the flour, sugar, baking powder, and salt.
-
3In a large bowl, using an electric mixer, beat the butter until it's creamy. Add the eggs one at a time, beating well after each addition. Beat in the red food coloring and vanilla extract.
-
4Gradually add the dry ingredients to the wet ingredients, beating until just combined.
-
5Divide the batter evenly among the cupcake liners.
-
6Bake for 18-20 minutes, or until a toothpick inserted into the center of a cupcake comes out clean.
-
7Allow the cupcakes to cool completely in the pan.
-
8Once the cupcakes are cool, use a small knife or a cupcake corer to remove a small circle from the center of each cupcake.
-
9Fill the hole with a small amount of creamy red filling.
-
10Top the cupcakes with additional creamy red filling, if desired, and garnish with white chocolate chips or shavings.