Mini Brown Butter Lemon Cakes Recipe
Introduction
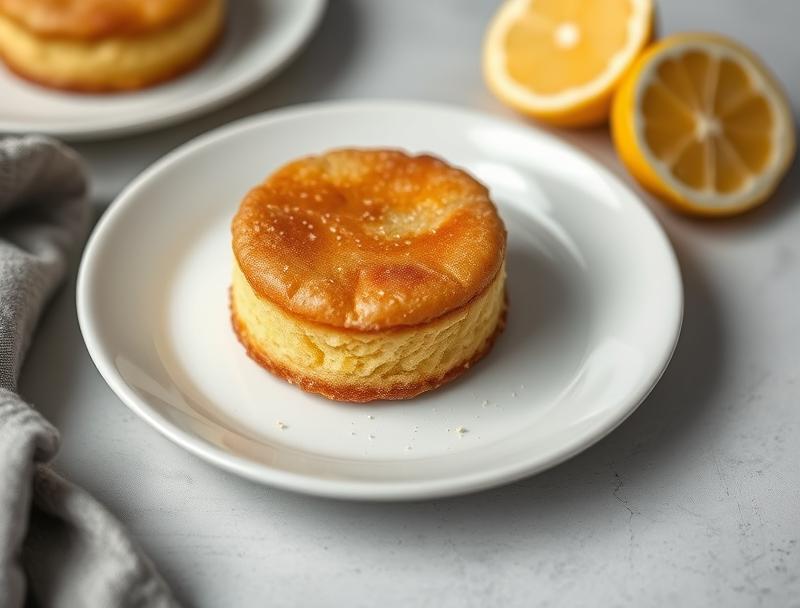
Imagine sinking your teeth into a moist, flavorful cake that’s bursting with the brightness of lemon and the richness of brown butter. These mini brown butter lemon cakes are not only a delight to eat, but they’re also incredibly easy to make, requiring just a few everyday ingredients and some basic kitchen tools. The combination of lemon zest, lemon juice, and brown butter creates a flavor profile that’s both familiar and exciting, perfect for a special occasion or a simple weekend treat. With this recipe, you’ll learn how to create these adorable cakes that are sure to impress your friends and family, all while exploring the nuances of flavor and texture that make baking so rewarding.
Why This Works
- The balance of flavors between the lemon and the brown butter is perfectly complemented by the sweetness of the cake, creating a delightful harmony of tastes.
- The use of brown butter instead of regular butter adds a nutty, caramel-like flavor that elevates the cakes to a new level of sophistication.
- The lemon zest and juice provide a bright, citrusy note that cuts through the richness of the brown butter, making each bite feel fresh and exciting.
- The cake recipe itself is straightforward and easy to follow, requiring minimal specialized equipment or ingredients, making it accessible to bakers of all skill levels.
- Despite their impressive flavor and presentation, these cakes are surprisingly easy to prepare, making them perfect for a quick dessert or snack.
Ingredients
- 1 1/2 cups (190g) all-purpose flour
- 1 cup (200g) granulated sugar
- 2 teaspoons baking powder
- 1/2 teaspoon salt
- 1/2 cup (115g) unsalted butter, browned and cooled slightly
- 2 large eggs, at room temperature
- 2 teaspoons grated lemon zest
- 2 tablespoons freshly squeezed lemon juice
- 1 teaspoon pure vanilla extract
- Confectioners’ sugar, for dusting (optional)
Instructions
- Step 1: Prepare the Brown Butter – In a small saucepan, melt the butter over medium heat. Continue cooking, stirring occasionally, until the butter turns golden brown and smells nutty, about 5-7 minutes. Remove from heat and let cool slightly.
- Step 2: Mix the Cake Batter – In a medium bowl, whisk together the flour, sugar, baking powder, and salt. In a large bowl, whisk together the brown butter, eggs, lemon zest, lemon juice, and vanilla extract. Add the dry ingredients to the wet ingredients and whisk until just combined, being careful not to overmix.
- Step 3: Divide and Pour the Batter – Divide the batter evenly among 12 mini cake molds or cupcake liners. Smooth the tops and make sure the batter is evenly distributed.
- Step 4: Bake the Cakes – Bake the cakes in a preheated oven at 375°F (190°C) for 15-20 minutes, or until a toothpick inserted into the center of a cake comes out clean. Let the cakes cool in the molds for 5 minutes before transferring them to a wire rack to cool completely.
Handy Tips
- Make sure to not overmix the batter, as this can result in dense cakes.
- Don’t overbake the cakes – they should be lightly golden and still moist in the center.
- Let the cakes cool completely before serving or storing – this will help them retain their texture and flavor.
- Consider using a high-quality, flavorful lemon for the best results.
Heat Control
When browning the butter, it’s essential to monitor the heat and stir frequently to prevent burning. The ideal temperature for browning butter is between 250°F and 300°F (120°C to 150°C). You’ll know the butter is ready when it turns a deep golden brown and has a nutty aroma. When baking the cakes, make sure your oven is at the correct temperature, and keep an eye on them to avoid overcooking.
Crunch Factor
These cakes are designed to be moist and tender, with a delicate crumb. To achieve this, make sure to not overmix the batter and don’t overbake the cakes. If you prefer a slightly crunchier exterior, you can try baking the cakes for an additional 1-2 minutes, but be careful not to overcook them.
Pro Kitchen Tricks
- Use a high-quality, flavorful lemon for the best results.
- Don’t overmix the batter – stop mixing as soon as the ingredients are combined.
- Let the cakes cool completely before serving or storing – this will help them retain their texture and flavor.
- Consider using a pastry brush to gently brush the tops of the cakes with a little extra brown butter before baking for an extra-rich flavor.
Storage Tips
- Store the cakes in an airtight container at room temperature for up to 3 days.
- Freeze the cakes for up to 2 months – simply wrap them tightly in plastic wrap or aluminum foil and place in a freezer-safe bag.
- Reheat the cakes gently in the microwave or oven if desired – they’re best served at room temperature or slightly warmed.
Gift Packaging Ideas
These mini cakes are perfect for gifting, and can be packaged in a variety of creative ways. Consider placing them in a decorative tin or box, or wrapping them individually in cellophane or parchment paper. You could also tie them up with a ribbon or twine, or place them in a small gift bag. Whatever you choose, make sure to include a personalized note or card to make the gift extra-special.
Flavor Variations
- Try adding a teaspoon of grated orange zest or a handful of chopped fresh herbs, such as rosemary or thyme, to the batter for a unique twist.
- Replace the lemon juice with lime or grapefruit juice for a different citrus flavor.
- Add a handful of chopped nuts or chocolate chips to the batter for added texture and flavor.
Troubleshooting
- If your cakes are too dense, try not overmixing the batter next time.
- If your cakes are too dry, try not overbaking them next time.
- If your brown butter is too dark or has a bitter flavor, try reducing the heat or cooking time next time.
FAQs
- Can I freeze the cakes? Yes, you can freeze the cakes for up to 2 months – simply wrap them tightly in plastic wrap or aluminum foil and place in a freezer-safe bag.
- Are the cakes gluten-free? No, the cakes contain all-purpose flour and are not gluten-free. However, you can try substituting the flour with a gluten-free alternative if needed.
- Can I double the recipe? Yes, you can double the recipe if you need to make more cakes – simply multiply all the ingredients by two and follow the same instructions.
Conclusion
These mini brown butter lemon cakes are a true delight, with their moist, tender texture and rich, citrusy flavor. Whether you’re a seasoned baker or just starting out, this recipe is sure to become a favorite. With its simple ingredients and easy instructions, you can whip up a batch of these adorable cakes in no time. So go ahead, get creative, and enjoy the process of baking and sharing these delicious treats with your loved ones. And don’t forget to experiment with different flavor variations and gift packaging ideas to make the experience even more special.
Mini Brown Butter Lemon Cakes Recipe
A recipe for mini brown butter lemon cakes that are moist, flavorful, and perfect for a special occasion or a simple weekend treat.
🥘 Ingredients
👩🍳 Instructions
-
1Prepare the brown butter by melting the butter in a small saucepan over medium heat and cooking until golden brown and nutty, about 5-7 minutes.
-
2Mix the cake batter by whisking together the flour, sugar, baking powder, and salt in a medium bowl, and the brown butter, eggs, lemon zest, lemon juice, and vanilla extract in a large bowl.
-
3Divide the batter evenly among 12 mini cake molds or cupcake liners and smooth the tops.
-
4Bake the cakes in a preheated oven at 375°F (190°C) for 15-20 minutes, or until a toothpick inserted into the center of a cake comes out clean.