Delicious Butterfinger Balls for Every Occasion
Introduction
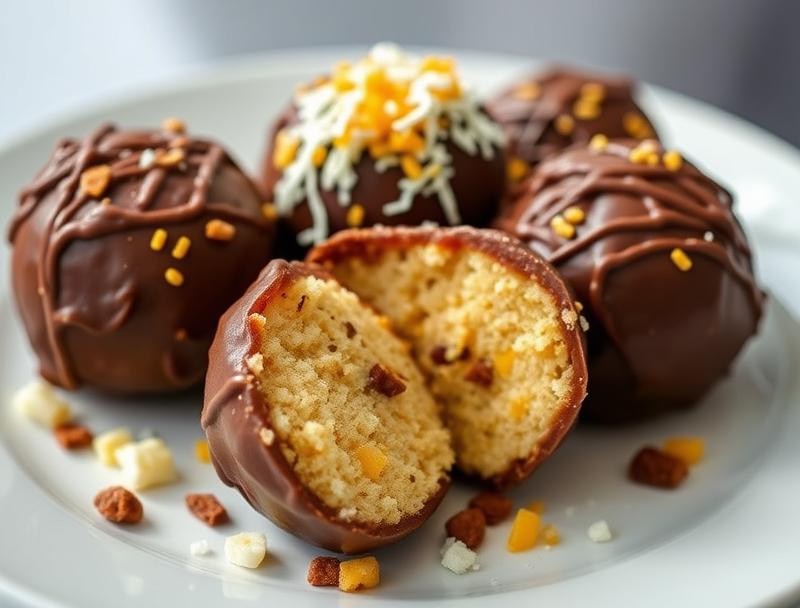
Imagine a treat that’s both decadent and easy to make, perfect for any occasion. The Delicious Butterfinger Balls recipe is a game-changer, requiring minimal effort while yielding impressive results. With everyday ingredients, you can create a delightful dessert or snack that combines the richness of chocolate, the crunch of Butterfinger, and the simplicity of a no-bake treat. This recipe is a masterclass in balancing flavors and textures, making it a must-try for anyone looking to elevate their dessert game without spending hours in the kitchen.
Why This Works
- The combination of peanut butter, chocolate, and Butterfinger bits creates a harmonious balance of flavors that will satisfy any sweet tooth.
- The ease of preparation is unparalleled, as this recipe requires no baking and can be made in a matter of minutes.
- The impressive results belay the minimal effort required, making these Butterfinger Balls perfect for parties, gatherings, or as a quick dessert for the family.
Ingredients
- 1 cup creamy peanut butter
- 1/2 cup confectioners’ sugar
- 1/4 cup graham cracker crumbs
- 1 cup crushed Butterfinger candy bars
- 1 cup white chocolate chips
- 1 tablespoon shortening (optional)
- Chopped peanuts or additional crushed Butterfinger for garnish (optional)
Instructions
- Step 1: In a large mixing bowl, combine the peanut butter, confectioners’ sugar, and graham cracker crumbs. Mix until well combined and a dough forms.
- Step 2: Stir in the crushed Butterfinger candy bars until they are evenly distributed throughout the dough.
- Step 3: Use a small cookie scoop or your hands to shape the dough into balls, about 1 inch in diameter. You should end up with around 20-25 balls.
- Step 4: Melt the white chocolate chips in a microwave-safe bowl in 30-second increments, stirring between each interval, until smooth. If using shortening, stir it in to help with the melting process.
- Step 5: Dip each peanut butter ball into the melted white chocolate, using a fork or dipping tool to fully coat the ball. Tap off any excess chocolate and place the coated ball on a piece of parchment paper or a silicone mat. If desired, garnish with chopped peanuts or additional crushed Butterfinger before the chocolate hardens.
- Step 6: Allow the chocolate to harden completely. This can be sped up by placing the coated balls in the refrigerator for about 10 minutes.
- Step 7: Serve and enjoy! These Butterfinger Balls are perfect for snacking, as a dessert, or packaged as gifts for friends and family.
Handy Tips
- For easier handling, make sure your hands are slightly damp when shaping the peanut butter dough into balls.
- If you find the dough too sticky, add a bit more confectioners’ sugar. If it’s too dry, add a bit more peanut butter.
- Experiment with different types of candy or nuts in place of the Butterfinger for unique flavor combinations.
Heat Control
When melting the white chocolate, be cautious not to overheat it, as this can cause the chocolate to seize up or become too thin. Heating in short intervals and stirring well between each heating cycle can help maintain a smooth, workable consistency.
Crunch Factor
The crunch in these Butterfinger Balls comes from the crushed Butterfinger candy bars mixed into the dough and potentially used as a garnish. To maintain this crunch, it’s essential to not overmix the dough and to handle the balls gently when coating them in chocolate.
Pro Kitchen Tricks
- Use high-quality chocolate for the best flavor and texture.
- Work in a cool, dry environment to prevent the chocolate from melting or becoming too soft to work with.
- For a professional finish, use a fork or dipping tool to create a decorative pattern on the top of each chocolate-coated ball.
Storage Tips
- Store the Butterfinger Balls in an airtight container in the refrigerator for up to 5 days.
- For longer storage, consider freezing the balls before coating them in chocolate. Simply place the peanut butter balls on a baking sheet lined with parchment paper and freeze until solid, then transfer them to a freezer-safe bag or container. Coat in chocolate when you’re ready to serve.
- Avoid storing the chocolate-coated balls at room temperature for extended periods, as the chocolate may melt or become soft.
Gift Packaging Ideas
These Butterfinger Balls make wonderful gifts, especially when packaged in decorative tins, jars, or boxes. Consider lining a gift box with parchment paper or a decorative liner, then arranging the balls in a single layer. You can also add a ribbon or gift tag with a personal message. For a more rustic look, place the balls in a mason jar and tie a ribbon around the lid.
Flavor Variations
- Try using different types of candy bars, like Snickers or Milky Way, for a unique twist.
- Add a sprinkle of sea salt on top of the chocolate for a salty-sweet combination.
- Experiment with coconut flakes, chopped nuts, or candy pieces as additional mix-ins or toppings.
Troubleshooting
- If the dough is too sticky, add a bit more confectioners’ sugar. If it’s too dry, add a bit more peanut butter.
- If the chocolate becomes too thin, allow it to cool and thicken slightly before continuing to coat the balls.
- If the balls become too soft or the chocolate melts, refrigerate them for about 10 minutes to firm up before serving.
FAQs
- Can I freeze the Butterfinger Balls? Yes, you can freeze them before or after coating in chocolate. Freezing before coating is recommended for longer storage.
- Are these gluten-free? Depending on the ingredients used (like the type of chocolate or candy), these can be gluten-free. Always check the labels of your ingredients to ensure they meet gluten-free standards.
- Can I double the recipe? Absolutely! Simply double all the ingredients and follow the instructions as usual. You may need to work in batches when coating the balls in chocolate to prevent overcrowding.
Conclusion
Delicious Butterfinger Balls are a versatile and crowd-pleasing treat that can be made for any occasion. With their perfect balance of flavors and textures, they’re sure to become a favorite. Don’t be afraid to experiment with different ingredients or packaging ideas to make them your own. Whether you’re a seasoned baker or a beginner in the kitchen, this recipe is a must-try. So go ahead, give it a try, and enjoy the delightful combination of peanut butter, chocolate, and Butterfinger in every bite!
Delicious Butterfinger Balls for Every Occasion
A no-bake dessert combining peanut butter, chocolate, and crushed Butterfinger for a delicious and easy-to-make treat.
🥘 Ingredients
👩🍳 Instructions
-
1Combine peanut butter, confectioners' sugar, and graham cracker crumbs in a bowl and mix until a dough forms.
-
2Stir in crushed Butterfinger candy bars.
-
3Shape the dough into balls, about 1 inch in diameter.
-
4Melt white chocolate chips in a microwave-safe bowl in 30-second increments, stirring between each interval, until smooth.
-
5Dip each peanut butter ball into the melted white chocolate, using a fork or dipping tool to fully coat the ball.
-
6Allow the chocolate to harden completely, either at room temperature or sped up by refrigerating for about 10 minutes.
-
7Serve and enjoy!
-
8Optional: Garnish with chopped peanuts or additional crushed Butterfinger before the chocolate hardens.