Irresistible Butterfinger Balls Youll Love
Introduction
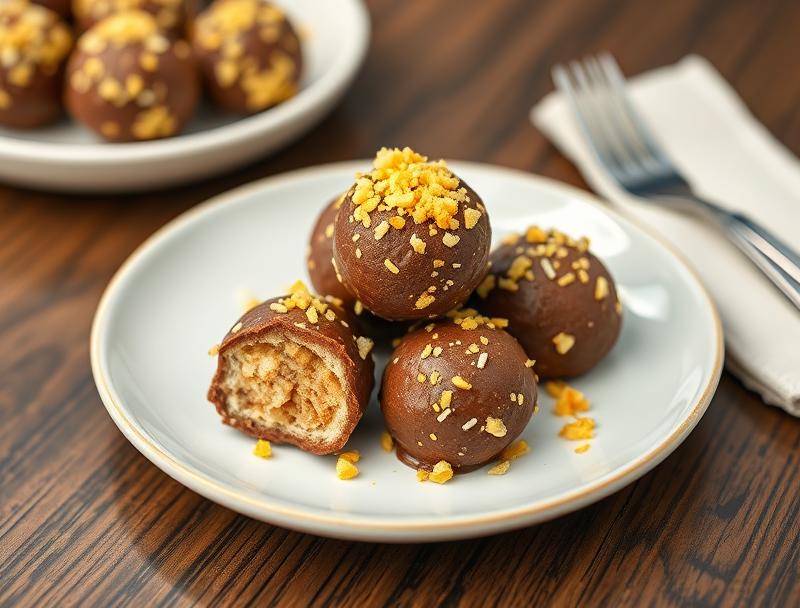
Indulge in the delightful world of no-bake treats with our Irresistible Butterfinger Balls recipe, a perfect blend of creamy, crunchy, and sweet. This recipe is designed to be easy, using everyday ingredients that you might already have in your pantry, making it a great option for a quick dessert or snack. The combination of peanut butter, powdered sugar, and crushed Butterfinger candies creates a flavor balance that is both familiar and exciting. Whether you’re a fan of peanut butter treats, a lover of all things chocolate, or simply looking for a creative dessert to impress your friends and family, these Butterfinger balls are sure to hit the spot.
Why This Works
- Flavor balance and ingredient accessibility: The recipe combines the richness of peanut butter with the sweetness of powdered sugar and the crunch of Butterfinger candies, creating a delightful flavor experience. All the ingredients are easily found in most grocery stores, making it accessible to everyone.
- Ease of preparation: This no-bake recipe requires minimal preparation time and effort. You simply need to mix the ingredients together, shape them into balls, and refrigerate until firm.
- Impressive results with minimal effort: Despite the simplicity of the recipe, the end result is impressive and perfect for parties, gatherings, or as a special treat for your loved ones. The presentation can be customized with melted chocolate and additional toppings for an extra wow factor.
Ingredients
- 2 cups creamy peanut butter
- 1 cup powdered sugar
- 1/2 cup graham cracker crumbs
- 1/4 cup melted butter
- 1 teaspoon vanilla extract
- 1 cup crushed Butterfinger candies
- 1 cup melted chocolate (for coating, optional)
- Additional crushed Butterfinger candies or chopped nuts for garnish (optional)
Instructions
- Step 1: In a large mixing bowl, combine the peanut butter, powdered sugar, graham cracker crumbs, and melted butter. Mix until well combined and a dough forms.
- Step 2: Add the vanilla extract and mix well.
- Step 3: Stir in the crushed Butterfinger candies to distribute them evenly throughout the dough.
- Step 4: Use your hands to shape the dough into small balls, about 1 inch in diameter. You should end up with around 20-25 balls.
- Step 5: Place the balls on a baking sheet lined with parchment paper and refrigerate for at least 30 minutes to firm up.
- Step 6 (optional): Melt the chocolate in a double boiler or in the microwave in 30-second increments, stirring between each interval until smooth. Dip the end of a fork into the melted chocolate and then insert it into a peanut butter ball, using the fork to fully coat the ball in chocolate. Tap off any excess chocolate by gently tapping the fork against the side of the bowl. Place the chocolate-covered ball back on the parchment-lined baking sheet. Repeat with the remaining balls.
- Step 7 (optional): Immediately sprinkle additional crushed Butterfinger candies or chopped nuts over the top of the chocolate-covered balls before the chocolate hardens.
- Step 8: Refrigerate the chocolate-covered balls for an additional 10-15 minutes to allow the chocolate to set.
Handy Tips
- If the dough is too sticky, you can add a bit more powdered sugar. If it’s too dry, you can add a bit more peanut butter.
- For a variation, you can use different types of candy or cookie crumbs to change up the flavor and texture.
- Make sure to not overmix the dough, as this can make the peanut butter balls dense and less enjoyable.
Heat Control
This recipe does not require any cooking, making it perfect for hot summer days or for those who prefer no-bake treats. However, if you choose to coat the peanut butter balls in chocolate, be careful not to overheat the chocolate, as this can cause it to seize up and become unusable. Heating the chocolate in short intervals and stirring between each heating will help prevent this.
Crunch Factor
The crunch in these Butterfinger balls comes from the crushed Butterfinger candies mixed into the dough and potentially from additional candies or nuts used as a topping after coating in chocolate. To enhance the crunch, ensure that the Butterfinger candies are finely crushed but still retain some texture. You can also experiment with different crunchy elements like chopped nuts or cookie crumbs to find your preferred texture.
Pro Kitchen Tricks
- To make the peanut butter balls more uniform in size, use a small cookie scoop to portion out the dough before rolling it into balls.
- If coating with chocolate, work in batches to prevent the chocolate from cooling and becoming too thick to coat evenly.
- For a glossy chocolate finish, make sure the chocolate is at the right temperature (not too hot, not too cool) and tap off any excess chocolate to prevent pooling at the bottom of the balls.
Storage Tips
- Store the peanut butter balls in an airtight container in the refrigerator for up to 5 days.
- If coated in chocolate, it’s best to consume them within 3 days for optimal flavor and texture.
- These treats can also be frozen for up to 2 months. Simply place them in a single layer in a freezer-safe bag or container and thaw at room temperature when ready to serve.
Gift Packaging Ideas
These Butterfinger balls are perfect for gifting, especially during holidays or special occasions. Consider packaging them in decorative tins, jars, or bags. You can wrap each ball individually in parchment paper or cellophane bags and then place them in a larger gift container. Add a ribbon or a gift tag with a personal message for a thoughtful touch. For a more rustic look, use brown paper bags or cones and tie with twine.
Flavor Variations
- Different spices: Try adding a pinch of salt or a teaspoon of cinnamon to the dough for a unique flavor twist.
- Creative toppings: Experiment with different types of candy pieces, nuts, or even dried fruit to change up the topping.
- Ingredient swaps: You can substitute the peanut butter with another nut butter like almond or cashew butter for a different flavor profile.
Troubleshooting
- Texture problems: If the dough is too sticky, add more powdered sugar. If it’s too dry, add more peanut butter.
- Ingredient replacements: If you can’t find Butterfinger candies, you can use another crunchy candy like peanut butter cups or chopped peanut brittle.
- Over/undercooking signs: Since this is a no-bake recipe, you don’t have to worry about cooking times. However, if coating with chocolate, make sure it’s not too hot, as this can cause the chocolate to seize up.
FAQs
- Can I freeze it? Yes, you can freeze the peanut butter balls for up to 2 months. Simply thaw at room temperature when ready to serve.
- Is it gluten-free? This recipe is gluten-free, making it a great option for those with gluten intolerance. However, always check the ingredients of the peanut butter, powdered sugar, and chocolate to ensure they are processed in a gluten-free facility.
- Can I double the recipe? Yes, you can easily double or triple this recipe if you’re making it for a larger crowd. Just be sure to have enough space in your refrigerator to chill all the peanut butter balls.
Conclusion
With these Irresistible Butterfinger Balls, you’re not just making a dessert; you’re creating a memorable experience. The combination of peanut butter, powdered sugar, and crushed Butterfinger candies is a match made in heaven, and the fact that it’s a no-bake recipe makes it accessible to everyone. Feel free to experiment with different flavors and toppings to make this recipe your own. Whether you’re a seasoned baker or a beginner in the kitchen, this recipe is sure to become a favorite. So go ahead, get creative, and enjoy the delightful taste of these Butterfinger balls!