Cheesy Green Chile Chilaquiles Recipe for Flavorful Mornings
Introduction
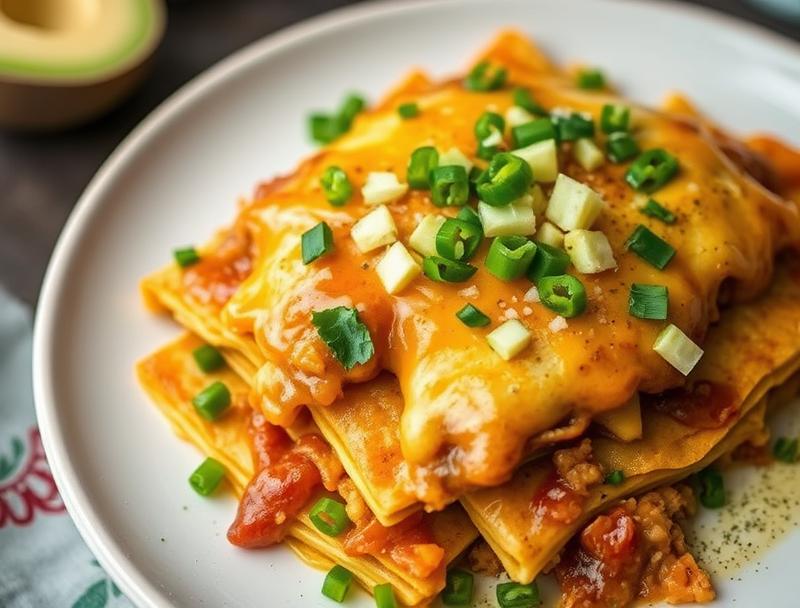
Imagine starting your day with a dish that’s not only delicious but also packed with flavor and creativity, all made possible with everyday ingredients. The Cheesy Green Chile Chilaquiles recipe is a morning game-changer, transforming leftover tortillas into a culinary masterpiece. This Mexican-inspired breakfast is easy to make, bursting with flavor, and perfect for using up stale tortillas. With its balance of crunchy tortilla chips, creamy cheese, and spicy green chile, this dish is sure to elevate your morning routine.
Why This Works
- Flavor balance and ingredient accessibility: This recipe combines the richness of cheese, the spiciness of green chile, and the earthiness of tortillas, all of which are readily available in most supermarkets.
- Ease of preparation: The steps involved are straightforward, from frying tortilla chips to assembling and baking the chilaquiles, making it a manageable dish for any skill level.
- Impressive results with minimal effort: Despite its simplicity, the presentation and taste of the Cheesy Green Chile Chilaquiles are impressive, making it perfect for brunch gatherings or special occasions.
Ingredients
- 6-8 corn tortillas, cut into quarters
- 1/2 cup vegetable oil
- 1 large onion, diced
- 2 cloves garlic, minced
- 1 large can of green chile, diced
- 1 cup shredded cheese (Monterey Jack or Cheddar work well)
- 1/2 cup grated queso fresco (optional)
- 1 teaspoon cumin
- Salt and pepper, to taste
- Fresh cilantro, chopped (for garnish)
- Sour cream or Greek yogurt (for serving)
- Optional toppings: diced tomatoes, shredded lettuce, diced avocado, salsa
Instructions
- Step 1: Begin by frying the tortilla quarters in hot oil until they are crispy and golden. Drain the tortilla chips on paper towels.
- Step 2: In a large skillet, sauté the diced onion and minced garlic until the onion is translucent. Add the diced green chile and cook for a few minutes, stirring occasionally.
- Step 3: In a large baking dish, create a layer of tortilla chips. You can trim them to fit the dish. Spoon some of the green chile mixture over the tortillas, followed by a sprinkle of shredded cheese. Repeat this process until all ingredients are used, ending with a layer of cheese on top.
- Step 4: Bake the chilaquiles in a preheated oven at 375°F (190°C) for about 20-25 minutes, or until the cheese is melted and bubbly. Remove from the oven and let it cool for a few minutes before serving. Garnish with chopped cilantro, and serve with your choice of toppings and a dollop of sour cream or Greek yogurt.
Handy Tips
- For an extra crispy top, broil the chilaquiles for 2-3 minutes after baking. Keep an eye on them to prevent burning.
- Customize your chilaquiles with different types of cheese or add some heat with diced jalapeños.
- Use leftover chicken or beans to add protein to your dish.
Heat Control
When frying the tortilla chips, it’s essential to maintain the right temperature. Heat the oil to about 350°F (175°C) and fry in batches to prevent the oil temperature from dropping. For the baking part, ensure your oven is preheated to the correct temperature to achieve a perfectly melted, golden-brown top.
Crunch Factor
The crunch in this dish comes from the fried tortilla chips. To achieve the perfect crunch, do not overcrowd the frying pan, and fry until the tortillas are golden and crispy. If you prefer a softer texture, you can bake the tortilla chips in the oven instead of frying them.
Pro Kitchen Tricks
- For easier cleanup, line your baking sheets with parchment paper when frying tortilla chips.
- Prepare the green chile mixture and tortilla chips ahead of time to streamline the assembly process.
- Experiment with different cheeses for unique flavor profiles. Queso fresco adds a nice salty kick, while Monterey Jack provides creaminess.
Storage Tips
- Leftover chilaquiles can be refrigerated for up to 3 days. Reheat them in the oven or microwave until warmed through.
- For longer storage, consider freezing the assembled but unbaked chilaquiles. Simply thaw and bake when needed.
- Store leftover tortilla chips in an airtight container to keep them fresh for up to a week.
Gift Packaging Ideas
While chilaquiles are best served fresh, components like homemade tortilla chips or green chile sauce can be packaged in decorative jars or bags and given as gifts. Add a ribbon and a recipe card for a thoughtful touch.
Flavor Variations
- Different spices: Add a pinch of cayenne pepper for extra heat or some smoked paprika for a smoky flavor.
- Creative toppings: Try adding diced ham, chopped hard-boiled eggs, or sliced black olives to your chilaquiles.
- Ingredient swaps: Use gluten-free tortillas for a gluten-free version or substitute the cheese with a vegan alternative for a plant-based option.
Troubleshooting
- Texture problems: If your chilaquiles become too soggy, try baking them for a few more minutes. For a crunchier top, broil for a short time.
- Ingredient replacements: If you can’t find green chile, you can substitute it with diced tomatoes and jalapeños for a similar flavor profile.
- Over/undercooking signs: The chilaquiles are done when the cheese is melted and bubbly. If the top starts to brown too quickly, cover the dish with foil to prevent burning.
FAQs
- Can I freeze it? Yes, you can freeze the assembled but unbaked chilaquiles for up to 2 months. Thaw and bake when needed.
- Is it gluten-free? This recipe can be made gluten-free by using gluten-free tortillas. Be sure to check the ingredients of the cheese and any additional toppings for gluten.
- Can I double the recipe? Yes, you can easily double or triple this recipe for larger gatherings. Just ensure you have a large enough baking dish.
Conclusion
The Cheesy Green Chile Chilaquiles recipe is a versatile and delicious breakfast or brunch option that’s perfect for any day of the week. With its rich flavors and satisfying crunch, it’s sure to become a favorite. Don’t be afraid to experiment with different ingredients and toppings to make it your own. Whether you’re cooking for one or a crowd, this recipe is sure to please. So go ahead, give it a try, and start your day off right with a flavorful and fulfilling meal.
Cheesy Green Chile Chilaquiles Recipe for Flavorful Mornings
A delicious Mexican-inspired breakfast dish made with fried tortilla chips, green chile, and melted cheese, perfect for using up stale tortillas and elevating your morning routine.
🥘 Ingredients
👩🍳 Instructions
-
1Fry tortilla quarters in hot oil until crispy and golden.
-
2Sauté diced onion and minced garlic, then add green chile and cook for a few minutes.
-
3Assemble the chilaquiles by layering tortilla chips, green chile mixture, and cheese in a baking dish.
-
4Bake in a preheated oven at 375°F for about 20-25 minutes, or until the cheese is melted and bubbly.