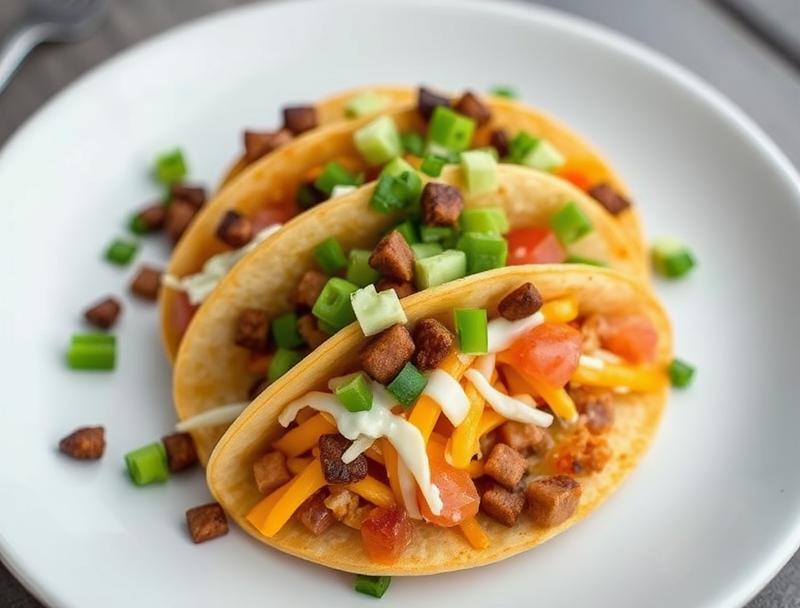
Ultimate Loaded Cheesy Pocket Tacos
Introduction
Imagine the perfect blend of flavors, textures, and creativity all coming together in a dish that’s not only mouthwateringly delicious but also incredibly easy to make. The Ultimate Loaded Cheesy Pocket Tacos are just that – a culinary masterpiece that combines the comfort of cheesy goodness with the vibrant zest of Mexican cuisine, all wrapped up in a pocket of crispy, golden taco shells. This recipe is a testament to how everyday ingredients can be transformed into an extraordinary meal with a little bit of imagination and flair. Whether you’re a seasoned chef or a culinary newbie, this dish promises to impress with its simplicity, flavor balance, and the sheer joy of creating something truly special.
Why This Works
- Flavor balance and ingredient accessibility: The beauty of this recipe lies in its ability to bring together a variety of flavors in perfect harmony, using ingredients that are readily available in most supermarkets. From the tang of cheese to the spice of salsa, every element works together to create a culinary symphony.
- Ease of preparation: One of the most appealing aspects of the Ultimate Loaded Cheesy Pocket Tacos is how straightforward they are to prepare. With a few simple steps, you can have a meal that’s not only delicious but also visually appealing, perfect for both weeknight dinners and special occasions.
- Impressive results with minimal effort: The real magic of this recipe is in its ability to deliver impressive results with minimal effort. The combination of pre-made taco shells, easy-to-cook fillings, and a blend of cheeses that melt to perfection makes it a dish that’s sure to wow your family and friends without requiring hours of preparation.
Ingredients
- 1 package of taco-sized flour tortillas (for the pockets)
- 1 lb ground beef (or ground turkey, chicken, or beans for a vegetarian option)
- 1 medium onion, diced
- 1 medium bell pepper, diced
- 2 cloves of garlic, minced
- 1 packet of taco seasoning
- 1 cup of shredded cheese (a mix of cheddar and Monterey Jack works well)
- 1 can of diced tomatoes with green chilies
- 1/4 cup of chopped fresh cilantro
- Salsa, sour cream, and any other desired toppings
- Olive oil for brushing the tortillas
- Salt and pepper, to taste
Instructions
- Step 1: Begin by preheating your oven to 400°F (200°C). While the oven is warming up, prepare your filling by cooking the ground beef in a large skillet over medium-high heat, breaking it up into small pieces as it cooks. Once the beef is browned, add the diced onion, bell pepper, and minced garlic, cooking until the vegetables are soft. Then, add the taco seasoning and cook according to the packet’s instructions.
- Step 2: In a separate pan, warm the tortillas over medium heat for about 30! seconds on each side. This will make them more pliable and easier to fold into pockets. Brush the tortillas lightly with olive oil on both sides to prevent them from drying out and to give them a slightly crispy texture when baked.
- Step 3: To assemble the tacos, lay a warmed tortilla flat and spoon some of the beef mixture onto the center of the tortilla. Top the beef with a spoonful of diced tomatoes with green chilies, a sprinkle of shredded cheese, and any desired additional toppings. Fold the bottom half of the tortilla up over the filling, then fold in the sides and roll the taco up to form a snug pocket. Place the taco seam-side down in a baking dish and repeat with the remaining tortillas and filling.
- Step 4: Once all the tacos are assembled, cover the baking dish with aluminum foil and bake for 15 minutes. Remove the foil and continue baking for an additional 5-10 minutes, or until the cheese is melted and the tortillas are crispy. Remove the tacos from the oven and let them cool for a few minutes before serving. Garnish with chopped cilantro, salsa, sour cream, and any other desired toppings.
Handy Tips
- For an extra crispy shell, you can lightly fry the tacos in a little bit of oil before baking. This step is optional but adds a nice texture contrast to the dish.
- Consider using leftover roast chicken or beef for the filling to add more depth of flavor and reduce food waste.
- Feel free to customize the toppings to your liking – diced avocado, sliced black olives, and diced tomatoes are all great additions.
Heat Control
When cooking the filling, it’s essential to adjust the heat as needed to prevent burning. Start with medium-high heat to get a good sear on the meat, then reduce the heat to medium or medium-low to simmer the mixture until the flavors are well combined and the meat is fully cooked. For baking, a temperature of 400°F (200°C) is ideal for melting the cheese and crisping the tortillas without burning them.
Crunch Factor
Achieving the right crunch factor is key to the success of this dish. The combination of crispy tortillas, crunchy vegetables, and the slight crunch from the baked cheese all contribute to a satisfying texture. To enhance the crunch, ensure that the tortillas are lightly fried before baking, and don’t overfill the tacos, as this can make them difficult to fold and can result in a softer texture.
Pro Kitchen Tricks
- Use a variety of cheeses for a deeper, richer flavor. Mixing cheddar, Monterey Jack, and a bit of pepper jack can add a nice kick to the dish.
- For easier assembly, prepare all the components of the filling and toppings ahead of time. This can make the process of assembling the tacos much quicker and more efficient.
- Experiment with different types of meat or vegetarian options to keep the dish interesting and tailored to your dietary preferences.
Storage Tips
- Assembled tacos can be stored in the refrigerator for up to a day before baking. Simply cover the baking dish with plastic wrap or aluminum foil and refrigerate until ready to bake.
- Leftover tacos can be reheated in the oven or microwave. For the oven, cover the tacos with foil and heat at 350°F (175°C) for about 10-15 minutes, or until warmed through. For the microwave, heat on high for 20-30 seconds per taco, or until the cheese is melted and the taco is hot.
- It’s best to store leftover tacos in airtight containers to maintain freshness. They can be safely stored in the refrigerator for up to 3 days.
Gift Packaging Ideas
If you’re considering gifting these tacos, perhaps for a potluck or as part of a meal train, they can be packaged in a variety of creative ways. Consider placing a few tacos in a decorative tin or cardboard box, wrapped in colorful paper or a festive towel. Adding a side of salsa, sour cream, or guacamole in small jars can enhance the gift. Don’t forget to include utensils, napkins, and any other essentials to make the gift complete and convenient.
Flavor Variations
- Different spices: Experiment with various spice blends, such as fajita seasoning or a homemade mix of chili powder, cumin, and smoked paprika, to give the tacos a unique flavor profile.
- Creative toppings: In addition to the standard toppings, consider adding some creativity with diced mango, pickled onions, or a sprinkle of queso fresco.
- Ingredient swaps: Swap out the ground beef for ground turkey, chicken, or roasted vegetables for a vegetarian option. You can also use different types of cheese or add beans for extra protein and fiber.
Troubleshooting
- Texture problems: If the tacos become too soft, it may be due to overfilling or not baking them long enough. Conversely, if they become too crispy, it could be from overbaking. Adjust the filling amount and baking time as needed to achieve the perfect texture.
- Ingredient replacements: If you find yourself missing an ingredient, don’t hesitate to get creative with substitutions. For example, you can use diced tomatoes instead of diced tomatoes with green chilies, or substitute one type of cheese for another.
- Over/undercooking signs: Keep an eye on the tacos while they’re baking. If the cheese is not melted and the tortillas are not crispy, they may need a few more minutes in the oven. On the other hand, if the cheese is bubbly and the tortillas are golden brown, they’re ready to come out.
FAQs
- Can I freeze it? Yes, you can freeze the assembled tacos before baking. Simply place them on a baking sheet lined with parchment paper, making sure they don’t touch each other, and put the sheet in the freezer until the tacos are frozen solid. Then, transfer them to a freezer-safe bag or container for storage. Bake frozen tacos at 400°F (200°C) for about 20-25 minutes, or until the cheese is melted and the tortillas are crispy.
- Is it gluten-free? This recipe can be adapted to be gluten-free by ensuring that the taco seasoning and any additional ingredients are gluten-free. Always check the labels of packaged ingredients to confirm their gluten-free status.
- Can I double the recipe? Absolutely! This recipe is easily scalable. Simply double all the ingredients and adjust the baking time as needed. Keep an eye on the tacos to ensure they don’t overcook.
Conclusion
The Ultimate Loaded Cheesy Pocket Tacos are a true culinary delight, offering a perfect blend of flavors, textures, and presentation that’s sure to please even the pickiest of eaters. With their ease of preparation, impressive results, and endless possibilities for customization, they’re an ideal choice for any meal. Whether you’re a foodie looking for a new adventure, a busy parent seeking a quick and delicious dinner solution, or simply someone who loves the joy of cooking and sharing meals with others, this recipe is sure to become a favorite. So go ahead, get creative, and enjoy the process of making something truly special – your taste buds, and those you share this dish with, will thank you!
Ultimate Loaded Cheesy Pocket Tacos
A delicious and easy-to-make Mexican dish filled with ground beef, cheese, and vegetables, wrapped in crispy taco shells.
🥘 Ingredients
👩🍳 Instructions
-
1Preheat the oven to 400°F (200°C).
-
2Prepare the filling by cooking the ground beef and adding the diced onion, bell pepper, and garlic.
-
3Assemble the tacos by spooning the filling onto a tortilla, topping with cheese and other desired toppings, and folding the tortilla into a pocket.
-
4Bake the tacos in the preheated oven for 15-20 minutes, or until the cheese is melted and the tortillas are crispy.