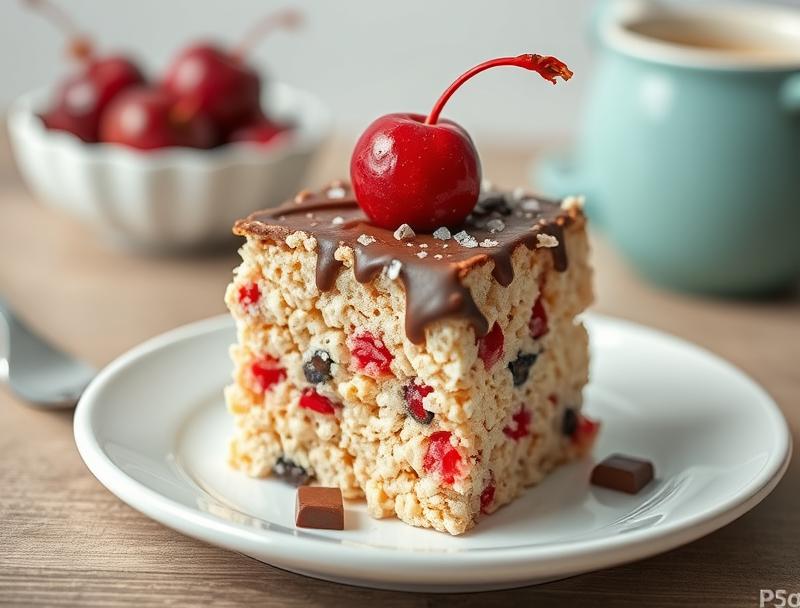
Rice Krispie Treats: Chocolate Covered Cherry Dream
Introduction
Who doesn’t love the classic combination of crunchy Rice Krispie treats, sweet cherries, and rich chocolate? This recipe for Rice Krispie Treats: Chocolate Covered Cherry Dream is a creative twist on the traditional childhood snack, perfect for both kids and adults alike. Using everyday ingredients, you can create a dessert that’s not only delicious but also visually stunning. The best part? It’s incredibly easy to make and requires minimal effort, making it a great option for a quick dessert or snack. In this article, we’ll guide you through the simple steps to create these mouthwatering treats and provide you with helpful tips and variations to make them your own.
Why This Works
- The balance of flavors between the marshmallow-infused Rice Krispies, the sweetness of the cherries, and the depth of the chocolate creates a perfect harmony of tastes.
- The ease of preparation is a significant advantage, as it requires no baking and can be made in under 30 minutes.
- Despite the simplicity, the end result is impressive, making it a great option for parties, gatherings, or as a special treat for the family.
Ingredients
- 2 cups of Rice Krispies cereal
- 1 cup of marshmallows
- 1/4 cup of melted butter or margarine
- 1 cup of cherries, dried or maraschino, chopped
- 1 cup of semisweet chocolate chips
- Optional: sprinkles, chopped nuts, or shredded coconut for decoration
Instructions
- Step 1: Begin by preparing your workspace. Lay out a large piece of parchment paper or a silicone mat on your countertop. This will make it easier to work with the sticky marshmallow mixture and chocolate later on.
- Step 2: In a large pot or saucepan, melt the butter or margarine over low heat. Add the marshmallows and stir until they are completely melted and the mixture is smooth. Remove from heat.
- Step 3: Quickly add the Rice Krispies cereal to the marshmallow mixture and stir until the cereal is evenly coated. Fold in the chopped cherries.
- Step 4: Press the mixture into a greased 9×13 inch baking dish. Let it cool and harden for about 30 minutes.
- Step 5: Melt the chocolate chips in a double boiler or in the microwave in 30-second increments, stirring between each interval until smooth. Pour the melted chocolate over the cooled Rice Krispie treats.
- Step 6: If desired, sprinkle with decorations such as sprinkles, chopped nuts, or shredded coconut before the chocolate hardens.
- Step 7: Let the chocolate set completely. This can take about 30 minutes to an hour, depending on the temperature and humidity of your environment.
- Step 8: Cut into bars or shapes of your choice. Serve and enjoy!
Handy Tips
- For easier handling, lightly grease your hands with butter or cooking spray before pressing the Rice Krispie mixture into the baking dish.
- Use high-quality chocolate for the best flavor. You can also experiment with different types of chocolate, like white chocolate or dark chocolate, for varying flavors.
- If using maraschino cherries, you might want to pat them dry with a paper towel before chopping to remove excess moisture, which can make the treats soggy.
Heat Control
When melting the marshmallows and the chocolate, it’s crucial to control the heat to avoid burning or seizing up the mixture. For the marshmallows, use low heat and constantly stir to ensure they melt evenly. For the chocolate, using a double boiler is ideal as it provides gentle heat. If using the microwave, be cautious and check the chocolate frequently to avoid overheating.
Crunch Factor
The crunch in these treats comes from the Rice Krispies cereal. To maintain the crunch, it’s essential to not overmix the cereal with the marshmallow mixture, as this can make the treats dense and lose their crunch. Also, avoid pressing the mixture too hard into the baking dish, as this can also reduce the crunchiness.
Pro Kitchen Tricks
- To make the treats more festive, use cookie cutters to cut out fun shapes before the chocolate hardens.
- Experiment with different mix-ins like nuts, dried fruits, or even candy pieces to create unique flavor combinations.
- For a cleaner look, drizzle the melted chocolate over the treats instead of pouring it. This can help avoid a mess and create a more polished appearance.
Storage Tips
- Store the treats in an airtight container at room temperature for up to 3 days.
- If you live in a humid climate, consider storing them in the refrigerator to keep them fresh for longer.
- These treats can be frozen for up to 2 months. Simply place them in a single layer in a freezer-safe bag or container and thaw at room temperature when you’re ready to serve.
Gift Packaging Ideas
These Chocolate Covered Cherry Rice Krispie Treats are perfect for gifting, especially during holidays or special occasions. Consider packaging them in decorative tins, jars, or bags. You can wrap each treat individually in plastic wrap or parchment paper and then place them in a larger container. Adding a ribbon or a gift tag can make the gift even more special and personalized.
Flavor Variations
- Try using different types of cereal, like Froot Loops or Cinnamon Toast Crunch, for a varied flavor and color.
- Experiment with various mix-ins such as M&M’s, chopped peanut butter cups, or caramel bits.
- For a boozy twist, soak the cherries in a liquor of your choice (like Kirsch or Grand Marnier) before adding them to the treats.
Troubleshooting
- If your treats turn out too sticky, it might be because the marshmallow mixture was not cooled enough or because too much butter was used. Try adding a bit more cereal to balance it out.
- If the chocolate doesn’t set, check the temperature and humidity of your environment. Sometimes, chocolate can seize up or not set properly in too warm or humid conditions.
- If you notice the treats becoming soggy, it could be due to high humidity or the use of moist ingredients without proper drying. Try storing them in a cooler, drier place.
FAQs
- Can I freeze the treats? Yes, you can freeze them for up to 2 months. Simply thaw at room temperature when you’re ready to serve.
- Are these treats gluten-free? Yes, as long as you use gluten-free chocolate and ensure the cereal and other ingredients are gluten-free, these treats can be enjoyed by those with gluten intolerance.
- Can I double the recipe? Absolutely. Just keep in mind that you might need a larger pot for melting the marshmallows and a bigger baking dish for pressing the mixture.
Conclusion
Making Rice Krispie Treats: Chocolate Covered Cherry Dream is a fun and rewarding experience that combines the nostalgia of childhood with the sophistication of adult flavors. With these simple steps and handy tips, you’re well on your way to creating a dessert that’s sure to impress both kids and adults. Don’t be afraid to experiment with different ingredients and decorations to make the recipe your own. Whether you’re making these for a special occasion or just a Tuesday, the joy of creating something delicious and sharing it with others is what truly makes cooking special. So go ahead, get creative, and enjoy the process of making these delightful treats!
Rice Krispie Treats: Chocolate Covered Cherry Dream
A creative twist on the traditional Rice Krispie treats, combining the crunch of cereal, the sweetness of cherries, and the richness of chocolate.
🥘 Ingredients
👩🍳 Instructions
-
1Prepare the workspace with parchment paper or a silicone mat.
-
2Melt the butter and marshmallows in a large pot over low heat, stirring constantly.
-
3Add the Rice Krispies cereal and chopped cherries to the marshmallow mixture and stir until well combined.
-
4Press the mixture into a greased 9x13 inch baking dish and let cool.
-
5Melt the chocolate chips and pour over the cooled Rice Krispie treats.
-
6Let the chocolate set before cutting into bars or shapes.
-
7Serve and enjoy!