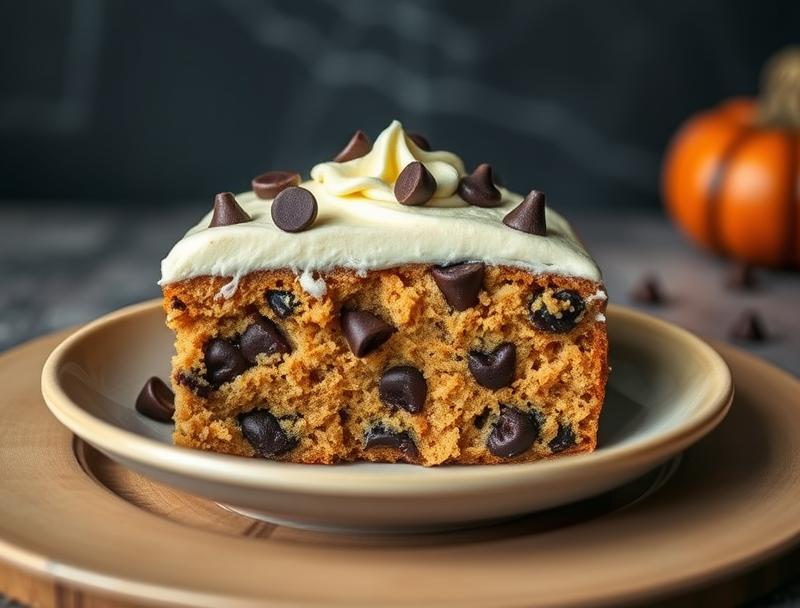
Easy Halloween Cookie Cake with Chocolate Chips and Buttercream
Introduction
This spooky season, impress your friends and family with an Easy Halloween Cookie Cake that combines the warmth of chocolate chips with the richness of buttercream frosting. Using everyday ingredients, this recipe allows you to unleash your creativity and make a dessert that’s both a visual treat and a taste sensation. The best part? It’s incredibly easy to make, requiring minimal effort for a dessert that’s sure to be the centerpiece of any Halloween party. Whether you’re a seasoned baker or a beginner, this recipe is perfect for anyone looking to add a little magic to their Halloween celebrations.
Why This Works
- The balance of flavors between the cookie cake, chocolate chips, and buttercream frosting creates a delightful taste experience that’s both familiar and exciting.
- The preparation is straightforward and quick, making it an ideal choice for busy Halloween schedules.
- Despite its simplicity, the presentation of the cookie cake can be made impressively spooky or fun with creative decorating ideas, ensuring it’s a hit at any gathering.
Ingredients
- 2 1/4 cups all-purpose flour
- 1 tsp baking soda
- 1 tsp salt
- 1 cup unsalted butter, at room temperature
- 3/4 cup white granulated sugar
- 3/4 cup brown sugar
- 2 large eggs
- 2 cups semi-sweet chocolate chips
- For the buttercream frosting: 1 cup unsalted butter, softened, 2 cups powdered sugar, 1/2 tsp salt, 2 tbsp milk or heavy cream, and food coloring (orange, black, or purple for Halloween theme)
Instructions
- Step 1: Preheat your oven to 350°F (180°C). Prepare a 9-inch round cake pan or a Halloween-themed cookie cake pan by greasing it and lining the bottom with parchment paper.
- Step 2: In a medium bowl, whisk together the flour, baking soda, and salt. Set aside. In a large bowl, use an electric mixer to cream together the butter and sugars until light and fluffy. Beat in the eggs one at a time, making sure each egg is fully incorporated before adding the next.
- Step 3: Gradually mix in the flour mixture until just combined, being careful not to overmix. Stir in the chocolate chips. Pour the batter into the prepared pan and smooth the top.
- Step 4: Bake for 35-40 minutes or until a toothpick inserted into the center comes out clean. Allow the cookie cake to cool completely in the pan. For the buttercream frosting, beat the softened butter in a large bowl until creamy. Gradually add the powdered sugar, beating until smooth and creamy. Add the salt and milk (or heavy cream), and mix until the frosting reaches the desired consistency. Divide the frosting into portions if you wish to create multiple colors for decorating.
Handy Tips
- Ensure all ingredients are at room temperature for easier mixing and a better texture.
- Don’t overbake the cookie cake, as it can become dry. A slightly underbaked texture will yield a chewier cookie cake.
- For the buttercream, if it becomes too thin, add a bit more powdered sugar. If it’s too thick, add a small amount of milk or heavy cream.
Heat Control
When baking the cookie cake, it’s crucial to maintain the oven temperature at 350°F (180°C) for even cooking. The baking time may vary depending on your oven and the size of your cookie cake, so keep an eye on it after 30 minutes and check every 5 minutes thereafter until it’s done.
Crunch Factor
The crunch factor in this dessert comes from the semi-sweet chocolate chips and the potential for a crispy edge on the cookie cake if you prefer it slightly more baked. To achieve a chewy center and a crispy edge, bake the cookie cake for 30-32 minutes and then check for doneness.
Pro Kitchen Tricks
- To ensure the cookie cake releases easily from the pan, make sure to grease it generously and line it with parchment paper.
- For a professional finish, use a turntable to display your cookie cake, and decorate it just before serving to prevent the frosting from smudging.
Storage Tips
- Store the cookie cake at room temperature in an airtight container for up to 3 days.
- If you wish to freeze the cookie cake, do so without the frosting. Wrap it tightly in plastic wrap or aluminum foil and place it in a freezer-safe bag. Freeze for up to 2 months. Thaw at room temperature or refrigerate overnight before frosting and serving.
Gift Packaging Ideas
This Easy Halloween Cookie Cake with Chocolate Chips and Buttercream makes a wonderful gift for friends, neighbors, or coworkers. Consider packaging it in a decorative Halloween-themed tin or box, or wrap it in cellophane and tie with a ribbon. You can also add a personal touch with a handmade card or a small bag of Halloween candies on the side.
Flavor Variations
- Try adding different types of chocolate chips, like white chocolate or mint chocolate chips, for a unique twist.
- Experiment with creative toppings such as chopped nuts, sprinkles, or even candy pieces like M&M’s or chopped peanut butter cups.
- For a different flavor profile, substitute the vanilla extract with another extract like almond or coconut, though this recipe doesn’t call for extract, it’s a consideration for future variations.
Troubleshooting
- If your cookie cake turns out too dry, it may have been overbaked. Try reducing the baking time in future attempts.
- If the buttercream frosting is too sweet, you can balance it by adding a pinch of salt.
- For a cookie cake that’s too dense, ensure you’re not overmixing the batter, and check your leavening agents (baking soda) are fresh.
FAQs
- Can I freeze it? Yes, you can freeze the cookie cake without the frosting for up to 2 months.
- Is it gluten-free? No, this recipe contains all-purpose flour and is not gluten-free. However, you can experiment with gluten-free flours as a substitute, though this may affect the texture and flavor.
- Can I double the recipe? Yes, you can double the recipe to make a larger cookie cake, but be sure to adjust the baking time accordingly.
Conclusion
With its simplicity, impressive presentation, and delicious taste, the Easy Halloween Cookie Cake with Chocolate Chips and Buttercream is a must-try for this spooky season. Whether you’re a fan of baking or just looking for a fun project to enjoy with family and friends, this recipe is sure to bring joy and satisfaction. Don’t hesitate to experiment with different decorations and flavor variations to make it your own, and happy baking!