Tropical Dream Bars: Easy Hawaiian Pineapple Coconut Bars with Frosting
Introduction
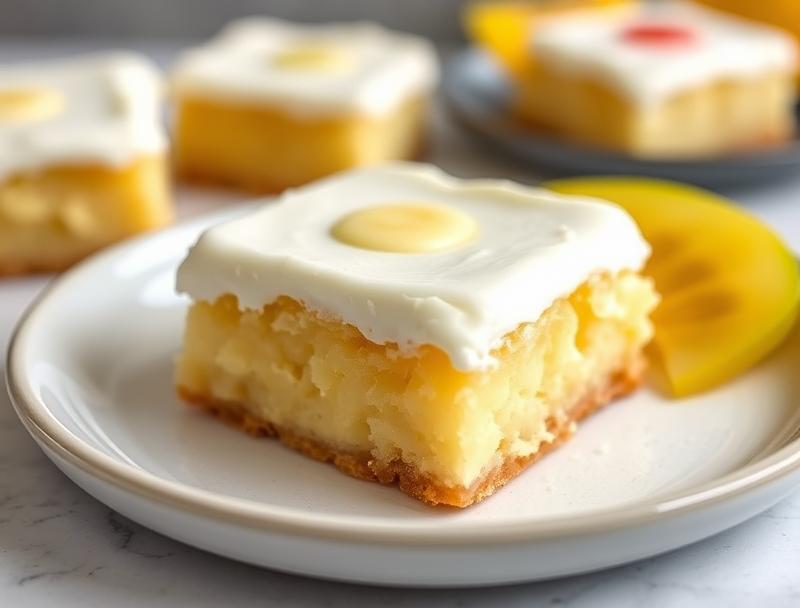
Imagine a dessert that transports you to a tropical paradise with every bite. The Tropical Dream Bars are an easy-to-make, crowd-pleasing dessert that combines the sweetness of pineapple, the richness of coconut, and the tanginess of a creamy frosting. These bars are perfect for anyone looking to indulge in a sweet treat that’s both refreshing and decadent. The best part? They’re incredibly easy to make, requiring minimal effort and using everyday ingredients. Whether you’re a beginner in the kitchen or a seasoned baker, these bars are sure to become a favorite. So, let’s dive into the world of tropical flavors and create a dessert that’s sure to impress!
Why This Works
- The balance of flavors between the pineapple, coconut, and frosting creates a harmonious and addictive taste experience that will leave you wanting more.
- The ease of preparation makes these bars accessible to anyone, regardless of their baking skills. The simple steps and minimal ingredients required ensure that you can have a delicious dessert ready in no time.
- Despite the simplicity of the recipe, the end result is impressive and perfect for serving at parties, gatherings, or as a special treat for your loved ones. The presentation is beautiful, and the flavors are sophisticated, making it a great option for any occasion.
Ingredients
- 1 1/2 cups all-purpose flour
- 1 cup granulated sugar
- 1/2 cup unsweetened shredded coconut
- 1/2 cup unsalted butter, softened
- 1 cup crushed pineapple
- 2 large eggs
- 1 teaspoon vanilla extract
- 1 cup powdered sugar
- 1/2 cup cream cheese, softened
- 1/4 cup unsweetened coconut milk
- Salt to taste
- Chopped fresh pineapple or toasted coconut flakes for garnish (optional)
Instructions
- Step 1: Prepare the Crust – Preheat your oven to 350°F (180°C). In a medium bowl, whisk together the flour, sugar, and unsweetened shredded coconut. Add the softened butter and mix until the mixture forms a crumbly dough. Press the dough into a 9×9-inch baking dish lined with parchment paper.
- Step 2: Bake the Crust – Bake the crust for 20-25 minutes, or until it’s lightly golden brown. Let it cool completely.
- Step 3: Prepare the Filling – In a large bowl, whisk together the crushed pineapple, eggs, and vanilla extract. Pour the pineapple mixture over the cooled crust.
- Step 4: Bake the Bars – Bake the bars for 25-30 minutes, or until the filling is set and the top is lightly golden brown.
- Step 5: Prepare the Frosting – In a medium bowl, beat the powdered sugar, cream cheese, and unsweetened coconut milk until smooth and creamy.
- Step 6: Assemble and Serve – Let the bars cool completely before spreading the frosting over the top. Refrigerate for at least 30 minutes to allow the flavors to meld together. Cut into bars and serve. Garnish with chopped fresh pineapple or toasted coconut flakes, if desired.
Handy Tips
- To ensure the crust doesn’t become too brown, keep an eye on it during the baking time and cover the edges with foil if necessary.
- Don’t overmix the pineapple filling, as it can become too dense and lose its fluffy texture.
- If you find the frosting too sweet, you can adjust the amount of powdered sugar to your taste.
Heat Control
When baking the crust and the bars, it’s essential to keep an eye on the temperature and timing. The ideal temperature for baking is 350°F (180°C), and the timing will depend on your oven’s performance. Make sure to check the crust and bars frequently to avoid overcooking. The crust should be lightly golden brown, and the filling should be set and not too jiggly. If you’re unsure, you can always do a toothpick test to check for doneness.
Crunch Factor
The crunch factor in these bars comes from the toasted coconut flakes on top and the crunchy crust at the bottom. To achieve the perfect crunch, make sure to not overbake the crust, and sprinkle the toasted coconut flakes on top of the frosting before serving. You can also add some chopped nuts or seeds to the crust for extra texture and flavor.
Pro Kitchen Tricks
- To ensure the bars cut cleanly, refrigerate them for at least 30 minutes before serving. This will help the frosting set and the filling to firm up.
- Use a high-quality vanilla extract to give the bars a deep and rich flavor.
- Don’t overmix the frosting, as it can become too stiff and lose its creamy texture. Stop beating once the ingredients are well combined.
Storage Tips
- Store the bars in an airtight container in the refrigerator for up to 5 days.
- Freeze the bars for up to 2 months, wrapped tightly in plastic wrap or aluminum foil. Thaw overnight in the refrigerator before serving.
- Reheat the bars in the microwave or oven if you prefer a warm dessert. However, be careful not to overheat, as the frosting can melt and the filling can become too soft.
Gift Packaging Ideas
If you want to give these bars as a gift, consider packaging them in a beautiful tin or a decorative box. You can wrap each bar individually in plastic wrap or wax paper and tie with a ribbon. Add a personalized note or a gift tag with the ingredients used, and you’ll have a thoughtful and delicious gift. You can also package the bars in a mason jar or a glass container, layered with toasted coconut flakes and chopped nuts for a beautiful presentation.
Flavor Variations
- Try adding different spices, such as cinnamon or nutmeg, to the crust for a unique flavor.
- Use creative toppings, such as chopped nuts, seeds, or dried fruit, to add texture and flavor to the bars.
- Swap the pineapple for other fruits, such as peaches or mango, for a different twist on the recipe.
Troubleshooting
- If the crust becomes too brown, it may be due to overbaking. Try reducing the baking time or covering the edges with foil to prevent overcooking.
- If the filling is too runny, it may be due to underbaking. Try baking the bars for a few more minutes or until the filling is set.
- If the frosting is too stiff, it may be due to overbeating. Try adding a little more unsweetened coconut milk to thin it out.
FAQs
- Can I freeze the bars? Yes, you can freeze the bars for up to 2 months. Wrap them tightly in plastic wrap or aluminum foil and thaw overnight in the refrigerator before serving.
- Are the bars gluten-free? No, the bars contain all-purpose flour, which contains gluten. However, you can try substituting the flour with a gluten-free alternative, such as almond flour or coconut flour.
- Can I double the recipe? Yes, you can double the recipe to make a larger batch of bars. Just keep in mind that you may need to adjust the baking time and temperature accordingly.
Conclusion
In conclusion, the Tropical Dream Bars are a delicious and easy-to-make dessert that’s perfect for any occasion. With their unique combination of pineapple, coconut, and creamy frosting, these bars are sure to impress your friends and family. Don’t be afraid to experiment with different flavors and toppings to make the recipe your own. And remember, the most important thing is to have fun and enjoy the process of creating something delicious and beautiful. Happy baking!
Tropical Dream Bars: Easy Hawaiian Pineapple Coconut Bars with Frosting
A delicious and easy-to-make dessert that combines the sweetness of pineapple, the richness of coconut, and the tanginess of a creamy frosting.
🥘 Ingredients
👩🍳 Instructions
-
1Preheat the oven to 350°F (180°C).
-
2Prepare the crust by whisking together the flour, sugar, and unsweetened shredded coconut. Add the softened butter and mix until the mixture forms a crumbly dough.
-
3Press the dough into a 9x9-inch baking dish lined with parchment paper and bake for 20-25 minutes, or until lightly golden brown.
-
4Prepare the filling by whisking together the crushed pineapple, eggs, and vanilla extract. Pour the pineapple mixture over the cooled crust and bake for 25-30 minutes, or until the filling is set.
-
5Prepare the frosting by beating the powdered sugar, cream cheese, and unsweetened coconut milk until smooth and creamy.
-
6Assemble the bars by spreading the frosting over the cooled filling and refrigerating for at least 30 minutes to allow the flavors to meld together.