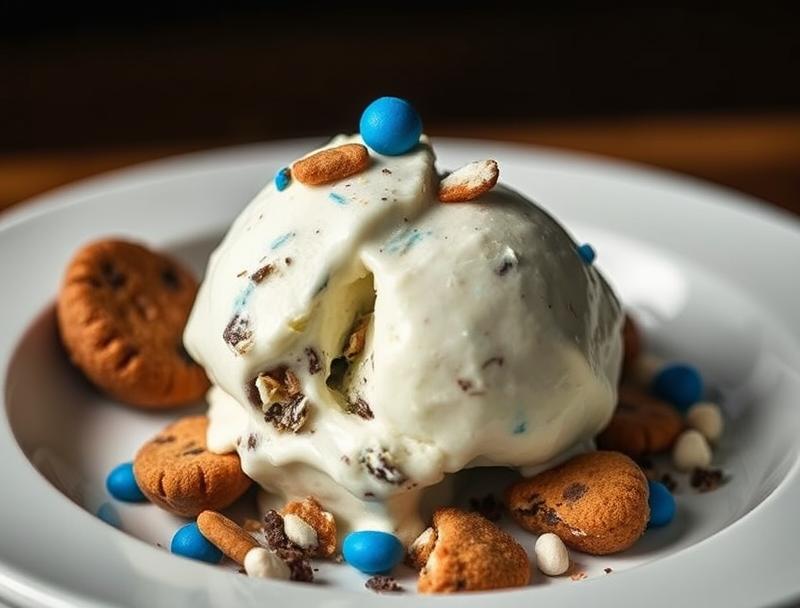
Homemade Cookie Monster Ice Cream (So Easy & Fun to Make!)
Introduction
Imagine a world where your favorite childhood dessert comes to life in a creamy, dreamy, and utterly delicious way. Welcome to the magical realm of Homemade Cookie Monster Ice Cream, where the boundaries of flavor and fun are pushed to new heights! This recipe is not just about making ice cream; it’s about creating an experience that’s both easy and enjoyable, using everyday ingredients that will make your taste buds dance with joy. Whether you’re a parent looking to surprise your kids, a dessert enthusiast seeking a new challenge, or simply someone who loves the idea of Cookie Monster’s favorite treats in a cold, creamy form, this recipe is for you.
Why This Works
- Flavor balance and ingredient accessibility: The combination of cookies, cream, and a hint of vanilla creates a perfect balance of flavors that everyone will love. Plus, the ingredients are easy to find and work with.
- Ease of preparation: This recipe simplifies the ice cream making process, requiring minimal equipment and effort. You can achieve professional-grade ice cream at home without the hassle.
- Impressive results with minimal effort: Despite its simplicity, the end result is incredibly impressive. The texture is creamy, the flavors are deep, and the presentation can be as fun and colorful as you like, making it perfect for parties or special occasions.
Ingredients
- 2 cups heavy cream
- 1 cup whole milk
- 1/2 cup granulated sugar
- 1 tsp vanilla extract
- 1 cup crushed cookies (Chocolate Chip, Peanut Butter, or any other favorite)
- 1/4 cup mini chocolate chips or chocolate chunks
- 1/4 cup chopped nuts (optional)
- Pinch of salt
Instructions
- Step 1: Begin by preparing your ice cream base. In a medium-sized mixing bowl, whisk together the heavy cream, whole milk, granulated sugar, and vanilla extract until the sugar is fully dissolved.
- Step 2: Cover the bowl with plastic wrap and refrigerate the mixture for at least 2 hours or overnight to chill.
- Step 3: Once your mixture is chilled, remove it from the refrigerator and pour it into an ice cream maker. Follow the manufacturer’s instructions to churn the ice cream. This process usually takes about 20-30 minutes, depending on the type of ice cream maker you have.
- Step 4: While the ice cream is churning, prepare your mix-ins. If using nuts, you can toast them lightly in a 350°F oven for 5-7 minutes to enhance their flavor. Let them cool completely before using.
- Step 5: Once the ice cream is almost fully churned, add the crushed cookies, mini chocolate chips, and chopped nuts (if using) to the ice cream maker. Continue to churn until these mix-ins are fully incorporated and the ice cream has reached the desired consistency.
- Step 6: Transfer the ice cream to an airtight container and place it in the freezer to harden for at least 2 hours. This will help the flavors to meld together and the ice cream to become scoopable.
Handy Tips
- For the best flavor, use high-quality ingredients, especially when it comes to the cookies and chocolate.
- Don’t overmix the ice cream base before chilling, as this can lead to ice crystals forming in the finished ice cream.
- If you don’t have an ice cream maker, you can also freeze the mixture in a shallow metal pan and then blend it in a food processor once it’s frozen solid. This will give you a slightly chunkier texture, similar to gelato.
Heat Control
This recipe doesn’t require cooking, but if you choose to toast nuts for added flavor, make sure to keep an eye on them. Nuts can go from perfectly toasted to burnt very quickly. The ideal temperature for toasting nuts is 350°F, and the timing can range from 5 to 10 minutes, depending on the type of nuts and your personal preference for their darkness.
Crunch Factor
The crunch in this ice cream comes from the cookies and nuts (if used). To maintain the crunch, it’s best to add these mix-ins towards the end of the churning process. This way, they retain their texture and provide a delightful contrast to the smooth ice cream.
Pro Kitchen Tricks
- Experiment with different types of cookies and mix-ins to create unique flavor combinations. This could include using peanut butter cookies, adding caramel bits, or incorporating fresh fruits like strawberries or raspberries.
- For a creamier ice cream, make sure your mixture is well-chilled before churning, and consider adding a little more heavy cream if you prefer a richer texture.
- If you’re having trouble getting your ice cream to churn properly, check that your ice cream maker is properly assembled and that the mixture is at the correct temperature.
Storage Tips
- Store your homemade ice cream in an airtight container in the freezer to maintain its quality. It’s best to use a container that’s specifically designed for storing ice cream, as these are usually insulated to keep the ice cream at the perfect temperature.
- When storing, press a piece of plastic wrap or parchment paper directly onto the surface of the ice cream to prevent ice crystals from forming.
- This ice cream will keep well in the freezer for up to 3 days. After this, the quality may start to degrade, and the ice cream might become icy.
Gift Packaging Ideas
If you’re looking to gift your homemade Cookie Monster Ice Cream, consider packaging it in decorative ice cream containers or jars. You can wrap these containers in colorful paper or ribbons and add a personalized note or gift tag. For a more rustic look, use mason jars and top them with a checkered cloth and twine. Whatever packaging you choose, make sure it’s insulated to keep the ice cream frozen during transport.
Flavor Variations
- Different spices: Try adding a pinch of cinnamon, nutmeg, or cardamom to give your ice cream a unique twist.
- Creative toppings: Offer a variety of toppings like whipped cream, caramel sauce, chopped nuts, or fresh fruits to let everyone customize their ice cream experience.
- Ingredient swaps: Substitute the cookies with wafers, brownies, or even candy pieces for a different flavor profile.
Troubleshooting
- Texture problems: If your ice cream turns out too icy, it might be because the mixture wasn’t chilled enough before churning, or it was over-churned. If it’s too soft, it could be under-churned or the freezer temperature might be too high.
- Ingredient replacements: If you’re looking to replace any ingredients due to dietary restrictions or preferences, consider using almond milk instead of regular milk for a dairy-free version, or opting for gluten-free cookies if needed.
- Over/undercooking signs: Since this recipe doesn’t involve cooking, the main thing to watch out for is the churning time. Under-churned ice cream will be too soft, while over-churned ice cream might become too hard and icy.
FAQs
- Can I freeze it? Yes, this ice cream can be frozen. In fact, it needs to be frozen to set properly after churning. It will keep in the freezer for up to 3 days.
- Is it gluten-free? This depends on the type of cookies you use. If you use gluten-free cookies, then the ice cream will be gluten-free. Otherwise, it will contain gluten.
- Can I double the recipe? Yes, you can double the recipe if you need to make a larger batch. Just keep in mind that you might need to churn the mixture in batches depending on the size of your ice cream maker.
Conclusion
Making Homemade Cookie Monster Ice Cream is a fun and rewarding process that’s perfect for anyone who loves ice cream and baking. With its unique blend of creamy texture and crunchy mix-ins, this ice cream is sure to become a favorite. Don’t be afraid to experiment with different flavors and ingredients to make it your own, and enjoy the process of creating something truly special. Whether you’re a seasoned chef or a beginner in the kitchen, this recipe is a great way to bring a little joy and whimsy into your life. So go ahead, get churning, and indulge in the delightful world of homemade ice cream!
Homemade Cookie Monster Ice Cream (So Easy & Fun to Make!)
A fun and easy recipe to make homemade Cookie Monster Ice Cream with a creamy texture and crunchy cookie mix-ins.
🥘 Ingredients
👩🍳 Instructions
-
1Prepare the ice cream base by whisking together the heavy cream, whole milk, granulated sugar, and vanilla extract until the sugar is dissolved.
-
2Chill the mixture in the refrigerator for at least 2 hours or overnight.
-
3Churn the mixture in an ice cream maker according to the manufacturer's instructions.
-
4Add the crushed cookies, mini chocolate chips, and chopped nuts (if using) to the ice cream maker during the last 2 minutes of churning.
-
5Transfer the ice cream to an airtight container and freeze for at least 2 hours to harden.
-
6Serve and enjoy!