Irresistible Butterfinger Balls Recipe with Cream Cheese
Introduction
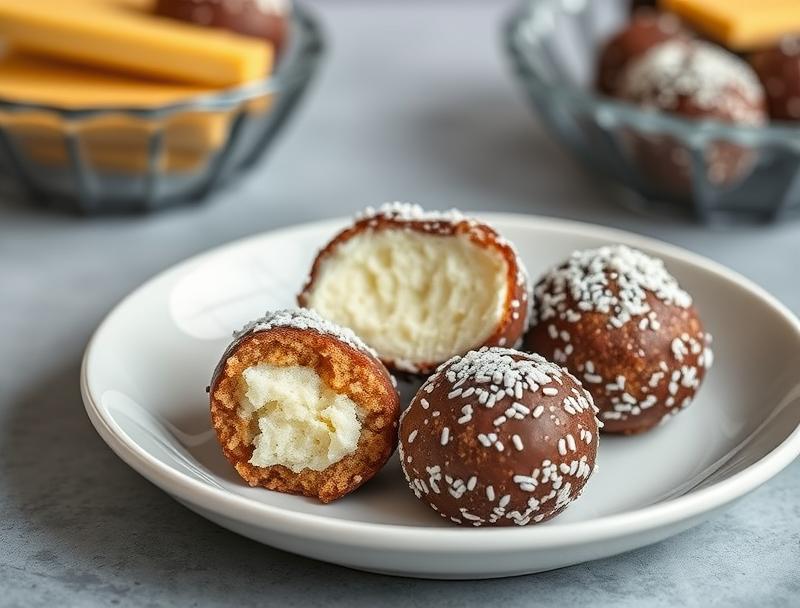
Indulge in the simplicity and decadence of our Irresistible Butterfinger Balls Recipe with Cream Cheese, a delightful treat that combines the richness of cream cheese with the crunchy, peanut buttery goodness of Butterfinger candies. This recipe is a masterclass in ease, flavor, and creativity, using everyday ingredients to create a dessert that is both impressive and effortless to make. Whether you’re a seasoned baker or a beginner in the kitchen, this recipe is sure to delight with its perfect balance of textures and tastes.
Why This Works
- The balance of flavors between the tangy cream cheese and the sweet, crunchy Butterfinger pieces creates a delightful harmony that will leave you wanting more.
- The accessibility of the ingredients and the simplicity of the preparation make this recipe a joy to undertake, requiring minimal time and effort for maximum reward.
- The impressive results, with their uniform balls and delicious coating, belie the minimal effort required, making this recipe perfect for both everyday treats and special occasions.
Ingredients
- 1 (14.4 oz) package of Butterfinger candy bars, crushed
- 1 (8 oz) package of cream cheese, softened
- 1/2 cup of powdered sugar
- 1/4 cup of peanut butter
- 1/4 cup of melted chocolate (white, milk, or dark)
- 1 tablespoon of shortening (optional, for smoother chocolate coating)
- Chopped peanuts or additional crushed Butterfinger for garnish (optional)
Instructions
- Step 1: In a large mixing bowl, combine the softened cream cheese, powdered sugar, and peanut butter. Mix until smooth and well combined.
- Step 2: Gradually add the crushed Butterfinger to the cream cheese mixture, mixing until the candy is evenly distributed and the mixture forms a cohesive dough.
- Step 3: Use your hands to shape the dough into small balls, about 1 inch in diameter. You should end up with around 20-25 balls, depending on the size.
- Step 4: Melt the chocolate in a double boiler or in the microwave in 30-second increments, stirring between each interval until smooth. If using shortening, stir it in once the chocolate is melted to help create a smoother coating.
- Step 5: Dip each Butterfinger ball into the melted chocolate, using a fork or dipping tool to fully coat the ball. Tap off any excess chocolate by gently tapping the fork or dipping tool against the side of the bowl.
- Step 6: Place the chocolate-coated balls on a parchment-lined baking sheet or a silicone mat. If desired, sprinkle with chopped peanuts or additional crushed Butterfinger before the chocolate hardens.
- Step 7: Refrigerate the coated balls for at least 30 minutes to allow the chocolate to set. Serve chilled and enjoy!
Handy Tips
- To ensure the chocolate coats the balls evenly, make sure the chocolate is at the right temperature. If it’s too hot, it will be too thin; if it’s too cool, it won’t coat smoothly.
- For a lighter coating, you can also drizzle the melted chocolate over the Butterfinger balls instead of fully dipping them.
- Experiment with different types of chocolate for the coating to find your favorite flavor combination.
Heat Control
When melting the chocolate, it’s crucial to avoid overheating, as this can cause the chocolate to seize up or become too thin. Using a double boiler or heating the chocolate in short increments in the microwave, stirring between each heating, can help maintain the ideal temperature for smooth, workable chocolate.
Crunch Factor
The crunch in these Butterfinger balls comes from the crushed Butterfinger candies mixed into the dough and potentially from any chopped peanuts used as a garnish. To maintain this crunch, it’s best to store the balls in an airtight container in the refrigerator and serve them chilled.
Pro Kitchen Tricks
- For easier handling, chill the shaped Butterfinger balls in the refrigerator for about 10-15 minutes before coating them with chocolate. This will firm them up and make the coating process smoother.
- Use high-quality chocolate for the best flavor. Different types of chocolate (milk, dark, white) can significantly affect the final taste of the Butterfinger balls.
Storage Tips
- Store the chocolate-coated Butterfinger balls in an airtight container in the refrigerator for up to 5 days.
- For longer storage, consider freezing the balls before coating them with chocolate. Simply place the uncoated balls on a baking sheet lined with parchment paper and freeze until solid, then transfer them to an airtight container or freezer bag for storage. Coat with chocolate when you’re ready to serve.
Gift Packaging Ideas
These Butterfinger balls make excellent gifts, especially during holidays or special occasions. Consider packaging them in decorative tins, jars, or gift boxes lined with tissue paper or candy wrappers. You can also wrap individual balls in cellophane bags and tie them with ribbons for a more personalized touch. Adding a handwritten note or a small gift card can make the gift even more special.
Flavor Variations
- Experiment with different candy bars: Try using other crushed candy bars like Snickers, Milky Way, or 3 Musketeers for a different flavor profile.
- Spice it up: Add a pinch of salt or a teaspoon of vanilla extract to the cream cheese mixture for added depth of flavor.
- Nutty variations: Substitute peanut butter with another nut butter like almond or cashew butter for a unique twist.
Troubleshooting
- Texture problems: If the dough is too sticky, add a bit more powdered sugar. If it’s too dry, add a small amount of cream cheese or peanut butter.
- Chocolate issues: If the chocolate is too thick, warm it slightly. If it’s too thin, let it cool a bit before using.
FAQs
- Can I freeze the coated balls? Yes, but it’s best to freeze them before coating with chocolate for the best results. Coat with chocolate just before serving for the freshest taste.
- Is this recipe gluten-free? Depending on the brand of Butterfinger and chocolate used, this recipe can be gluten-free. Always check the ingredients of your specific brands to ensure they meet gluten-free requirements.
- Can I double the recipe? Absolutely. Simply double the ingredients and follow the instructions as given. Note that you may need to work in batches when coating the balls with chocolate to avoid overcrowding.
Conclusion
With its irresistible combination of creamy filling and crunchy, chocolatey exterior, the Irresistible Butterfinger Balls Recipe with Cream Cheese is a treat that’s sure to become a favorite. Whether you’re making them for a special occasion, a potluck, or just a Tuesday, these bite-sized delights are easy to make, fun to eat, and perfect for sharing. So go ahead, indulge in the simplicity and joy of creating something delicious with everyday ingredients, and enjoy the smiles and satisfaction that come with sharing your creations with others.
Irresistible Butterfinger Balls Recipe with Cream Cheese
A delicious and easy-to-make dessert combining cream cheese, crushed Butterfinger candies, and chocolate.
🥘 Ingredients
👩🍳 Instructions
-
1Combine cream cheese, powdered sugar, and peanut butter in a bowl and mix until smooth.
-
2Add crushed Butterfinger to the mixture and mix until well combined.
-
3Shape the mixture into small balls.
-
4Melt the chocolate and coat each ball.
-
5Refrigerate the coated balls for at least 30 minutes before serving.