Homemade Apple & Cranberry Dog Dental Sticks Recipe
Introduction
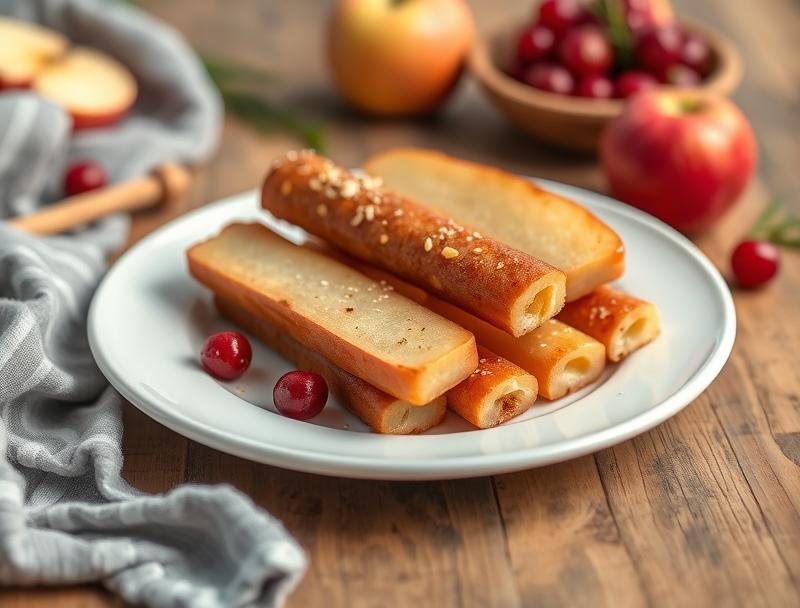
As a dog owner, there’s nothing quite like seeing your furry friend’s tail wag with excitement when they’re given a tasty and healthy treat. The Homemade Apple & Cranberry Dog Dental Sticks Recipe is not only a delicious way to reward your dog but also helps maintain their dental health. Made with everyday ingredients like apples, cranberries, and oats, this recipe is easy to follow, packed with flavor, and shows your creativity in the kitchen. The best part? It’s specifically designed with your dog’s health and happiness in mind, using ingredients that are both nutritious and safe for canine consumption.
Why This Works
- The balance of sweet apples and tart cranberries creates a flavor combination that dogs love, making it an excellent way to encourage them to chew on something beneficial for their teeth.
- The ease of preparation is a significant advantage, requiring minimal time and effort to mix and shape the ingredients into dental sticks.
- The impressive results, with dental sticks that are not only healthy but also appealing to dogs, are achieved with minimal effort, making this recipe a staple for any dog owner looking to provide a homemade touch to their pet’s care.
Ingredients
- 2 cups whole wheat flour
- 1 cup rolled oats
- 1/2 cup finely chopped apples
- 1/4 cup dried cranberries
- 1/4 cup honey
- 1 egg
- 1 teaspoon vanilla extract
- 1/2 teaspoon cinnamon powder
Instructions
- Step 1: Preheat your oven to 350°F (180°C). Line a baking sheet with parchment paper. In a large bowl, whisk together the flour, oats, and cinnamon powder.
- Step 2: In another bowl, mix the chopped apples, dried cranberries, honey, egg, and vanilla extract until well combined. Add this mixture to the dry ingredients and stir until a dough forms.
- Step 3: Roll out the dough to about 1/4 inch thickness. Use a cookie cutter or a knife to cut into desired shapes. Place the shapes on the prepared baking sheet, leaving about 1 inch of space between each stick.
- Step 4: Bake for 15-20 minutes, or until the edges are lightly golden. Allow the sticks to cool completely on the baking sheet before transferring them to an airtight container for storage.
Handy Tips
- Always check with your veterinarian before introducing new foods or treats, especially if your dog has food allergies or sensitivities.
- Consider substituting the honey with peanut butter for a different flavor, but ensure the peanut butter does not contain xylitol, which is toxic to dogs.
- Avoid overbaking, as this can make the sticks too hard and potentially harmful for your dog’s teeth.
Heat Control
When baking the dental sticks, it’s crucial to keep an eye on them to avoid overcooking. The ideal baking time is between 15-20 minutes, but this can vary depending on your oven. Look for lightly golden edges as a sign of doneness. Remember, the sticks should be firm but not too hard, as they are meant to be chewed by your dog to help clean their teeth.
Crunch Factor
The crunch factor in these dental sticks is important for their purpose – to help remove plaque and tartar from your dog’s teeth. The combination of oats and flour provides a gentle abrasiveness that is safe and effective. To achieve the right crunch, ensure you don’t overbake the sticks, and consider adjusting the baking time based on your dog’s preference for crunchiness.
Pro Kitchen Tricks
- For an extra crispy texture, you can try baking the sticks for an additional 2-3 minutes. However, keep a close eye to prevent burning.
- Using a variety of shapes with your cookie cutter can make treat time more exciting for your dog, offering a fun surprise each time.
- Consider making these sticks in bulk and freezing them for up to 2 months for a quick and healthy snack anytime.
Storage Tips
- Store the cooled dental sticks in an airtight container to keep them fresh for up to 5 days.
- For longer storage, place the sticks in a freezer-safe bag or container and freeze. Frozen sticks can be given to your dog directly from the freezer.
- When reheating frozen sticks, simply leave them at room temperature for a few hours or warm them slightly in the oven at a very low temperature.
Gift Packaging Ideas
If you’re considering gifting these homemade dental sticks to fellow dog owners, you can package them in decorative jars or bags with a ribbon and a personalized note. Adding a few dried cranberries or a sprinkle of cinnamon on top can give the gift a charming, homemade touch. Don’t forget to include the recipe and any relevant storage or serving instructions.
Flavor Variations
- Try adding different spices like nutmeg or ginger for a unique flavor profile.
- Experiment with various fruits, such as blueberries or bananas, for a change in sweetness and flavor.
- For dogs with sensitivities, consider swapping the wheat flour with a gluten-free alternative to ensure the treats remain safe and enjoyable.
Troubleshooting
- If the dough is too sticky, add a bit more flour. If it’s too dry, add a small amount of water or honey.
- For sticks that turn out too hard, reduce the baking time in future batches. For sticks that are too soft, increase the baking time slightly.
- If your dog experiences any adverse reactions after consuming the sticks, such as vomiting or diarrhea, discontinue use and consult with your veterinarian.
FAQs
- Can I freeze the dough instead of the baked sticks? Yes, you can freeze the dough for up to 2 months. Simply thaw and bake as instructed when you’re ready.
- Is this recipe gluten-free? The recipe as given contains wheat flour, making it not gluten-free. However, you can easily make it gluten-free by substituting the wheat flour with a gluten-free flour mix.
- Can I double the recipe? Yes, you can double or even triple the recipe if you need to make more sticks. Just ensure you have enough space on your baking sheet for all the shapes.
Conclusion
Making your own dog treats at home can be a fun and rewarding experience, especially when you see how much your dog enjoys them. The Homemade Apple & Cranberry Dog Dental Sticks Recipe offers a healthy, tasty, and creative way to care for your dog’s dental health. Don’t hesitate to experiment with different ingredients and flavors to keep things interesting for your furry friend. Remember, always prioritize your dog’s health and safety by checking with your veterinarian before introducing any new foods or treats. Happy baking, and enjoy seeing your dog thrive on these delicious homemade dental sticks!