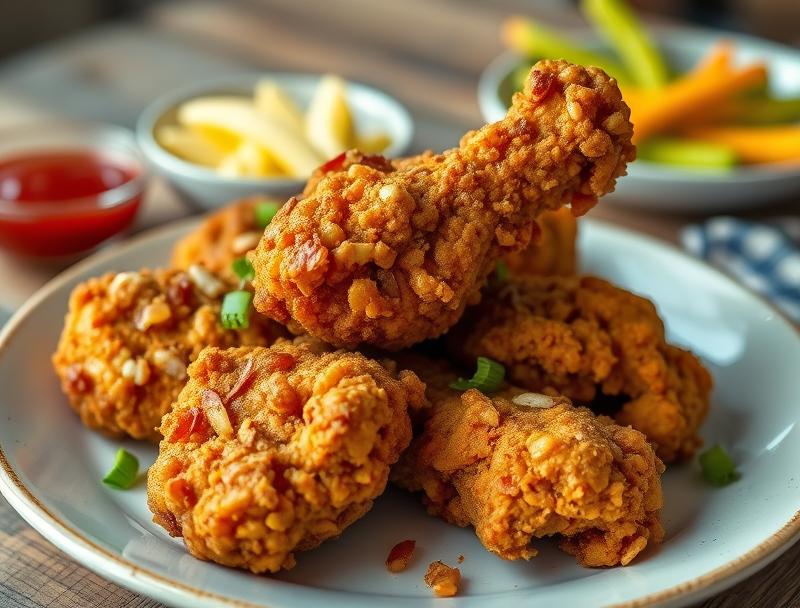
Crispy Grandma’s Fried Chicken Recipe
Introduction
Crispy Grandma’s Fried Chicken Recipe is a classic dish that combines the ease of preparation with the richness of flavor, all using everyday ingredients that you likely have in your pantry. This recipe is perfect for a family dinner, a picnic, or even a casual gathering with friends. The best part? It’s incredibly easy to make and requires minimal effort, yet yields impressive results that are sure to delight both kids and adults alike. With a focus on creating a crispy exterior and a juicy interior, this fried chicken recipe is a game-changer for anyone looking to elevate their cooking skills without spending hours in the kitchen.
Why This Works
- Flavor balance and ingredient accessibility: This recipe uses a combination of spices and herbs that are readily available in most supermarkets, making it easy to replicate at home. The balance of flavors is also key, with a mix of salty, sweet, and spicy notes that complement the chicken perfectly.
- Ease of preparation: One of the best things about this recipe is how easy it is to prepare. With just a few simple steps, you can have a delicious batch of crispy fried chicken ready to go in no time. Whether you’re a beginner cook or an experienced chef, this recipe is sure to please.
- Impressive results with minimal effort: Despite its ease of preparation, this recipe yields impressive results that are sure to wow your family and friends. The crispy exterior and juicy interior are a match made in heaven, and the flavors are complex and satisfying without being overwhelming.
Ingredients
- 2 lbs chicken pieces (such as legs, thighs, wings, and breasts), cut into bite-sized pieces
- 1 cup all-purpose flour
- 2 teaspoons paprika
- 1 teaspoon garlic powder
- 1 teaspoon onion powder
- 1 teaspoon salt
- 1/2 teaspoon black pepper
- 1/4 teaspoon cayenne pepper
- 1 cup buttermilk
- Vegetable oil for frying
Instructions
- Step 1: In a large bowl, combine the flour, paprika, garlic powder, onion powder, salt, black pepper, and cayenne pepper. Mix well to combine.
- Step 2: Pour the buttermilk into a separate large bowl. Add the chicken pieces to the buttermilk and mix well to coat. Let it sit for at least 30 minutes to allow the chicken to marinate.
- Step 3: Remove the chicken from the buttermilk, allowing any excess to drip off. Dredge the chicken pieces in the flour mixture, shaking off any excess. Place the coated chicken on a plate or tray.
- Step 4: Heat about 1/2-inch of vegetable oil in a large skillet over medium-high heat until it reaches 350°F. Carefully place the coated chicken pieces in the hot oil. Do not overcrowd the skillet. Fry the chicken in batches if necessary.
- Step 5: Fry the chicken for 5-7 minutes on each side, or until it reaches a golden brown and the internal temperature reaches 165°F. Remove the chicken from the oil with a slotted spoon and place it on a paper towel-lined plate to drain any excess oil.
Handy Tips
- Make sure to not overcrowd the skillet when frying the chicken, as this can lower the oil temperature and result in greasy or undercooked chicken.
- If you don’t have buttermilk, you can make a substitute by mixing 1 cup of milk with 1 tablespoon of white vinegar or lemon juice. Let it sit for 5-10 minutes to allow it to curdle before using.
- For an extra crispy coating, you can chill the coated chicken pieces in the refrigerator for 30 minutes before frying.
Heat Control
When frying the chicken, it’s essential to maintain the right temperature to achieve a crispy exterior and a juicy interior. The ideal temperature for frying chicken is between 350°F and 375°F. If the oil is too hot, the exterior will burn before the interior is fully cooked. If the oil is too cold, the chicken will absorb too much oil and be greasy. Use a thermometer to monitor the temperature, and adjust the heat as needed to maintain the right temperature.
Crunch Factor
The crunch factor is what sets this fried chicken recipe apart from others. To achieve a crispy exterior, make sure to not overcrowd the skillet, and fry the chicken in batches if necessary. Also, don’t stir the chicken too much, as this can prevent the coating from forming a crunchy crust. Finally, let the chicken rest for a few minutes after frying to allow the coating to set before serving.
Pro Kitchen Tricks
- For a lighter coating, you can use panko breadcrumbs instead of all-purpose flour. Panko breadcrumbs are lighter and crisper than regular breadcrumbs, and they will give your fried chicken a more delicate coating.
- To add extra flavor to your fried chicken, you can sprinkle some grated spices or herbs over the coating before frying. This will give your chicken a more complex flavor profile and a delicious aroma.
- If you want to make your fried chicken extra crispy, you can try double-frying it. Double-frying involves frying the chicken twice, once at a lower temperature to cook the interior, and again at a higher temperature to crisp the exterior. This will give your chicken a crunchy exterior and a juicy interior.
Storage Tips
- Leftover fried chicken can be stored in an airtight container in the refrigerator for up to 3 days. To reheat, simply place the chicken in the oven at 350°F for 10-15 minutes, or until heated through.
- For longer storage, you can freeze the fried chicken in an airtight container or freezer bag for up to 2 months. To reheat, simply thaw the chicken overnight in the refrigerator and reheat in the oven as instructed above.
- When storing leftover fried chicken, make sure to keep it away from strong-smelling foods, as the chicken can absorb odors easily.
Gift Packaging Ideas
If you want to give your fried chicken as a gift, you can package it in a variety of ways. One idea is to place the chicken in a decorative tin or container, along with some homemade biscuits or coleslaw. You can also wrap the chicken in wax paper or aluminum foil and tie it with a ribbon or twine. Another idea is to place the chicken in a mason jar or container, along with some pickles or other toppings, and give it as a gift basket.
Flavor Variations
- Korean-style fried chicken: To make Korean-style fried chicken, you can add some Korean chili flakes (gochugaru) to the coating, along with some garlic and ginger. You can also serve the chicken with a side of kimchi or pickled radishes.
- Nashville-style hot chicken: To make Nashville-style hot chicken, you can add some hot sauce (such as Frank’s RedHot) to the coating, along with some brown sugar and smoked paprika. You can also serve the chicken with a side of pickles and local honey.
- Japanese-style teriyaki chicken: To make Japanese-style teriyaki chicken, you can add some teriyaki sauce to the coating, along with some soy sauce and sake. You can also serve the chicken with a side of steamed bok choy or pickled ginger.
Troubleshooting
- Texture problems: If your fried chicken is too greasy or soggy, it may be due to overcrowding the skillet or not maintaining the right temperature. Try frying the chicken in batches and adjusting the heat as needed to achieve a crispy exterior.
- Ingredient replacements: If you don’t have buttermilk, you can make a substitute by mixing 1 cup of milk with 1 tablespoon of white vinegar or lemon juice. Let it sit for 5-10 minutes to allow it to curdle before using.
- Over/undercooking signs: If your fried chicken is overcooked, it may be dry and tough. If it’s undercooked, it may be pink and juicy. Make sure to check the internal temperature of the chicken to ensure it reaches 165°F before serving.
FAQs
- Can I freeze it? Yes, you can freeze the fried chicken in an airtight container or freezer bag for up to 2 months. To reheat, simply thaw the chicken overnight in the refrigerator and reheat in the oven as instructed above.
- Is it gluten-free? No, this recipe is not gluten-free, as it contains all-purpose flour. However, you can substitute the flour with gluten-free flour to make it gluten-free.
- Can I double the recipe? Yes, you can double the recipe to make more fried chicken. Simply multiply the ingredients and follow the instructions as instructed.
Conclusion
Crispy Grandma’s Fried Chicken Recipe is a classic dish that is easy to make and yields impressive results. With its crispy exterior and juicy interior, this fried chicken is sure to delight both kids and adults alike. Whether you’re a beginner cook or an experienced chef, this recipe is sure to please. So go ahead, give it a try, and enjoy the delicious flavors and textures of this mouth-watering dish. Don’t forget to experiment with different flavor variations and ingredients to make the recipe your own, and happy cooking!
Crispy Grandma's Fried Chicken Recipe
A classic Southern-style fried chicken recipe with a crispy exterior and juicy interior, made with a secret blend of spices and herbs.
🥘 Ingredients
👩🍳 Instructions
-
1In a large bowl, combine the flour, paprika, garlic powder, onion powder, salt, black pepper, and cayenne pepper. Mix well to combine.
-
2Pour the buttermilk into a separate large bowl. Add the chicken pieces to the buttermilk and mix well to coat. Let it sit for at least 30 minutes to allow the chicken to marinate.
-
3Remove the chicken from the buttermilk, allowing any excess to drip off. Dredge the chicken pieces in the flour mixture, shaking off any excess. Place the coated chicken on a plate or tray.
-
4Heat about 1/2-inch of vegetable oil in a large skillet over medium-high heat until it reaches 350°F. Carefully place the coated chicken pieces in the hot oil. Do not overcrowd the skillet. Fry the chicken in batches if necessary.
-
5Fry the chicken for 5-7 minutes on each side, or until it reaches a golden brown and the internal temperature reaches 165°F. Remove the chicken from the oil with a slotted spoon and place it on a paper towel-lined plate to drain any excess oil.