Irresistibly Crispy Hot Honey Chicken Recipe
Introduction
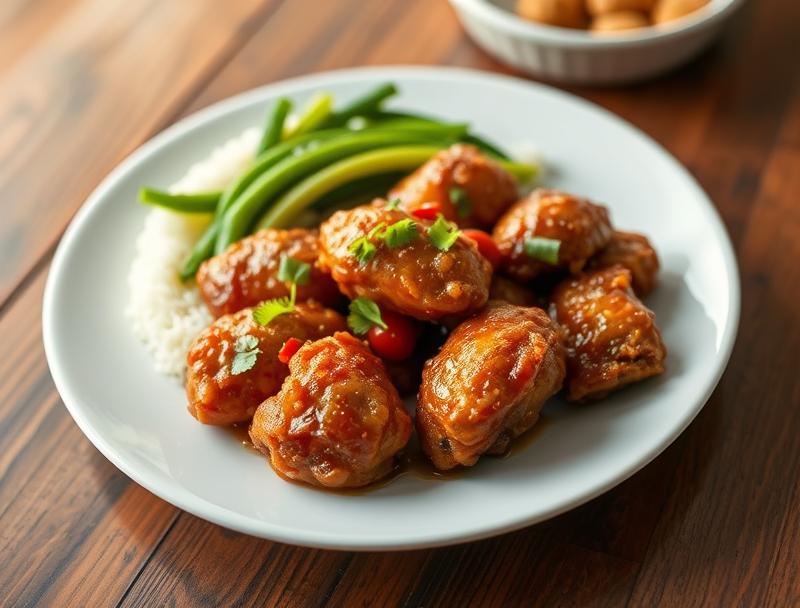
Welcome to the most mouth-watering, finger-licking, and irresistibly crispy hot honey chicken recipe you’ll ever try! This dish is a game-changer for anyone who loves the combination of spicy, sweet, and savory flavors. The best part? It’s incredibly easy to make using everyday ingredients, and the result is a culinary masterpiece that will impress your family and friends. Whether you’re a seasoned chef or a beginner in the kitchen, this recipe is perfect for anyone looking to elevate their meal game. So, let’s dive in and explore the magic of crispy hot honey chicken!
Why This Works
- The perfect balance of flavors, with the spiciness of hot sauce, the sweetness of honey, and the savory taste of chicken, creates a truly addictive taste experience.
- The accessibility of ingredients makes it easy to whip up this dish at any time, and the simplicity of the preparation process ensures that you can have a delicious meal on the table in no time.
- The impressive results, with the crispy exterior and juicy interior of the chicken, will make you look like a pro in the kitchen, even if you’re a beginner. The minimal effort required to achieve such an impressive outcome is a major win!
Ingredients
- 2 lbs chicken pieces (such as legs, thighs, wings, and breasts), skin removed
- 1/2 cup hot honey sauce (or a mixture of honey and hot sauce)
- 1/4 cup buttermilk
- 1 tablespoon olive oil
- 1 teaspoon garlic powder
- 1 teaspoon onion powder
- 1 teaspoon paprika
- Salt and pepper, to taste
- 1 cup all-purpose flour
- 1 teaspoon cornstarch
- 1/4 teaspoon cayenne pepper (optional)
- Fresh parsley or chives, chopped (for garnish)
Instructions
- Step 1: Preparation – In a large bowl, whisk together the buttermilk, hot honey sauce, garlic powder, onion powder, paprika, salt, and pepper. Add the chicken pieces and mix well to coat. Cover the bowl with plastic wrap and refrigerate for at least 2 hours or overnight.
- Step 2: Dredging – In a separate large bowl, whisk together the flour, cornstarch, and cayenne pepper (if using). Remove the chicken from the buttermilk mixture, allowing any excess to drip off. Dredge the chicken pieces in the flour mixture, shaking off any excess.
- Step 3: Frying – Heat the olive oil in a large skillet over medium-high heat. When the oil is hot, add a few pieces of the coated chicken to the skillet (do not overcrowd). Fry the chicken for 5-7 minutes on each side, or until golden brown and crispy. Repeat with the remaining chicken pieces.
- Step 4: Glazing – In a small bowl, whisk together the hot honey sauce and 1 tablespoon of water. Brush the glaze over the fried chicken pieces and return them to the skillet for an additional 1-2 minutes, or until the glaze is caramelized and sticky.
Handy Tips
- To ensure crispy coating, make sure the chicken is completely dry before dredging in the flour mixture.
- If you don’t have buttermilk, you can make a substitute by mixing 1 cup of milk with 1 tablespoon of white vinegar or lemon juice. Let it sit for 5-10 minutes before using.
- For an extra crispy coating, you can chill the coated chicken in the refrigerator for 30 minutes before frying.
Heat Control
To achieve the perfect crispiness, it’s essential to control the heat. The ideal temperature for frying is between 350°F and 375°F. If the oil is too hot, the coating will burn before the chicken is cooked through. If the oil is too cold, the coating will absorb excess oil and become greasy. Adjust the heat as needed to maintain a consistent temperature.
Crunch Factor
The crunch factor is what sets this recipe apart from others. To achieve the perfect crunch, make sure the chicken is fried at the right temperature, and the coating is not too thick. You can also try adding a little bit of cornstarch or panko breadcrumbs to the flour mixture for extra crunch.
Pro Kitchen Tricks
- To prevent the chicken from steaming instead of frying, make sure the skillet is hot before adding the chicken. You can test the heat by flicking a few drops of water onto the skillet – if they sizzle and evaporate quickly, the skillet is ready.
- For easy cleanup, line the skillet with parchment paper or aluminum foil before frying. This will prevent the sticky glaze from adhering to the skillet.
- To keep the chicken warm while frying in batches, place the cooked pieces on a wire rack set over a baking sheet in a low-temperature oven (around 200°F).
Storage Tips
- Leftover chicken can be stored in an airtight container in the refrigerator for up to 3 days. Reheat in the oven or microwave until crispy and hot.
- To freeze, place the cooled chicken pieces in a single layer on a baking sheet, then transfer to a freezer-safe bag or container. Frozen chicken can be stored for up to 2 months. Reheat in the oven or microwave until crispy and hot.
- The best containers for storing and reheating are those that are airtight and microwave-safe, such as glass or plastic containers with tight-fitting lids.
Gift Packaging Ideas
If you want to share your delicious hot honey chicken with friends and family, consider packaging it in a cute and convenient way. You can place the chicken pieces in a paper cone or a small paper bag, then tie with a ribbon or twine. Add a few sprigs of fresh parsley or chives for a pop of color and a personal touch. You can also include a side of your favorite dipping sauce, such as ranch or blue cheese dressing.
Flavor Variations
- Try adding different spices to the flour mixture, such as smoked paprika or ground cumin, for a unique flavor twist.
- Experiment with various types of hot sauce, such as sriracha or Frank’s RedHot, for a different level of heat.
- Swap out the chicken for other proteins, such as shrimp or tofu, for a vegetarian or seafood option.
Troubleshooting
- If the coating is not crispy, try adjusting the heat or adding more cornstarch to the flour mixture.
- If the chicken is not cooked through, try increasing the cooking time or temperature.
- If the glaze is too sticky, try reducing the amount of hot honey sauce or adding a little bit of water to thin it out.
FAQs
- Can I freeze it? Yes, you can freeze the cooked chicken for up to 2 months. Reheat in the oven or microwave until crispy and hot.
- Is it gluten-free? The recipe is gluten-free, but make sure to check the ingredients of the hot sauce and flour to ensure they are gluten-free.
- Can I double the recipe? Yes, you can easily double or triple the recipe to feed a larger crowd. Just adjust the cooking time and temperature as needed.
Conclusion
And there you have it – the most irresistibly crispy hot honey chicken recipe that’s sure to become a favorite in your household. With its perfect balance of flavors, ease of preparation, and impressive results, this dish is a must-try for anyone who loves chicken. Don’t be afraid to experiment with different spices and ingredients to make it your own, and don’t hesitate to share your creations with friends and family. Happy cooking, and enjoy the ooohs and ahhhs from your loved ones as you serve up this mouth-watering masterpiece!
Irresistibly Crispy Hot Honey Chicken Recipe
A crispy and flavorful hot honey chicken recipe that's easy to make and perfect for any occasion.
🥘 Ingredients
👩🍳 Instructions
-
1In a large bowl, whisk together the buttermilk, hot honey sauce, garlic powder, onion powder, paprika, salt, and pepper. Add the chicken pieces and mix well to coat. Cover the bowl with plastic wrap and refrigerate for at least 2 hours or overnight.
-
2In a separate large bowl, whisk together the flour, cornstarch, and cayenne pepper (if using). Remove the chicken from the buttermilk mixture, allowing any excess to drip off. Dredge the chicken pieces in the flour mixture, shaking off any excess.
-
3Heat the olive oil in a large skillet over medium-high heat. When the oil is hot, add a few pieces of the coated chicken to the skillet (do not overcrowd). Fry the chicken for 5-7 minutes on each side, or until golden brown and crispy. Repeat with the remaining chicken pieces.
-
4In a small bowl, whisk together the hot honey sauce and 1 tablespoon of water. Brush the glaze over the fried chicken pieces and return them to the skillet for an additional 1-2 minutes, or until the glaze is caramelized and sticky.