Crispy Cheese Straws Recipe with Sharp Cheddar
Introduction
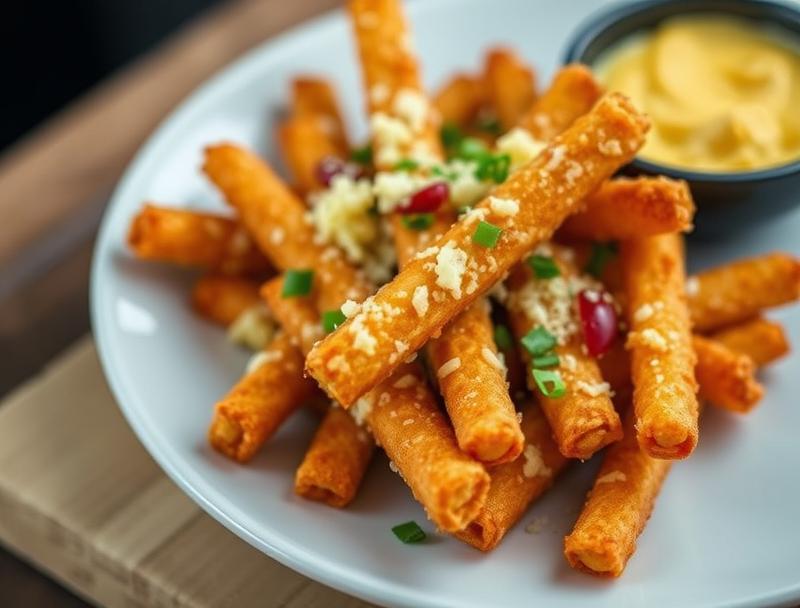
Imagine a snack that’s both elegant and easy to make, perfect for any occasion. Our Crispy Cheese Straws Recipe with Sharp Cheddar is just that – a delightful combination of flavors and textures that will impress your family and friends. Using everyday ingredients like sharp cheddar, flour, and butter, you can create these irresistible cheese straws that are perfect for parties, gatherings, or just a quick snack. The best part? They’re incredibly easy to make and require minimal effort, making them a great addition to your repertoire of quick and delicious recipes.
Why This Works
- The balance of sharp cheddar and other ingredients creates a flavor profile that’s both rich and balanced, appealing to a wide range of tastes.
- The preparation is straightforward and simple, requiring basic kitchen tools and techniques that anyone can master.
- Despite the simplicity, the end result is impressive – crispy on the outside, cheesy on the inside, and visually appealing, making it perfect for serving to guests or as a special treat for yourself.
Ingredients
- 1 1/2 cups all-purpose flour
- 1/2 cup cold unsalted butter, cut into small pieces
- 1/2 cup grated sharp cheddar cheese
- 1/4 teaspoon salt
- 1/4 teaspoon black pepper
- 1/4 teaspoon paprika
- 1 egg, beaten (for egg wash)
- 1 tablespoon water
Instructions
- Step 1: Preheat your oven to 400°F (200°C). Line a baking sheet with parchment paper or a silicone mat.
- Step 2: In a large bowl, whisk together the flour, salt, pepper, and paprika. Add the cold butter and use a pastry blender or your fingers to work the butter into the flour mixture until it resembles coarse crumbs.
- Step 3: Stir in the grated cheddar cheese until well combined with the flour mixture.
- Step 4: Turn the dough out onto a lightly floured surface and knead it a few times until it comes together. Roll the dough out into a sheet about 1/4 inch thick. Cut into long, thin strips, about 1/2 inch wide and 6-8 inches long.
- Step 5: Place the strips on the prepared baking sheet, leaving about 1 inch of space between each straw. Brush the tops with the beaten egg mixed with a tablespoon of water for a golden glaze.
- Step 6: Bake for 15-20 minutes, or until the cheese straws are golden brown and crispy. Remove from the oven and let cool on the baking sheet for 5 minutes before transferring to a wire rack to cool completely.
Handy Tips
- For an extra crispy exterior, try chilling the shaped straws in the refrigerator for 30 minutes before baking.
- If you find the dough too sticky, add a bit more flour. If it’s too dry, you can add a small amount of cold water.
- Experiment with different types of cheese for unique flavor profiles. For example, parmesan can add a nice salty depth, while mozzarella can provide a milder taste.
Heat Control
When baking the cheese straws, it’s essential to keep an eye on them to ensure they don’t overcook. The ideal temperature is 400°F (200°C), and you’re looking for a golden brown color as a sign of doneness. If you prefer a crisper straw, you can bake them for an additional 2-3 minutes, but be cautious not to burn them.
Crunch Factor
Achieving the perfect crunch in your cheese straws is key to their appeal. This is largely due to the baking process, where the outside becomes crispy while the inside remains cheesy and tender. To enhance the crunch, make sure your butter is cold, and don’t overwork the dough. Additionally, the egg wash before baking helps to create a golden, crispy exterior.
Pro Kitchen Tricks
- For uniform straws, use a pasta machine or a sharp knife to cut the dough into strips of equal width.
- To add an extra layer of flavor, sprinkle some grated cheese or paprika on top of the straws before baking.
- Consider making the dough ahead of time and storing it in the refrigerator overnight. This can help the flavors meld together and make the dough easier to work with.
Storage Tips
- Cool the cheese straws completely on a wire rack before storing them in an airtight container at room temperature for up to 3 days.
- For longer storage, you can freeze the baked straws for up to 2 months. Simply place them in a single layer in a freezer-safe bag or container and thaw at room temperature when you’re ready to serve.
- Reheating can be done in a low-temperature oven (about 300°F or 150°C) for a few minutes to crisp them up again.
Gift Packaging Ideas
If you’re considering gifting these crispy cheese straws, presentation can make all the difference. Place them in decorative jars or tins, wrapped in tissue paper or cellophane bags tied with a ribbon. You could also pair them with other homemade treats like jams or chocolates for a more substantial gift basket. Adding a handwritten note or a small recipe card can make the gift even more personal and special.
Flavor Variations
- Spicy Twist: Add some diced jalapeños or red pepper flakes to the dough for an extra kick.
- Herby Delight: Mix in some chopped fresh herbs like parsley, chives, or thyme into the dough for added depth of flavor.
- Smokey Flavor: Use smoked paprika instead of regular paprika for a smoky, savory flavor.
Troubleshooting
- If your cheese straws turn out too dense, it might be because the dough was overworked. Try to mix and knead the dough just until the ingredients come together.
- For straws that are too crispy or burnt, check your oven temperature and baking time. Every oven is different, so some adjustment might be necessary.
- If you find that your straws don’t hold their shape well, chilling the dough before rolling it out can help firm up the butter and make the dough easier to work with.
FAQs
- Can I freeze the dough instead of the baked straws? Yes, you can freeze the dough for up to 2 months. Simply thaw it overnight in the refrigerator before rolling it out and baking.
- Is this recipe gluten-free? No, this recipe uses all-purpose flour and is not gluten-free. However, you can experiment with gluten-free flours as a substitute, though the texture might be slightly different.
- Can I double or triple the recipe? Absolutely. Just keep in mind that you might need to bake the straws in batches to ensure they have enough room on the baking sheet to cook evenly.
Conclusion
Making crispy cheese straws with sharp cheddar is a fun and rewarding process that yields delicious results with minimal effort. Whether you’re a seasoned baker or a beginner in the kitchen, this recipe is sure to please. Don’t be afraid to experiment with different flavors and ingredients to make the recipe your own, and enjoy sharing these tasty treats with your loved ones. With its perfect balance of crunch and cheese, this snack is sure to become a favorite in your household.