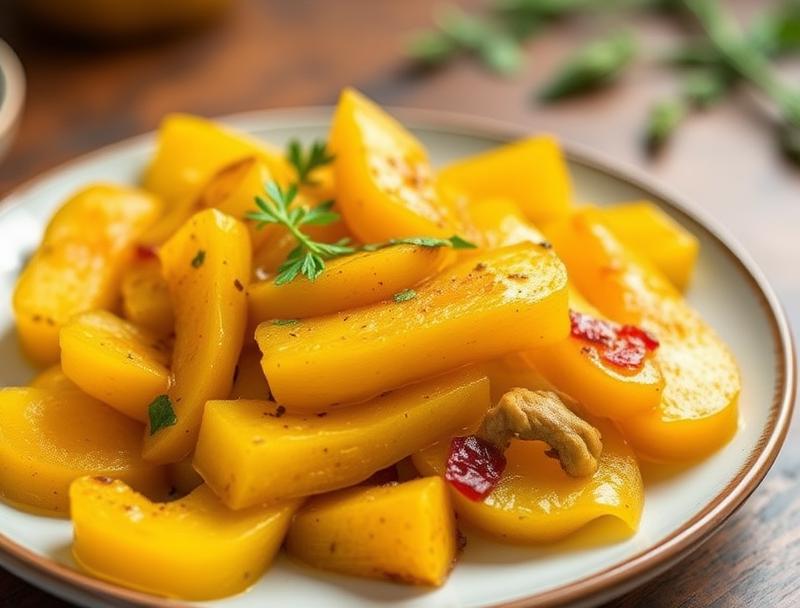
Easy Homemade Yellow Squash Pickles Recipe
Introduction
Welcoming the warmth of summer with a refreshing and tangy twist, our Easy Homemade Yellow Squash Pickles Recipe is a game-changer for any garden party, picnic, or simple weeknight dinner. This delightful recipe transforms the humble yellow squash into a crunchy, flavorful delight that’s as easy to make as it is impressive. With everyday ingredients and minimal fuss, you can create a side dish or snack that bursts with the sweetness of summer squash, the zing of vinegar, and the warmth of spices. Whether you’re a seasoned cook or a beginner in the kitchen, this recipe promises to deliver a delicious and satisfying treat that showcases the best of seasonal produce.
Why This Works
- The perfect balance of sweet and tangy flavors, combined with the accessibility of the ingredients, makes this recipe a winner for anyone looking to add a fresh twist to their meals.
- The ease of preparation is unparalleled; with just a few simple steps, you can turn your yellow squash into a mouthwatering pickle that’s perfect for snacking, salads, or as a side dish.
- Despite the minimal effort required, the results are impressive. The pickles are crunchy, flavorful, and visually appealing, making them an excellent choice for entertaining or as a unique gift for friends and family.
Ingredients
- 4 medium-sized yellow squashes, sliced into 1/4-inch thick rounds
- 1 large onion, thinly sliced
- 2 cloves of garlic, minced
- 1 cup (250 ml) of white vinegar
- 1/2 cup (125 ml) of water
- 1 tablespoon of pickling salt
- 1 teaspoon of whole black peppercorns
- 1 teaspoon of dill weed
- 1/4 teaspoon of red pepper flakes (optional, for some heat)
- 1 tablespoon of granulated sugar
Instructions
- Step 1: Prepare the Squash and Onion – In a large bowl, combine the sliced yellow squash and onion. Sprinkle with salt and let it sit for about 30 minutes to draw out excess moisture. After 30 minutes, rinse the squash and onion slices under cold running water to remove excess salt and pat them dry with paper towels to remove excess moisture.
- Step 2: Create the Pickling Brine – In a medium saucepan, combine the vinegar, water, pickling salt, black peppercorns, dill weed, red pepper flakes (if using), and sugar. Bring the mixture to a boil over medium-high heat, stirring occasionally. Reduce the heat to medium-low and simmer for about 10 minutes, or until the brine has slightly thickened and reduced.
- Step 3: Pack the Pickles – Pack the prepared squash and onion slices into clean, hot jars, leaving about 1/2 inch of headspace. Pour the hot pickling brine over the squash, making sure that all the pieces are covered. Remove any air bubbles by running a non-metallic utensil, such as a plastic spatula, around the inside of the jar. Adjust the lids and rings, and let the jars cool to room temperature, undisturbed, for 24 hours.
- Step 4: Store the Pickles – Once the jars have cooled, store them in the refrigerator. The pickles will be ready to eat within a few hours and will keep, refrigerated, for several weeks. Always check the seals after 24 hours and before storing to ensure the jars have sealed properly.
Handy Tips
- For an extra crunchy pickle, make sure to dry the squash and onion slices thoroughly after rinsing off the salt. This step is crucial in achieving the perfect texture.
- Customize your pickles by adding other spices or herbs to the brine. Garlic, mustard seeds, and chili flakes are all great options for adding depth and heat.
- Avoid overpacking the jars, as this can lead to improper sealing and spoilage. Leave the recommended headspace to ensure the pickles age well and remain safe to eat.
Heat Control
When creating the pickling brine, it’s essential to monitor the heat to prevent scorching or boiling over. Bring the mixture to a boil over medium-high heat, then reduce the heat to medium-low to simmer. This gentle simmer helps to infuse the flavors into the brine without causing it to reduce too quickly or burn.
Crunch Factor
Achieving the perfect crunch in your pickles is largely about the preparation and drying of the squash and onion slices before pickling. By salting the slices and then rinsing and drying them, you remove excess moisture that can lead to soft or soggy pickles. Additionally, using the right amount of pickling salt in the brine helps to maintain the crunch and freshness of the pickles.
Pro Kitchen Tricks
- Use a variety of squash colors to create a visually appealing jar of pickles. This not only adds to the aesthetic but can also provide a slightly different flavor profile with each color.
- For a quicker pickle, you can slice the squash thicker and use a higher vinegar concentration in the brine. However, be cautious not to overpower the natural sweetness of the squash.
- Experiment with different types of vinegar, such as apple cider vinegar or white wine vinegar, to give your pickles a unique twist. Each type of vinegar will impart a distinct flavor to the pickles.
Storage Tips
- Always store the pickles in the refrigerator. The cold temperature will help to slow down the fermentation process, keeping the pickles fresh and crunchy for a longer period.
- Use clean and sterilized equipment and jars to prevent contamination and spoilage. This is especially important when canning or making pickles, as improper sterilization can lead to unsafe food.
- Label and date the jars so you can keep track of how long they’ve been stored. This is helpful for rotation and ensuring that older jars are consumed before they go bad.
Gift Packaging Ideas
If you’re considering gifting your homemade yellow squash pickles, presentation is key. Fill clean, decorative jars with the pickles, making sure to leave a bit of the pickling liquid at the top. Seal the jars and decorate them with ribbons, twine, or small gift tags. You can also include a few recipe ideas or serving suggestions on a card to inspire the recipient to get creative with their gift. For a more rustic look, wrap the jar in a piece of burlap or a linen cloth, tied with twine, and add a few fresh herbs like dill or rosemary for a pop of color and fragrance.
Flavor Variations
- Spicy Pickles: Add more red pepper flakes or introduce other spicy elements like sliced jalapeños to the brine for an extra kick.
- Herby Pickles: Infuse the brine with fresh or dried herbs like thyme, rosemary, or parsley to give the pickles a savory, herby flavor.
- Sweet Pickles: Increase the amount of sugar in the brine or add other sweet elements like honey or maple syrup for a sweeter pickle.
Troubleshooting
- Texture Problems: If your pickles turn out too soft, it might be due to insufficient drying after the salting process or too high a water content in the brine. For pickles that are too crunchy, they might have been over-dried or the brine was too concentrated.
- Ingredient Replacements: If you’re looking to replace any ingredients, consider the flavor and texture you’re trying to achieve. For example, replacing white vinegar with another type of vinegar will change the flavor profile of the pickles.
- Over/Undercooking Signs: Since these are pickles, the concept of over or undercooking is more about the texture and flavor achievement. Pickles that are too soft or mushy might have been left in the brine for too long or not dried properly. Pickles that are too hard might not have been given enough time in the brine or were pickled at too low a temperature.
FAQs
- Can I freeze it? – While it’s technically possible to freeze pickles, it’s not recommended as freezing can affect the texture and crunch of the pickles. Refrigeration is the best way to store pickles to maintain their quality and safety.
- Is it gluten-free? – Yes, this recipe for yellow squash pickles is gluten-free, making it a great option for those with gluten intolerance or sensitivity. However, always double-check the ingredients of any store-bought components, if used, to ensure they are gluten-free.
- Can I double the recipe? – Absolutely, you can double or even triple this recipe if you’re planning to make a large batch of pickles. Just ensure you have enough jars and equipment to handle the increased volume, and adjust the cooking time of the brine slightly if necessary.
Conclusion
Making your own Easy Homemade Yellow Squash Pickles is a rewarding process that combines the simplicity of a few fresh ingredients with the joy of creating something delicious and unique. Whether you’re a fan of tangy pickles, looking for a new way to enjoy your summer squash, or simply wanting to try your hand at preserving, this recipe is a perfect place to start. With its flexibility, flavor, and ease of preparation, it’s sure to become a favorite in your kitchen. So, don’t hesitate to get creative, experiment with different flavors, and share your delicious homemade pickles with friends and family. Happy pickling!
Easy Homemade Yellow Squash Pickles Recipe
A refreshing and tangy recipe for homemade yellow squash pickles, perfect for summer gatherings or as a unique gift.
🥘 Ingredients
👩🍳 Instructions
-
1Prepare the squash and onion by slicing and salting to draw out moisture.
-
2Create the pickling brine by combining vinegar, water, pickling salt, black peppercorns, dill weed, red pepper flakes, and sugar in a saucepan and bringing to a boil.
-
3Pack the prepared squash and onion into clean, hot jars and pour the hot pickling brine over them, leaving 1/2 inch of headspace.
-
4Seal the jars and let them cool to room temperature before storing in the refrigerator.