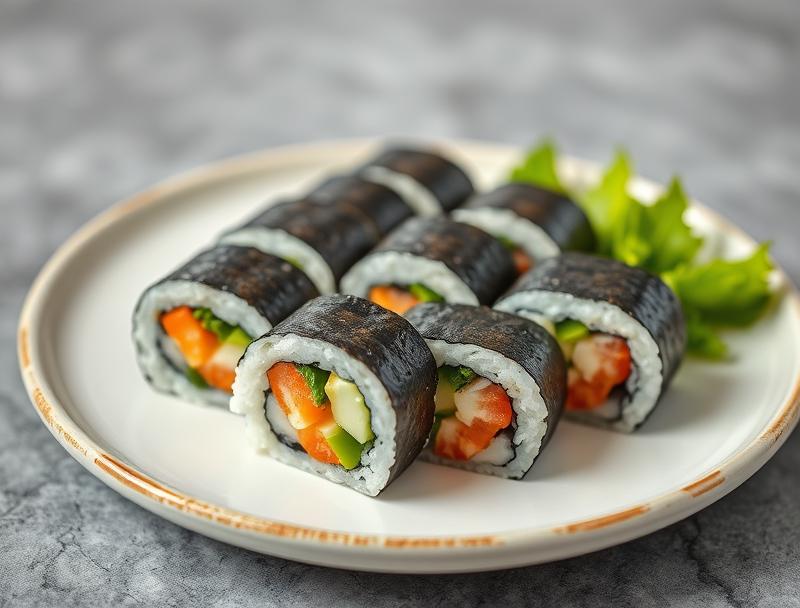
California Sushi Rolls Recipe for Beginners
Introduction
Imagine a dish that’s as easy to make as it is delicious, requiring only everyday ingredients to create a culinary masterpiece that will impress both family and friends. The California Sushi Rolls Recipe is exactly that – a perfect blend of flavors, textures, and creativity that beginners can master with ease. This iconic dish, originating from the heart of California, combines the freshness of crab, the crunch of cucumber, and the creaminess of avocado, all wrapped in a delicate layer of sushi rice and nori seaweed. In this article, we’ll guide you through the simple steps of making your own California Sushi Rolls, highlighting the ease, flavor, and creativity that makes this dish a standout in any setting.
Why This Works
- Flavor balance and ingredient accessibility: The combination of ingredients in a California roll provides a well-rounded flavor profile that is both familiar and exciting, using ingredients that are readily available in most supermarkets.
- Ease of preparation: Despite the intimidating appearance of sushi, making California rolls is surprisingly straightforward. With basic kitchen tools and a bit of practice, anyone can achieve professional-looking results.
- Impressive results with minimal effort: The beauty of the California roll lies in its simplicity. With a short list of ingredients and a few simple steps, you can create a dish that looks and tastes like it was made by a sushi master.
Ingredients
- 1 cup of sushi rice
- 1/2 cup of water
- 1/4 cup of rice vinegar
- 1 tablespoon of sugar
- 1 teaspoon of salt
- 1/2 avocado, sliced
- 1/2 cucumber, sliced
- 1/4 cup of real crab meat (or surimi)
- 1 sheet of nori seaweed
- Sesame seeds and soy sauce for serving (optional)
Instructions
- Step 1: Prepare the Sushi Rice – Rinse the rice thoroughly and cook it according to the package instructions. Typically, sushi rice is cooked with a 1:1 ratio of rice to water. Once cooked, allow the rice to cool down to room temperature. Then, mix the rice vinegar, sugar, and salt in a small saucepan and heat it until the sugar and salt dissolve. Combine this vinegar mixture with the cooled sushi rice and mix well.
- Step 2: Prepare the Fillings – Slice the avocado and cucumber into thin pieces. If using real crab meat, ensure it’s flaked and ready to use. If using surimi, it usually comes pre-cooked and flaked.
- Step 3: Assemble the Roll – Lay a sheet of nori flat on a sushi mat or a piece of parchment paper. Spread a thin layer of sushi rice onto the nori, leaving about 1 inch of space at the top. Place your fillings (avocado, cucumber, and crab meat) in the middle of the rice. Roll the sushi using the mat or parchment paper, applying gentle pressure to form a compact roll.
- Step 4: Slice and Serve – Once the roll is formed, slice it into 8 equal pieces using a sharp knife. Serve with soy sauce, wasabi, and pickled ginger for an authentic experience. Garnish with sesame seeds for added flavor and texture.
Handy Tips
- Use short-grain Japanese rice, as it’s stickier and better suited for sushi.
- Handle the sushi rice gently when mixing it with the vinegar mixture to avoid mashing the grains.
- Keep your hands and utensils moist with water or vinegar to prevent the rice from sticking.
- Experiment with different fillings to create your unique sushi roll variations.
Heat Control
When cooking the sushi rice, it’s essential to use the right amount of water and heat to achieve the perfect texture. Typically, sushi rice is cooked over medium heat until the water is absorbed and the rice is tender. Be cautious not to overcook, as it can make the rice mushy and unsuitable for rolling.
Crunch Factor
The crunch in a California roll comes from the cucumber and the sesame seeds (if used). To maintain the crunch, it’s best to slice the cucumber just before assembling the roll. For an extra crunchy texture, you can also add toasted sesame seeds on top of the roll before serving.
Pro Kitchen Tricks
- Use a bamboo sushi mat to help form the roll evenly and apply the right amount of pressure.
- Chill the fillings and the sushi rice in the refrigerator for about 30 minutes before rolling to make the assembly process easier and to prevent the ingredients from falling apart.
- For a golden touch, lightly brush the top of the roll with a small amount of water and then sprinkle with sesame seeds before slicing.
Storage Tips
- Store any leftover sushi in an airtight container in the refrigerator and consume within a day for best flavor and texture.
- It’s not recommended to freeze sushi rolls as the texture and flavor can be significantly altered.
- For longer storage of sushi rice, cook it, allow it to cool, and then refrigerate or freeze it. Frozen sushi rice can be thawed and used for making sushi rolls later.
Gift Packaging Ideas
If you’re considering gifting your homemade California rolls, you can make it a beautiful and thoughtful present by packaging them nicely. Use a decorative box or a bento box, and include a small bottle of soy sauce, wasabi, and pickled ginger. Add some greenery like parsley or shiso leaves around the rolls for a pop of color. Don’t forget to include chopsticks and a small note with serving instructions for a complete gift.
Flavor Variations
- Different spices: Add a pinch of cayenne pepper or red pepper flakes to the rice for a spicy kick.
- Creative toppings: Try adding sliced green onions, toasted sesame seeds, or diced mango on top of the roll for added flavor and texture.
- Ingredient swaps: Replace crab meat with smoked salmon or grilled chicken for a different twist. You can also use different types of vegetables like carrots or asparagus.
Troubleshooting
- Texture problems: If the sushi rice is too sticky, it might be due to overmixing with the vinegar mixture. If it’s too dry, it could be undercooked or overcooked.
- Ingredient replacements: Always choose ingredients that are fresh and of good quality. For vegan versions, you can replace crab meat with tofu or tempeh.
- Over/undercooking signs: Sushi rice should be cooked until it’s tender but still retains a bit of firmness. Overcooking can make it mushy, while undercooking leaves it hard and crunchy.
FAQs
- Can I freeze it? It’s not recommended to freeze assembled sushi rolls, but you can freeze cooked sushi rice for later use.
- Is it gluten-free? Most ingredients in a California roll are gluten-free, but be cautious with the soy sauce. Look for gluten-free soy sauce or tamari to make it suitable for gluten-free diets.
- Can I double the recipe? Yes, you can easily double or triple the recipe. Just ensure you have enough nori sheets and ingredients for the increased number of rolls.
Conclusion
Making California Sushi Rolls at home is a fun and rewarding experience that allows you to be creative with ingredients and presentation. With these simple steps and handy tips, you’re well on your way to becoming a sushi master in your own kitchen. Don’t be afraid to experiment with different fillings and toppings to make the dish your own. Share your creations with friends and family, and enjoy the joy of cooking and sharing a meal together. Happy rolling!
California Sushi Rolls Recipe for Beginners
A simple and delicious recipe for making California Sushi Rolls at home, perfect for beginners. With easy-to-follow steps and accessible ingredients, this dish is a great introduction to the world of sushi.
🥘 Ingredients
👩🍳 Instructions
-
1Prepare the sushi rice according to the instructions.
-
2Prepare the fillings by slicing the avocado and cucumber.
-
3Assemble the roll by spreading the sushi rice onto the nori, adding the fillings, and rolling it up.
-
4Slice the roll into 8 equal pieces and serve with soy sauce, wasabi, and pickled ginger.