Fluffy Homemade Angel Biscuits with Buttermilk
Introduction
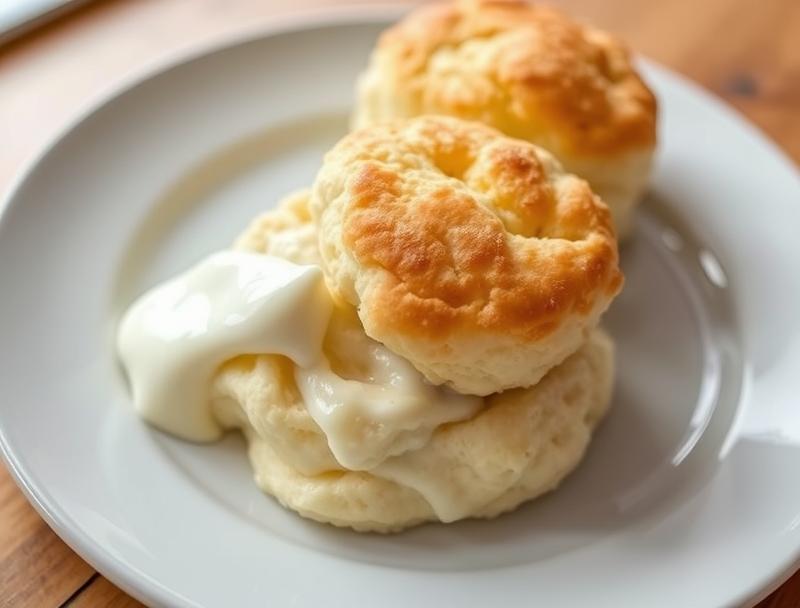
Imagine sinking your teeth into a warm, fluffy biscuit, fresh from the oven, with a subtle tang of buttermilk and a hint of sweetness. These Fluffy Homemade Angel Biscuits with Buttermilk are a delight to make and eat, requiring only a few everyday ingredients and minimal effort. The beauty of this recipe lies in its simplicity and versatility, allowing you to enjoy these tender treats for breakfast, as a side dish, or even as a base for your favorite sandwiches. With their light and airy texture, these biscuits are sure to become a staple in your kitchen, impressing family and friends alike with their homemade charm.
Why This Works
- The combination of all-purpose flour, baking powder, and buttermilk creates a perfect balance of flavor and texture, making each biscuit a masterpiece of fluffiness and taste.
- The ease of preparation is unparalleled; with just a few steps, you can have these biscuits ready for baking, making them perfect for busy mornings or last-minute dinner plans.
- Despite the simplicity of the ingredients and the method, the results are consistently impressive, with biscuits that rise beautifully and retain their moisture, ensuring a delightful experience with every bite.
Ingredients
- 2 cups all-purpose flour
- 4 teaspoons baking powder
- 1 teaspoon salt
- 1/2 cup cold butter, cut into small pieces
- 3/4 cup buttermilk
- 1 tablespoon sugar
- 1 egg, beaten (for egg wash)
- Optional: sesame seeds or poppy seeds for topping
Instructions
- Step 1: Preparing the Dough – In a large mixing bowl, whisk together the flour, baking powder, salt, and sugar. Add the cold butter and use a pastry blender or your fingers to work the butter into the flour mixture until it resembles coarse crumbs.
- Step 2: Adding the Buttermilk – Make a well in the center of the flour mixture and pour in the buttermilk. Use a fork to gently mix the dough until it comes together in a shaggy mass.
- Step 3: Kneading the Dough – Turn the dough out onto a floured surface and gently knead it a few times until it becomes cohesive and smooth. Be careful not to overwork the dough.
- Step 4: Cutting the Biscuits – Roll the dough out to about 1 inch thickness and use a biscuit cutter or the rim of a glass to cut out the biscuits. Gather the scraps, re-roll the dough, and cut out additional biscuits.
- Step 5: Baking the Biscuits – Place the biscuits on a baking sheet lined with parchment paper, leaving about 1 inch of space between each biscuit. Brush the tops with the beaten egg for a golden glaze and sprinkle with sesame or poppy seeds if desired. Bake in a preheated oven at 400°F (200°C) for about 15-20 minutes, or until the biscuits are golden brown.
Handy Tips
- For an extra flaky texture, keep the butter cold and handle the dough gently to prevent the butter from melting into the flour.
- If you don’t have buttermilk, you can make a substitute by mixing 1 cup of milk with 1 tablespoon of white vinegar or lemon juice. Let it sit for 5-10 minutes to thicken before using.
- Avoid overmixing the dough, as this can lead to tough biscuits. Stop mixing as soon as the ingredients come together in a shaggy mass.
Heat Control
To achieve the perfect bake, ensure your oven is preheated to the correct temperature. For these biscuits, 400°F (200°C) is ideal. The baking time may vary depending on the size of your biscuits and your oven’s performance, so keep an eye on them after 12 minutes. They are done when they are golden brown on top and firm to the touch.
Crunch Factor
The crunch factor in these biscuits comes from the egg wash and any toppings you might choose, like sesame seeds. The biscuit itself should be tender and flaky on the inside with a lightly crispy exterior. To enhance the crunch, make sure the biscuits are spaced well apart on the baking sheet to allow for even baking.
Pro Kitchen Tricks
- For an extra golden brown top, brush the biscuits with egg wash twice – once before baking and again halfway through the baking time.
- Keep your baking powder fresh, as old baking powder can affect the rise and flavor of your biscuits.
- Experiment with different flavorings, such as dried herbs or grated cheese, to add variety to your biscuits.
Storage Tips
- Biscuits are best served fresh but can be stored in an airtight container at room temperature for up to 2 days. Freeze for longer storage.
- To reheat, wrap biscuits in foil and warm in the oven at 350°F (175°C) for a few minutes.
- Consider freezing the biscuit dough before baking for up to 2 months. Simply cut out the biscuits, place them on a baking sheet, and freeze until solid before transferring to a freezer-safe bag or container.
Gift Packaging Ideas
If you’re considering gifting these biscuits, a beautifully wrapped basket or tin filled with freshly baked biscuits, along with a jar of homemade jam or honey, makes a thoughtful and delicious gift. You can also package the biscuit dough in a decorative tin or jar, complete with baking instructions, for a unique and interactive gift.
Flavor Variations
- Try adding different herbs like rosemary, thyme, or chives to the dough for a savory twist.
- For a sweet treat, add a handful of dried cranberries or cherries to the dough and sprinkle with sugar on top before baking.
- Experiment with cheese – grated cheddar, parmesan, or feta can add a rich, savory flavor to your biscuits.
Troubleshooting
- If your biscuits don’t rise, check the expiration date of your baking powder and ensure your oven temperature is accurate.
- For biscuits that are too dense, review your mixing technique to avoid overworking the dough.
- If the tops are too brown, cover the biscuits with foil for the remaining baking time to prevent overbrowning.
FAQs
- Can I freeze the baked biscuits? Yes, baked biscuits can be frozen for up to 2 months. Simply thaw at room temperature or reheat in the oven.
- Is this recipe gluten-free? No, this recipe uses all-purpose flour and is not gluten-free. However, you can experiment with gluten-free flours, though the texture may vary.
- Can I double the recipe? Yes, you can easily double or triple this recipe to make more biscuits. Just ensure you have enough space on your baking sheets for the biscuits to have about 1 inch of space between each.
Conclusion
Making Fluffy Homemade Angel Biscuits with Buttermilk is a journey of simplicity and delight, offering a versatile treat that can be enjoyed in numerous ways. Whether you’re a seasoned baker or just starting out, this recipe is sure to become a favorite, thanks to its ease, flavor, and the joy of sharing homemade goodies with loved ones. Don’t hesitate to experiment and make this recipe your own, and remember, the key to perfect biscuits is in the details – from the cold butter to the gentle mixing and the precise baking time. Happy baking!
Fluffy Homemade Angel Biscuits with Buttermilk
A simple and delicious recipe for homemade angel biscuits using buttermilk, perfect for breakfast or as a side dish.
🥘 Ingredients
👩🍳 Instructions
-
1Preheat the oven to 400°F (200°C).
-
2Prepare the dough by whisking together flour, baking powder, salt, and sugar, then adding cold butter and buttermilk.
-
3Knead the dough gently and roll it out to about 1 inch thickness.
-
4Cut out the biscuits and place them on a baking sheet lined with parchment paper.
-
5Brush the tops with egg wash and bake for 15-20 minutes, or until golden brown.