Celebrate Hispanic Heritage Month with Fried Ice Cream Magic
Introduction
Celebrating Hispanic Heritage Month is a wonderful opportunity to delve into the rich and diverse culinary traditions of Hispanic cultures. One dessert that stands out for its creativity and delightful flavor combination is Fried Ice Cream. This magical treat is a staple in many Hispanic countries, including Mexico and Puerto Rico, where it’s often served as a decadent finale to a meal. The concept of frying ice cream may seem counterintuitive, but trust us, it’s a game-changer. By encasing a scoop of your favorite ice cream in a crispy, cinnamon-sugar coated shell, you create a textural contrast that elevates the dessert to new heights. The best part? It’s surprisingly easy to make and requires just a few everyday ingredients. In this article, we’ll guide you through the simple yet impressive process of creating Fried Ice Cream Magic, perfect for celebrating Hispanic Heritage Month or any time you want to wow your family and friends with a unique dessert.
Why This Works
- Flavor balance and ingredient accessibility: The combination of cold ice cream, crunchy exterior, and the warmth of cinnamon creates a perfect balance of flavors and textures. Moreover, the ingredients are easily accessible, making it a practical choice for any occasion.
- Ease of preparation: Despite its impressive presentation, Fried Ice Cream is relatively simple to prepare. It requires minimal cooking skills and can be ready in under 30 minutes, making it ideal for both beginners and experienced cooks.
- Impressive results with minimal effort: The contrast between the hot, crispy shell and the cold ice cream is sure to impress your guests. The fact that it achieves such a dramatic effect with so little effort is a testament to the magic of this dessert.
Ingredients
- 1 1/2 quarts of your favorite ice cream (we recommend vanilla or a flavor of your choice)
- 1 cup all-purpose flour
- 1/2 cup granulated sugar
- 1/4 cup cinnamon sugar (a mixture of granulated sugar and cinnamon)
- 1/2 teaspoon ground cinnamon
- 1/4 teaspoon salt
- 2 large eggs
- 1 cup crushed cornflakes or fry cookies (for the crust)
- Oil for frying (preferably vegetable or canola oil)
- Whipped cream, chocolate sauce, or caramel (optional for topping)
Instructions
- Step 1: Begin by scooping your ice cream into balls, about 1 1/2 inches in diameter. Place these on a baking sheet lined with parchment paper and put them back in the freezer to harden for at least 30 minutes.
- Step 2: In a shallow dish, mix together the flour, granulated sugar, cinnamon, and salt. In another dish, beat the eggs until they’re well mixed. In a third dish, place the crushed cornflakes or fry cookies.
- Step 3: Remove the ice cream balls from the freezer. Dip each ball first into the flour mixture to coat lightly, then into the eggs, making sure they’re completely covered, and finally roll them in the crushed cornflakes or cookies to coat evenly. Place the coated ice cream balls back on the baking sheet and freeze for another 30 minutes.
- Step 4: Heat about 2-3 inches of oil in a deep frying pan over medium heat until it reaches 375°F. Fry the ice cream balls for 10-15 seconds on each side, until they’re golden brown. Remove them from the oil with a slotted spoon and place them on a paper towel-lined plate to drain excess oil. Serve immediately, topped with whipped cream, chocolate sauce, or caramel if desired.
Handy Tips
- Make sure the ice cream is very hard before frying to prevent it from melting too quickly. If the ice cream starts to melt during the coating process, put it back in the freezer for a few minutes to firm up.
- Don’t overcoat the ice cream with the crust mixture, as this can make the dessert too heavy and difficult to fry evenly.
- For an extra crunchy coating, you can chill the coated ice cream balls in the freezer for 30 minutes to an hour before frying.
Heat Control
When frying the ice cream, it’s crucial to maintain the right temperature. The ideal temperature for frying is between 350°F and 375°F. If the oil is too hot, the exterior will burn before the ice cream has a chance to warm slightly, and if it’s too cold, the ice cream will melt too much. Use a thermometer to monitor the temperature, and adjust the heat as necessary. Fry for 10-15 seconds on each side, or until the coating is golden brown and crispy.
Crunch Factor
The crunch factor in Fried Ice Cream comes from the coating. To achieve the perfect crunch, ensure that the ice cream balls are fully coated in the cornflake or cookie mixture and that they’re frozen solid before frying. The brief frying time is just enough to crisp the exterior without melting the ice cream inside. For an extra crunchy shell, you can also try adding a bit of cinnamon or nutmeg to the coating mixture for added depth of flavor.
Pro Kitchen Tricks
- For easier coating, use one hand to dip the ice cream into the coatings and the other hand to sprinkle or coat, to prevent the coatings from sticking to your hands.
- Experiment with different types of ice cream and coatings to find your favorite combinations. Unique ice cream flavors paired with complementary coatings can elevate this dessert to a whole new level.
- Consider using a deep fryer if you have one, as it allows for more precise temperature control and can make the frying process safer and easier.
Storage Tips
- Once fried, Fried Ice Cream is best served immediately. However, you can prepare the ice cream balls and coat them ahead of time, storing them in an airtight container in the freezer for up to 24 hours before frying.
- For leftovers, place the fried ice cream in an airtight container and store it in the freezer. When reheating, be cautious not to melt the ice cream. A quick zap in the microwave or a few seconds under the broiler can help crisp the exterior again without melting the interior.
- It’s best to consume Fried Ice Cream within a day or two of preparation for optimal flavor and texture.
Gift Packaging Ideas
Fried Ice Cream can be a unique and appreciated gift, especially for those with a sweet tooth. Consider packaging the coated, unfried ice cream balls in airtight containers or freezer bags, along with a card that includes frying instructions. You can also package fried and frozen ice cream balls in insulated containers with ice packs for a more immediate treat. Decorate the packaging with festive ribbons or gift tags to make it a special and personalized gift.
Flavor Variations
- Different spices: Add a pinch of nutmeg, cardamom, or a blend of spices to the coating mixture for unique flavor profiles.
- Creative toppings: Experiment with various toppings such as caramel sauce, whipped cream, chopped nuts, or even candy pieces to match different occasions or preferences.
- Ingredient swaps: Try using different types of milk or cream for the ice cream, or substitute the cornflakes with crushed wafers, cookies, or even cereal for a varied texture.
Troubleshooting
- Texture problems: If the coating doesn’t crisp up, it might be due to insufficient freezing time or incorrect oil temperature. Adjust these factors and try again.
- Ingredient replacements: If you’re missing a specific ingredient, consider substitutions. For example, you can use almond milk instead of regular milk for a non-dairy ice cream version.
- Over/undercooking signs: The ice cream is overcooked if it starts to melt excessively during frying, and undercooked if the coating doesn’t achieve a golden brown color. Adjust frying time accordingly.
FAQs
- Can I freeze it? Yes, you can freeze the coated ice cream balls for up to 24 hours before frying. However, it’s best consumed fresh for optimal taste and texture.
- Is it gluten-free? Depending on the type of ice cream and coating used, Fried Ice Cream can be gluten-free. Ensure that all ingredients, especially the ice cream and any mix-ins, are gluten-free.
- Can I double the recipe? Yes, you can easily double or triple the recipe to serve a larger crowd. Just be sure to have enough oil and space in your freezer for the increased number of ice cream balls.
Conclusion
Celebrating Hispanic Heritage Month with Fried Ice Cream Magic is not only a delicious way to honor the rich culinary traditions of Hispanic cultures, but it’s also a fun and creative dessert to make and share with loved ones. With its unique blend of textures and flavors, Fried Ice Cream is sure to become a favorite. Don’t be afraid to experiment with different ice cream flavors and coatings to make the dish your own, and enjoy the process of creating something truly special. Whether you’re a seasoned chef or a beginner in the kitchen, this dessert is approachable and impressive, making it perfect for any occasion. So go ahead, give Fried Ice Cream a try, and experience the magic for yourself.
Celebrate Hispanic Heritage Month with Fried Ice Cream Magic
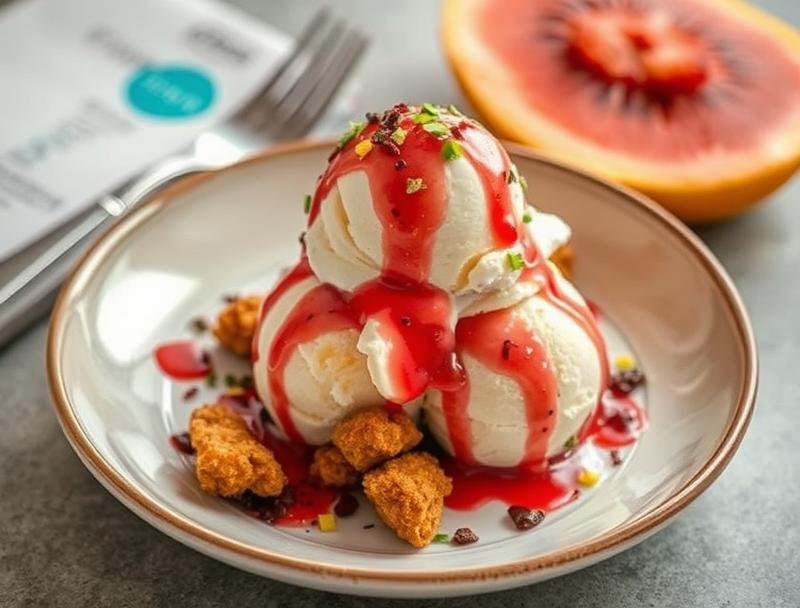
A dessert featuring a scoop of ice cream coated in a crispy, cinnamon-sugar shell, perfect for celebrating Hispanic Heritage Month.
🥘 Ingredients
👩🍳 Instructions
-
1Scoop ice cream into balls and freeze.
-
2Prepare the coating mixture.
-
3Coat the ice cream balls and freeze again.
-
4Fry the coated ice cream balls until golden brown.