The Best Homemade Garlic Naan Bread
Introduction
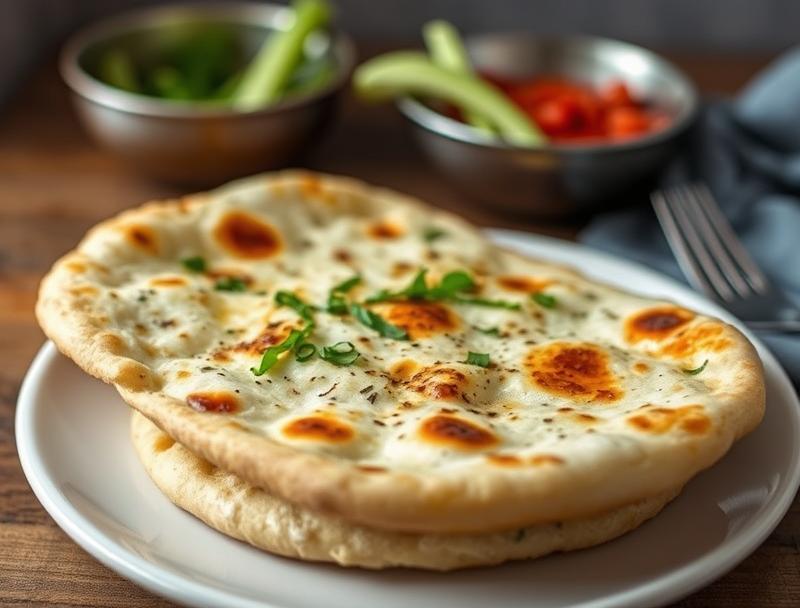
Imagine sinking your teeth into a warm, fluffy, and aromatic piece of garlic naan bread, fresh from your oven. The combination of soft texture, the slight crunch of garlic, and the subtle tang of yogurt is a culinary delight that’s surprisingly easy to achieve at home. With this recipe, you’ll discover how to create the perfect garlic naan bread using everyday ingredients, requiring minimal effort but yielding impressive results. Whether you’re a seasoned baker or a beginner in the kitchen, this recipe is designed to guide you through each step, ensuring that you end up with a deliciously authentic Indian flatbread that’s sure to become a staple in your household.
Why This Works
- Flavor balance and ingredient accessibility: This recipe strikes a perfect balance between the pungency of garlic, the slight sourness of yogurt, and the richness of butter, all of which are easily accessible in most supermarkets.
- Ease of preparation: The dough is simple to mix and knead, and the rising time is relatively short, making it a quick project for a weeknight dinner or a weekend meal.
- Impressive results with minimal effort: Despite its simplicity, homemade garlic naan bread is sure to impress your family and friends with its authentic flavor and soft, airy texture.
Ingredients
- 1 1/2 cups all-purpose flour
- 1/4 teaspoon salt
- 1/4 teaspoon sugar
- 1/2 teaspoon active dry yeast
- 1/2 cup lukewarm water
- 1/4 cup plain yogurt
- 2 tablespoons butter, melted
- 3 cloves garlic, minced
- Chopped cilantro or scallions for garnish (optional)
Instructions
- Step 1: In a large mixing bowl, combine the flour, salt, sugar, and yeast. Gradually add the lukewarm water and mix until a dough forms. Knead the dough for about 5-7 minutes until it becomes smooth and elastic.
- Step 2: Place the dough in a greased bowl, cover it with a damp cloth, and let it rise in a warm place for about 1 hour, or until it has doubled in size.
- Step 3: Preheat a non-stick skillet or tava over medium heat. Divide the dough into 4-6 equal portions, depending on how large you want your naan breads to be. Roll out each portion into a ball and then flatten it slightly into an oval shape. Brush the tops with melted butter and sprinkle with minced garlic.
- Step 4: Place the naan breads in the skillet and cook for about 1-2 minutes on each side, or until they are golden brown and puffed up. Brush with additional butter if desired, and garnish with chopped cilantro or scallions.
Handy Tips
- Make sure the yeast is fresh and active, as this will affect the rising of the dough. If you’re unsure, you can test the yeast by mixing it with warm water and sugar and waiting for it to foam.
- Don’t overwork the dough, as this can lead to tough naan bread. Mix the ingredients just until they come together, and knead the dough gently until it becomes smooth.
- If you find that your naan breads are not puffing up, check that your skillet is hot enough and that you’re not overloading it. Cooking the naan breads one at a time can help them cook more evenly and prevent them from steaming instead of browning.
Heat Control
To achieve the perfect golden brown color and crispy texture on your garlic naan bread, it’s crucial to control the heat. Medium heat is ideal, as it allows the naan to cook slowly and evenly. If the heat is too high, the naan may burn on the outside before it’s fully cooked on the inside. On the other hand, if the heat is too low, the naan may not brown at all. Look for signs of doneness such as a golden brown color, a slightly puffed texture, and a crispy edge.
Crunch Factor
The crunch factor in garlic naan bread comes from the slight charring on the outside, which contrasts beautifully with the soft, fluffy interior. To achieve this, make sure your skillet is hot before adding the naan, and don’t flip it too soon. Let it develop a nice golden brown color on one side before flipping it over. Additionally, brushing the naan with butter or ghee during the last minute of cooking can enhance the crunch and flavor.
Pro Kitchen Tricks
- Use a cast-iron skillet or a tava, as these retain heat well and can achieve a nice crispy crust on the naan.
- Don’t overproof the dough, as this can lead to a dense naan. Let it rise just until it has doubled in size, then punch it down and proceed with shaping.
- For an extra crispy crust, try baking the naan in a preheated oven at 400°F (200°C) for a few minutes after cooking it in the skillet. This will dry out the surface slightly and enhance the crunch.
Storage Tips
- Leftover garlic naan bread can be stored in an airtight container at room temperature for up to 2 days. Simply wrap it in foil or plastic wrap to keep it fresh.
- To reheat, wrap the naan in a damp paper towel and microwave for 20-30 seconds, or until it’s warmed through and soft again.
- Garlic naan bread can also be frozen for up to 2 months. Simply place the cooled naan in a freezer-safe bag or wrap it tightly in plastic wrap and aluminum foil. To reheat, thaw at room temperature or reheat frozen in the microwave or oven.
Gift Packaging Ideas
Garlic naan bread is a wonderful gift for friends and family, especially when paired with a delicious curry or dip. Consider packaging it in a decorative basket or tin, wrapped in a colorful cloth or paper. You could also include a jar of homemade chutney or a packet of spice mix to complement the naan. For a more rustic look, wrap the naan in brown paper and twine, and add a handwritten note with the recipe or a personal message.
Flavor Variations
- Different spices: Try adding a pinch of cumin, coriander, or carom seeds to the dough for a unique flavor profile.
- Creative toppings: Instead of garlic, brush the naan with butter or ghee and sprinkle with chopped herbs like cilantro, scallions, or parsley. You could also try grated cheese, diced onions, or minced jalapeños for added flavor.
- Ingredient swaps: For a gluten-free version, try substituting the all-purpose flour with a gluten-free flour blend. You could also use different types of yogurt, such as Greek yogurt or coconut yogurt, for a tangier or creamier flavor.
Troubleshooting
- Texture problems: If your naan bread is too dense, check that you’re not overmixing the dough. If it’s too dry, try adding a little more yogurt or water. If it’s too sticky, add a little more flour.
- Ingredient replacements: If you don’t have active dry yeast, you can try using instant yeast or rapid rise yeast. However, note that the rising time may be shorter, so keep an eye on the dough.
- Over/undercooking signs: If your naan bread is undercooked, it may be pale and soft. If it’s overcooked, it may be dark brown or even burnt. Adjust the cooking time and heat as needed to achieve the perfect golden brown color and crispy texture.
FAQs
- Can I freeze it? Yes, garlic naan bread can be frozen for up to 2 months. Simply place the cooled naan in a freezer-safe bag or wrap it tightly in plastic wrap and aluminum foil.
- Is it gluten-free? No, this recipe uses all-purpose flour, which contains gluten. However, you can try substituting it with a gluten-free flour blend for a gluten-free version.
- Can I double the recipe? Yes, you can easily double or triple this recipe to make more garlic naan bread. Simply multiply the ingredients accordingly and adjust the cooking time as needed.
Conclusion
Making garlic naan bread at home is a rewarding experience that’s sure to become a staple in your kitchen. With its soft texture, crispy crust, and aromatic flavor, it’s the perfect accompaniment to your favorite curries, stews, or dips. Don’t be afraid to experiment with different flavors and toppings, and share your creations with friends and family. Whether you’re a seasoned baker or a beginner, this recipe is designed to guide you through each step, ensuring that you end up with a deliciously authentic Indian flatbread that’s sure to impress. So go ahead, give it a try, and enjoy the warm, fuzzy feeling of biting into a freshly baked garlic naan bread, straight from your oven.
The Best Homemade Garlic Naan Bread
A simple recipe for homemade garlic naan bread, perfect for accompanying your favorite curries or dips.
🥘 Ingredients
👩🍳 Instructions
-
1Combine flour, salt, sugar, and yeast in a large mixing bowl.
-
2Gradually add lukewarm water and mix until a dough forms.
-
3Knead the dough for 5-7 minutes until smooth and elastic.
-
4Let the dough rise in a warm place for 1 hour, or until doubled in size.
-
5Preheat a non-stick skillet or tava over medium heat.
-
6Divide the dough into 4-6 portions and roll out each into a ball and then flatten slightly into an oval shape.
-
7Brush the tops with melted butter and sprinkle with minced garlic.
-
8Cook the naan breads in the skillet for 1-2 minutes on each side, or until golden brown and puffed up.