St. Patrick’s Day Green Velvet Cake 🍀 – So Easy, So Fun!
Introduction
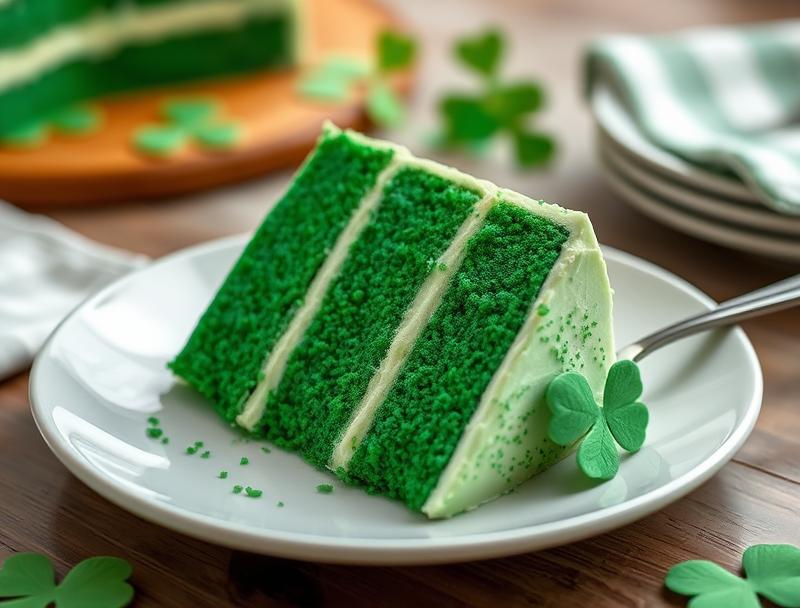
Get ready to celebrate St. Patrick’s Day with a dessert that’s as green as a shamrock and as delicious as a pot of gold! This St. Patrick’s Day Green Velvet Cake is an easy and fun twist on the classic red velvet cake. Made with everyday ingredients and requiring minimal effort, this cake is perfect for anyone looking to add a little magic to their holiday celebrations. The best part? It’s incredibly moist and flavorful, with a subtle green color that’s sure to delight both kids and adults alike. So why not give it a try and make this St. Patrick’s Day one to remember?
Why This Works
- The combination of buttermilk, cocoa powder, and green food coloring creates a unique and delicious flavor profile that’s both tangy and rich.
- The cake is surprisingly easy to prepare, requiring only a few simple ingredients and minimal mixing.
- The end result is a beautifully colored and moist cake that’s sure to impress your friends and family, making it perfect for St. Patrick’s Day celebrations.
Ingredients
- 2 cups all-purpose flour
- 1 cup granulated sugar
- 2 teaspoons baking powder
- 1 teaspoon salt
- 1 cup unsalted butter, softened
- 2 large eggs
- 2 teaspoons vanilla extract
- 1 cup buttermilk
- 2 tablespoons cocoa powder
- Green food coloring (about 1-2 teaspoons)
- Cream cheese frosting (for serving)
Instructions
- Step 1: Preheat your oven to 350°F (180°C). Grease and flour two 9-inch round cake pans.
- Step 2: In a medium bowl, whisk together the flour, sugar, baking powder, and salt.
- Step 3: In a large bowl, using an electric mixer, beat the butter until creamy. Add the eggs one at a time, beating well after each addition. Beat in the vanilla extract.
- Step 4: Gradually add the dry ingredients to the wet ingredients, alternating with the buttermilk, beginning and ending with the dry ingredients. Beat just until combined.
- Step 5: Stir in the cocoa powder and green food coloring until the batter is evenly colored.
- Step 6: Divide the batter evenly between the prepared pans and smooth the tops.
- Step 7: Bake for 30-35 minutes or until a toothpick inserted into the center comes out clean. Let the cakes cool in the pans for 10 minutes before transferring them to a wire rack to cool completely.
- Step 8: Once the cakes are completely cool, you can frost them with cream cheese frosting and decorate as desired.
Handy Tips
- To ensure the cake is evenly colored, make sure to stir the batter well after adding the green food coloring.
- If you don’t have buttermilk, you can make a substitute by mixing 1 cup of milk with 1 tablespoon of white vinegar or lemon juice. Let it sit for 5-10 minutes before using.
- To prevent the cake from becoming too dense, don’t overmix the batter.
Heat Control
To ensure the cake is cooked through, keep an eye on it after 25 minutes of baking. A toothpick inserted into the center should come out clean, and the cake should be firm to the touch. If you’re unsure, you can always bake for a few more minutes and check again.
Crunch Factor
This cake is designed to be moist and tender, not crunchy. To achieve this, make sure not to overbake it, and don’t overmix the batter. If you want to add a crunchy element, you could try topping the cake with chopped nuts or sprinkles.
Pro Kitchen Tricks
- To ensure the cake releases easily from the pan, make sure to grease it well and dust it with flour.
- If you’re not using the cake immediately, you can store it in an airtight container at room temperature for up to 3 days.
- To make the cake more stable, you can insert a dowel or straw into the center of each layer before stacking them.
Storage Tips
- The cake can be stored in an airtight container at room temperature for up to 3 days.
- If you want to freeze the cake, you can do so for up to 2 months. Simply wrap it tightly in plastic wrap or aluminum foil and place it in a freezer-safe bag.
- To thaw the cake, simply leave it at room temperature for a few hours or overnight in the refrigerator.
Gift Packaging Ideas
If you want to give the cake as a gift, you could consider packaging it in a decorative tin or box. Simply place the cake on a piece of cardboard or a cake board, and wrap it in plastic wrap or aluminum foil. You could also add a ribbon or gift tag to make it more festive.
Flavor Variations
- To give the cake a minty flavor, you could add a few drops of peppermint extract to the batter.
- If you want to add a bit of spice, you could try adding a teaspoon of cinnamon or nutmeg to the batter.
- To make the cake more decadent, you could try adding a cup of chocolate chips or chopped nuts to the batter.
Troubleshooting
- If the cake is too dense, it may be because you overmixed the batter. Try to mix the ingredients just until they’re combined, and don’t overbeat the butter and sugar.
- If the cake is too dry, it may be because you overbaked it. Try to check the cake more frequently towards the end of the baking time, and remove it from the oven when it’s still slightly tender in the center.
- If the cake doesn’t release from the pan, it may be because you didn’t grease it well enough. Try to grease the pan more thoroughly next time, and make sure to dust it with flour.
FAQs
- Can I freeze the cake? Yes, you can freeze the cake for up to 2 months. Simply wrap it tightly in plastic wrap or aluminum foil and place it in a freezer-safe bag.
- Is the cake gluten-free? No, the cake contains wheat flour and is not gluten-free. However, you could try substituting the flour with a gluten-free alternative if you need to.
- Can I double the recipe? Yes, you can double the recipe if you need to make a larger cake. Simply multiply all the ingredients by two and bake the cakes in larger pans.
Conclusion
This St. Patrick’s Day Green Velvet Cake is a fun and delicious twist on the classic red velvet cake. With its moist and tender texture, and its beautifully colored green layers, it’s sure to be a hit at any St. Patrick’s Day celebration. So why not give it a try and make this holiday one to remember? With its easy instructions and minimal ingredients, you can’t go wrong. And don’t forget to share your creations with your friends and family on social media using the hashtag #StPatricksDayCake. Happy baking!
St. Patrick’s Day Green Velvet Cake
A moist and delicious green velvet cake perfect for St. Patrick's Day celebrations
🥘 Ingredients
👩🍳 Instructions
-
1Preheat the oven to 350°F (180°C). Grease and flour two 9-inch round cake pans.
-
2In a medium bowl, whisk together the flour, sugar, baking powder, and salt.
-
3In a large bowl, using an electric mixer, beat the butter until creamy. Add the eggs one at a time, beating well after each addition. Beat in the vanilla extract.
-
4Gradually add the dry ingredients to the wet ingredients, alternating with the buttermilk, beginning and ending with the dry ingredients. Beat just until combined.
-
5Stir in the cocoa powder and green food coloring until the batter is evenly colored.
-
6Divide the batter evenly between the prepared pans and smooth the tops.
-
7Bake for 30-35 minutes or until a toothpick inserted into the center comes out clean. Let the cakes cool in the pans for 10 minutes before transferring them to a wire rack to cool completely.
-
8Once the cakes are completely cool, you can frost them with cream cheese frosting and decorate as desired.