Ultimate Grilled Cheese Recipe
Introduction
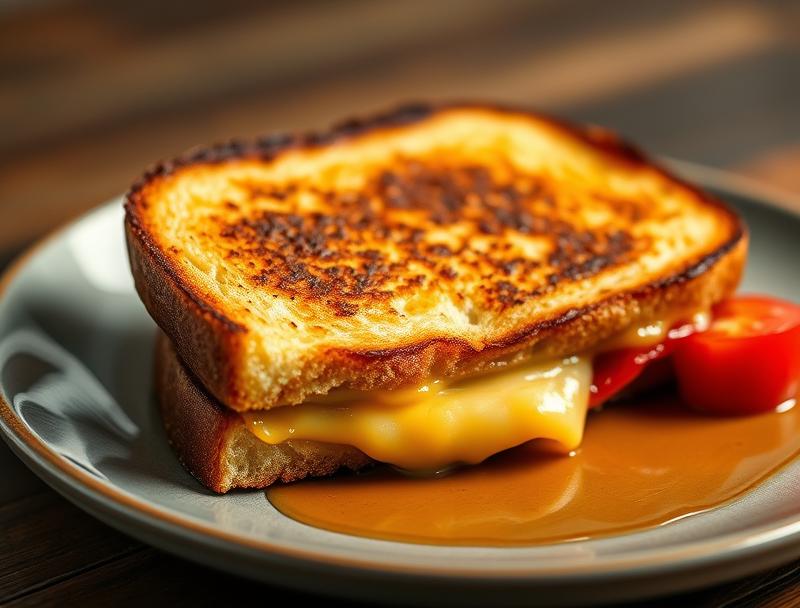
The ultimate grilled cheese recipe is a game-changer for anyone who loves a perfectly toasted, cheesy sandwich. This recipe is all about ease, flavor, and creativity, using everyday ingredients to create a dish that’s both comforting and impressive. With its gooey cheese, crispy bread, and savory flavors, this grilled cheese is sure to become a favorite in your household. The best part? It’s incredibly easy to make, requiring just a few simple ingredients and some basic kitchen tools. Whether you’re a busy weeknight cook or a weekend brunch enthusiast, this recipe is sure to delight.
Why This Works
- Flavor balance and ingredient accessibility: This recipe uses a combination of melted cheese, savory spreads, and fresh ingredients to create a balanced flavor profile that’s both rich and refreshing. Plus, the ingredients are easy to find in most supermarkets, making it a great option for a quick weeknight dinner.
- Ease of preparation: The ultimate grilled cheese recipe is incredibly easy to prepare, requiring just a few minutes of prep time and some basic cooking skills. Simply butter your bread, fill it with cheese and spreads, and cook it in a pan until it’s golden brown and crispy.
- Impressive results with minimal effort: Despite its simplicity, this recipe yields impressive results that are sure to wow your family and friends. The combination of melted cheese, crispy bread, and savory flavors creates a dish that’s both comforting and elegant, making it perfect for special occasions or everyday meals.
Ingredients
- 2 tablespoons unsalted butter, divided
- 2 slices of artisanal bread (such as sourdough or brioche)
- 2 slices of cheese (such as cheddar, gouda, or provolone)
- 1/4 cup of caramelized onions (see note)
- 1/4 cup of fig jam or other sweet spread
- 1/4 cup of fresh arugula or other leafy greens
- Salt and pepper, to taste
- Fresh herbs, such as thyme or rosemary, for garnish (optional)
Instructions
- Step 1: Prepare your ingredients – Start by buttering one side of each slice of bread. Then, slice your cheese and prepare your spreads, such as caramelized onions and fig jam.
- Step 2: Assemble your sandwich – Place one slice of bread, buttered side down, in a pan or skillet over medium heat. Top with a slice of cheese, a spoonful of caramelized onions, and a sprinkle of fresh arugula. Drizzle with fig jam and top with the second slice of bread, buttered side up.
- Step 3: Cook your sandwich – Cook for 2-3 minutes or until the bread is golden brown and the cheese is melted. Carefully flip the sandwich over and cook for an additional 2-3 minutes or until the other side is also golden brown.
- Step 4: Serve and enjoy – Remove the sandwich from the pan and let it cool for a minute or two. Slice in half and serve immediately, garnished with fresh herbs if desired.
Handy Tips
- Use a variety of cheeses for a unique flavor profile – Experiment with different types of cheese, such as gouda, provolone, or blue cheese, to create a one-of-a-kind flavor profile.
- Don’t overfill your sandwich – While it’s tempting to add lots of fillings to your grilled cheese, remember that too much can make the sandwich difficult to cook and messy to eat. Stick to a few high-quality ingredients and let the cheese be the star of the show.
- Experiment with different types of bread – Artisanal breads, such as sourdough or brioche, add a rich, depth of flavor to the grilled cheese. Try using different types of bread to find your favorite.
Heat Control
Heat control is crucial when cooking a grilled cheese sandwich. You want the bread to be toasted to a golden brown and the cheese to be melted and gooey. To achieve this, cook the sandwich over medium heat, using a thermometer to ensure the pan reaches a temperature of around 325°F. Cook for 2-3 minutes on the first side, or until the bread is golden brown and the cheese is starting to melt. Then, carefully flip the sandwich over and cook for an additional 2-3 minutes, or until the other side is also golden brown.
Crunch Factor
The crunch factor is an essential component of a great grilled cheese sandwich. To achieve the perfect crunch, cook the sandwich in a pan with a small amount of butter or oil until the bread is golden brown and crispy. You can also add some crunchy elements to the sandwich, such as chopped nuts or crispy bacon, to add texture and interest.
Pro Kitchen Tricks
- Use a panini press for a crispy, evenly cooked sandwich – A panini press is a great tool for cooking grilled cheese sandwiches, as it applies even pressure and heat to the sandwich, resulting in a crispy, evenly cooked final product.
- Add some acidity, such as a squeeze of lemon juice, to balance the richness of the cheese – A squeeze of lemon juice can help balance the richness of the cheese and add a bright, refreshing flavor to the sandwich.
- Experiment with different types of cheese and fillings to create unique flavor profiles – Don’t be afraid to experiment with different types of cheese and fillings to create unique flavor profiles and find your favorite combinations.
Storage Tips
- Store leftover grilled cheese sandwiches in an airtight container in the refrigerator for up to 24 hours – If you have leftover grilled cheese sandwiches, store them in an airtight container in the refrigerator for up to 24 hours. Simply reheat in the microwave or oven until crispy and hot.
- Reheat grilled cheese sandwiches in the oven or microwave until crispy and hot – To reheat a grilled cheese sandwich, simply place it in the oven at 350°F for a few minutes or until crispy and hot. Alternatively, you can reheat it in the microwave for 20-30 seconds or until hot and melted.
- Freeze grilled cheese sandwiches for up to 2 months – If you want to freeze grilled cheese sandwiches, simply assemble the sandwiches and place them on a baking sheet lined with parchment paper. Freeze until solid, then transfer to a freezer-safe bag or container for up to 2 months. Simply thaw and reheat in the oven or microwave until crispy and hot.
Gift Packaging Ideas
If you want to give grilled cheese sandwiches as a gift, consider packaging them in a cute basket or container with some gourmet accompaniments, such as artisanal jams or chutneys. You could also include some crispy snacks, such as crackers or chips, and a few fresh herbs or edible flowers for garnish. Simply wrap the sandwiches in plastic wrap or aluminum foil and place them in the basket or container, along with the accompaniments and snacks.
Flavor Variations
- Try using different types of cheese, such as gouda or provolone, for a unique flavor profile – Experiment with different types of cheese to create unique flavor profiles and find your favorite combinations.
- Add some spicy elements, such as diced jalapenos or sliced hot peppers, for a bold and spicy sandwich – If you like a little heat in your grilled cheese, try adding some spicy elements, such as diced jalapenos or sliced hot peppers.
- Use some sweet and savory spreads, such as fig jam or caramelized onions, to add depth and complexity to the sandwich – Sweet and savory spreads, such as fig jam or caramelized onions, can add depth and complexity to the sandwich and balance out the richness of the cheese.
Troubleshooting
- If the bread is not toasting evenly, try adjusting the heat or using a different type of bread – If the bread is not toasting evenly, try adjusting the heat or using a different type of bread. You could also try using a panini press or grill to get a crispy, evenly cooked sandwich.
- If the cheese is not melting, try using a different type of cheese or adjusting the heat – If the cheese is not melting, try using a different type of cheese or adjusting the heat. You could also try adding some grated cheese or shredded cheese to the sandwich to help it melt more evenly.
- If the sandwich is not crispy, try cooking it for a few more minutes or until crispy and golden brown – If the sandwich is not crispy, try cooking it for a few more minutes or until crispy and golden brown. You could also try using a different type of bread or adding some crunchy elements, such as chopped nuts or crispy bacon, to add texture and interest.
FAQs
- Can I freeze grilled cheese sandwiches? – Yes, you can freeze grilled cheese sandwiches for up to 2 months. Simply assemble the sandwiches and place them on a baking sheet lined with parchment paper. Freeze until solid, then transfer to a freezer-safe bag or container.
- Is this recipe gluten-free? – No, this recipe is not gluten-free, as it uses bread that contains gluten. However, you could try using gluten-free bread to make a gluten-free version of the recipe.
- Can I double or triple this recipe? – Yes, you can double or triple this recipe to make more grilled cheese sandwiches. Simply multiply the ingredients and cook the sandwiches in batches until crispy and hot.
Conclusion
In conclusion, this ultimate grilled cheese recipe is a game-changer for anyone who loves a perfectly toasted, cheesy sandwich. With its gooey cheese, crispy bread, and savory flavors, this recipe is sure to become a favorite in your household. Whether you’re a busy weeknight cook or a weekend brunch enthusiast, this recipe is easy to make and requires just a few simple ingredients. So go ahead, get creative, and experiment with different types of cheese, spreads, and fillings to create your perfect grilled cheese sandwich. Happy cooking!
Ultimate Grilled Cheese Recipe
A simple and delicious grilled cheese recipe using artisanal bread, melted cheese, and sweet and savory spreads.
🥘 Ingredients
👩🍳 Instructions
-
1Butter one side of each slice of bread.
-
2Assemble the sandwich by placing one slice of bread, buttered side down, in a pan or skillet over medium heat. Top with a slice of cheese, a spoonful of caramelized onions, and a sprinkle of fresh arugula. Drizzle with fig jam and top with the second slice of bread, buttered side up.
-
3Cook for 2-3 minutes or until the bread is golden brown and the cheese is melted. Carefully flip the sandwich over and cook for an additional 2-3 minutes or until the other side is also golden brown.
-
4Remove the sandwich from the pan and let it cool for a minute or two. Slice in half and serve immediately, garnished with fresh herbs if desired.