Indulge Guilt-Free! My Healthy Homemade Butterfingers Recipe is Your New Favorite Sweet Treat!
Introduction
Who doesn’t love the crispy, peanut buttery goodness of a Butterfinger? Now, imagine enjoying that same delicious taste without any of the guilt that comes with devouring a candy bar. My healthy homemade Butterfingers recipe is here to revolutionize your snack game, using everyday ingredients to create a treat that’s not only mouth-wateringly tasty but also better for you. With its perfect balance of flavors and textures, this recipe is incredibly easy to make and requires minimal effort, making it perfect for a quick dessert or snack any time of the day. The best part? You can customize it to your liking, whether you’re a fan of peanuts, almonds, or perhaps something a bit more adventurous like cashews.
Why This Works
- Flavor balance and ingredient accessibility: This recipe strikes the perfect balance between sweet and savory, using ingredients that are easily found in most grocery stores, ensuring that you can whip up a batch whenever the craving strikes.
- Ease of preparation: One of the standout features of this recipe is how simple it is to prepare. With just a few steps, you can transform basic ingredients into a gourmet snack that rivals any store-bought candy.
- Impressive results with minimal effort: Despite its simplicity, this recipe yields impressive results. The combination of crunchy, chewy, and smooth textures, along with the deep, satisfying flavors, will make you wonder how something so easy can taste so good.
Ingredients
- 1 cup creamy natural peanut butter (or any nut butter of your choice)
- 1/2 cup honey or natural sweetener (like maple syrup)
- 1/4 cup coconut sugar
- 1/2 cup oats
- 1/4 cup puffed rice cereal
- 1/4 cup chopped peanuts (or any nuts for added crunch)
- 1/2 teaspoon sea salt
- 1/4 teaspoon vanilla extract
- 1/2 cup dark chocolate chips (at least 70% cocoa for the best flavor)
Instructions
- Step 1: Begin by preparing your nut butter mixture. In a large bowl, combine the peanut butter, honey or natural sweetener, and coconut sugar. Mix until you have a smooth, consistent paste. This is the base of your Butterfingers, so make sure it’s well combined.
- Step 2: Add the oats, puffed rice cereal, chopped peanuts, sea salt, and vanilla extract to the peanut butter mixture. Mix well until all the ingredients are fully incorporated. The mixture should be thick but still manageable to shape.
- Step 3: Shape your mixture into long, thin bars, resembling the classic Butterfinger shape. You can also get creative and make bars, balls, or even bites, depending on your preference. Place the shaped bars on a baking sheet lined with parchment paper and refrigerate for about 30 minutes to set.
- Step 4: Melt the dark chocolate chips in a double boiler or in the microwave in 30-second increments, stirring between each interval until smooth. Dip each bar into the melted chocolate, coating completely. Place the chocolate-covered bars back on the parchment paper and refrigerate for another 30 minutes to allow the chocolate to set.
Handy Tips
- For an extra crunchy coating, you can chill the bars in the freezer for 10 minutes before dipping them in chocolate. This will help the chocolate set faster and give a nicer snap when you bite into it.
- If you find the peanut butter mixture too sticky, you can add a bit more oats. Conversely, if it’s too dry, a drizzle of honey can help bind it together.
- Experiment with different types of nut butter and nuts to find your favorite combination. Almond butter with chopped almonds or cashew butter with pistachios can offer interesting twists on the classic recipe.
Heat Control
When melting the chocolate, it’s crucial to do so gently to avoid overheating, which can cause the chocolate to seize up or become too thin. Using a double boiler is ideal as it provides a gentle, consistent heat. If using the microwave, be cautious and check the chocolate frequently to avoid burning or overheating.
Crunch Factor
Achieving the perfect crunch is key to a great homemade Butterfinger. The combination of puffed rice cereal and chopped nuts within the bars provides a satisfying crunch, while the dark chocolate coating adds a smooth, velvety texture. To enhance the crunch, ensure that your bars are well chilled before coating them in chocolate, and consider adding a sprinkle of sea salt or chopped nuts on top of the chocolate before it sets for an extra textured element.
Pro Kitchen Tricks
- For a more professional finish, use a fork to create a textured pattern on top of the chocolate before it sets. This not only looks appealing but can also help the chocolate adhere better to the bar.
- Keep your chocolate at room temperature before melting for better results. Cold chocolate can be difficult to melt smoothly, while chocolate that’s too warm can be too thin and difficult to work with.
- Invest in high-quality chocolate for the best flavor. Dark chocolate, in particular, offers a deeper, richer taste that complements the peanut butter perfectly.
Storage Tips
- Store your homemade Butterfingers in an airtight container in the refrigerator to keep them fresh. They can last up to a week when stored properly.
- For longer storage, consider freezing the bars. Place them in a single layer in a freezer-safe bag or container and store in the freezer for up to 2 months. Allow to thaw at room temperature or in the refrigerator when you’re ready to enjoy them.
- When storing, it’s a good idea to place parchment paper or wax paper between layers of bars to prevent them from sticking together.
Gift Packaging Ideas
These homemade Butterfingers make wonderful gifts, especially when packaged nicely. Consider placing a few bars in a decorative tin or jar, wrapped in colored paper or foil, and tied with a ribbon. You can also create a gift basket filled with these treats, along with other homemade goodies like cookies or fudge, for a thoughtful and delicious present.
Flavor Variations
- Different spices: Add a pinch of cinnamon, nutmeg, or cayenne pepper to the peanut butter mixture for a unique twist.
- Creative toppings: Before the chocolate sets, sprinkle chopped nuts, shredded coconut, or even candy pieces on top for added flavor and texture.
- Ingredient swaps: Use almond butter instead of peanut butter, or substitute the oats with another cereal for a different texture.
Troubleshooting
- Texture problems: If your bars are too soft, they may need more time in the refrigerator to set. If they’re too hard, you can try adding a bit more honey to the mixture before shaping.
- Ingredient replacements: Always try to use the freshest ingredients for the best flavor. However, if you’re out of something, don’t be afraid to experiment with substitutions.
- Over/undercooking signs: Since this recipe doesn’t involve baking, the main thing to watch out for is the chocolate. If it’s too hot, it can seize up or become too thin. If it’s not melted enough, it won’t coat the bars smoothly.
FAQs
- Can I freeze it? Yes, these bars can be frozen for up to 2 months. Simply place them in a single layer in a freezer-safe bag or container.
- Is it gluten-free? This recipe is inherently gluten-free, making it a great option for those with gluten intolerance. However, always check the ingredients of your specific brands of peanut butter, oats, and chocolate to ensure they are processed in a gluten-free environment.
- Can I double the recipe? Absolutely! This recipe can be easily doubled or even tripled if you’re making it for a larger group. Just be sure to adjust the chilling time slightly if you’re making a larger batch.
Conclusion
Making your own healthier version of Butterfingers at home is not only fun but also incredibly rewarding. With this recipe, you can enjoy the classic candy bar taste without any of the guilt, knowing exactly what goes into each and every bite. Feel free to experiment with different flavors and ingredients to make this recipe your own, and don’t hesitate to share your creations with friends and family. Whether you’re a fan of peanut butter, chocolate, or just love trying new things, this healthy homemade Butterfingers recipe is sure to become a new favorite. So go ahead, indulge guilt-free, and enjoy the process of creating something deliciously yours.
Indulge Guilt-Free! My Healthy Homemade Butterfingers Recipe is Your New Favorite Sweet Treat!
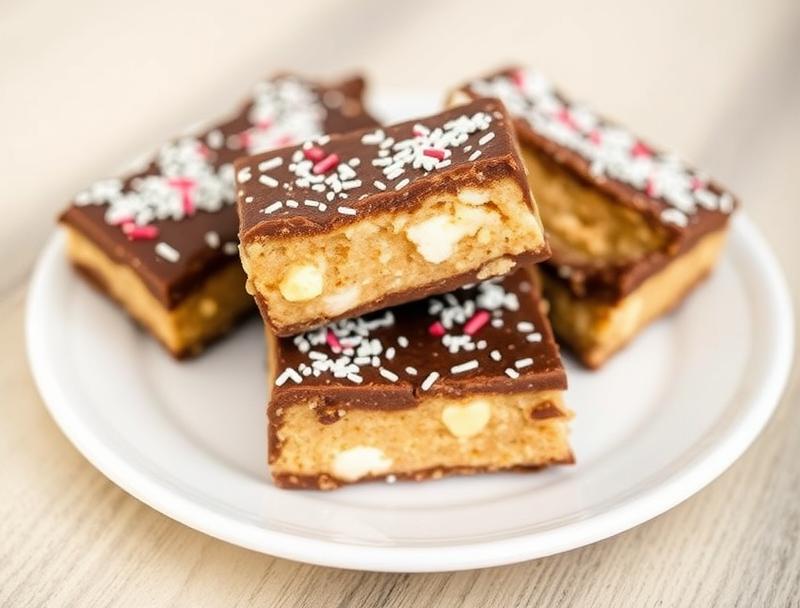
A healthier, homemade version of the classic Butterfinger candy bar, made with natural peanut butter, oats, and dark chocolate.
🥘 Ingredients
👩🍳 Instructions
-
1Combine peanut butter, honey, and coconut sugar in a bowl and mix until smooth.
-
2Add oats, puffed rice cereal, chopped peanuts, sea salt, and vanilla extract to the bowl and mix well.
-
3Shape the mixture into bars and refrigerate for 30 minutes.
-
4Melt the dark chocolate chips and dip each bar into the chocolate to coat.
-
5Refrigerate the chocolate-covered bars for 30 minutes to set the chocolate.