Mini Pumpkin Pie Crescents: Bite-Sized Fall Treats
Introduction
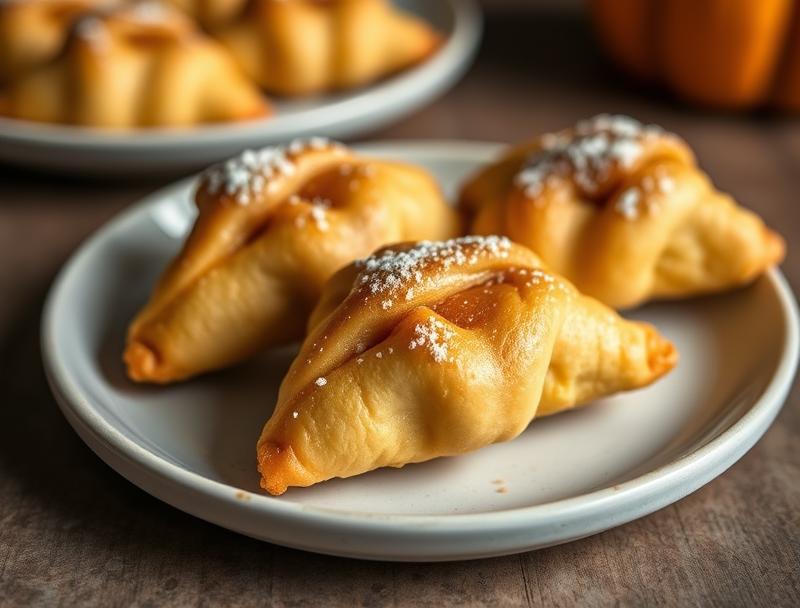
As the leaves change colors and the air grows crisper, our taste buds begin to crave the warm, comforting flavors of fall. One of the most iconic and beloved treats of the season is pumpkin pie, but why settle for a traditional slice when you can indulge in bite-sized, flaky, and deliciously spiced mini pumpkin pie crescents? These adorable pastries are not only a delight to eat, but they’re also surprisingly easy to make, requiring just a few everyday ingredients and some simple creativity. In this recipe, we’ll guide you through the process of crafting these mini marvels, perfect for snacking, entertaining, or as a unique addition to your holiday spread.
Why This Works
- The balance of pumpkin, spice, and pastry creates a flavor profile that’s both familiar and exciting, making each bite a satisfying experience.
- The use of pre-made crescent roll dough simplifies the preparation, allowing you to focus on the filling and presentation rather than laboring over homemade pastry.
- Despite their impressive appearance, these mini pies require minimal effort, making them an ideal choice for busy fall evenings or as a fun project to enjoy with family and friends.
Ingredients
- 1 can of pumpkin puree (15 oz)
- 1 package of crescent roll dough (8-10 rolls)
- 1/2 cup of heavy cream
- 1/2 teaspoon of salt
- 1/2 teaspoon of ground cinnamon
- 1/4 teaspoon of ground nutmeg
- 1/4 teaspoon of ground ginger
- 1 tablespoon of unsalted butter, melted
- 1 egg, beaten (for egg wash)
- Confectioners’ sugar (!optional, for dusting)
Instructions
- Step 1: Prepare the Filling – In a medium bowl, whisk together the pumpkin puree, heavy cream, salt, cinnamon, nutmeg, and ginger until well combined.
- Step 2: Roll Out the Dough – Open the package of crescent roll dough and separate the rolls. Roll out each triangle of dough into a thinner, larger triangle, about double its original size.
- Step 3: Fill and Shape the Crescents – Place about 1 tablespoon of the pumpkin filling at the base of each dough triangle. Brush the edges with the melted butter. Roll each into a crescent shape, starting from the base and curving towards the point. Press the edges to seal.
- Step 4: Brush with Egg Wash and Bake – Place the shaped crescents on a baking sheet lined with parchment paper, leaving about 1 inch of space between each. Brush the tops with the beaten egg for a golden glaze. Bake in a preheated oven at 375°F (190°C) for about 12-15 minutes, or until golden brown.
Handy Tips
- To avoid the dough from becoming too warm and sticky, keep it refrigerated until you’re ready to roll it out. If it starts to soften, place it back in the fridge for a few minutes to firm up.
- Don’t overfill the crescents, as this can cause them to burst open during baking. About 1 tablespoon of filling is the perfect amount.
- For an extra crispy bottom, you can bake the crescents on a preheated baking stone or baking steel.
Heat Control
Baking these mini pumpkin pie crescents at the right temperature is crucial for achieving the perfect flaky pastry and cooked filling. Ensure your oven is preheated to 375°F (190°C). The crescents are done when they’re golden brown, which should take about 12-15 minutes. Keep an eye on them, as the baking time might vary slightly depending on the size of your crescents and your oven’s performance.
Crunch Factor
The crunch factor in these treats comes from the flaky, baked pastry. To enhance this, make sure the crescent rolls are chilled and firm before baking. A light egg wash before baking will also contribute to a golden, crispy exterior. If you prefer an extra crunchy topping, you can sprinkle the crescents with a pinch of granulated sugar before baking.
Pro Kitchen Tricks
- To make the process more efficient, prepare the pumpkin filling ahead of time and store it in the refrigerator for up to a day.
- For a uniform bake, try to make all your crescents roughly the same size. This ensures they all bake evenly and are done at the same time.
- Experiment with different spices in the filling, like adding a pinch of cardamom or a dash of allspice, to give your mini pies a unique twist.
Storage Tips
- These mini pumpkin pie crescents are best served fresh, but they can be stored in an airtight container at room temperature for up to 2 days.
- For longer storage, consider freezing the baked crescents. Place them in a single layer in a freezer-safe bag or container and store for up to 2 months. To reheat, simply bake in a preheated oven at 350°F (175°C) for about 5 minutes, or until warmed through.
- When storing, it’s a good idea to place a sheet of parchment paper between layers of crescents to prevent them from sticking together.
Gift Packaging Ideas
These mini pumpkin pie crescents make for a delightful gift, especially during the fall season. Consider packaging them in decorative tins, paper bags tied with twine, or even a beautifully arranged platter. You can also add a personal touch with a handwritten note or a small bag of gourmet coffee. For a more rustic look, wrap individual crescents in parchment paper and tie with a piece of jute string.
Flavor Variations
- Pumpkin Spice Variation: Add an extra pinch of cinnamon, nutmeg, and ginger to the filling for an intensified pumpkin spice flavor.
- Maple Walnut Variation: Drizzle the tops of the baked crescents with maple syrup and sprinkle with chopped walnuts for a sweet and nutty twist.
- Chocolate Chip Variation: Mix in a few dark chocolate chips into the pumpkin filling before baking for a sweet and indulgent treat.
Troubleshooting
- Underbaked Crescents: If your crescents are not golden brown after the recommended baking time, continue to bake in 2-minute increments until they reach the desired color.
- Overfilled Crescents: If a crescent bursts open during baking, don’t worry! Simply continue baking until the filling is set and the pastry is golden. You can also use a little extra dough to patch any open seams before baking.
- Dough Too Sticky: If the dough becomes too warm and sticky to work with, refrigerate it for about 10 minutes to firm up before proceeding.
FAQs
- Can I freeze the unbaked crescents? Yes, you can freeze the shaped, unbaked crescents on a baking sheet, then transfer them to a freezer-safe bag for storage. Bake frozen crescents for an additional 2-3 minutes.
- Is this recipe gluten-free? Unfortunately, traditional crescent roll dough contains gluten. However, you can experiment with gluten-free dough alternatives to make this recipe accessible to those with gluten intolerance.
- Can I double the recipe? Absolutely! Simply double all the ingredients and proceed with the instructions. Keep in mind that you may need to bake the crescents in batches depending on the size of your baking sheets.
Conclusion
Mini pumpkin pie crescents are a delightful twist on traditional pumpkin pie, offering a bite-sized, flaky, and deliciously spiced treat that’s perfect for the fall season. With their ease of preparation, impressive presentation, and versatility in flavor variations, these little pastries are sure to become a new favorite. Whether you’re entertaining a crowd, seeking a unique dessert for your holiday table, or simply looking for a fun baking project, these mini pumpkin pie crescents are sure to deliver. So go ahead, get baking, and enjoy the warm, comforting flavors of fall in every delicious bite!
Mini Pumpkin Pie Crescents: Bite-Sized Fall Treats
A recipe for bite-sized, flaky, and deliciously spiced mini pumpkin pie crescents, perfect for fall and the holiday season.
🥘 Ingredients
👩🍳 Instructions
-
1Prepare the pumpkin filling by whisking together the pumpkin puree, heavy cream, salt, cinnamon, nutmeg, and ginger.
-
2Roll out the crescent roll dough and separate into triangles.
-
3Fill each dough triangle with about 1 tablespoon of the pumpkin filling and roll into a crescent shape.
-
4Brush the tops with the beaten egg for a golden glaze and bake in a preheated oven at 375°F (190°C) for about 12-15 minutes, or until golden brown.