Mini Pumpkin Pie Crescents: Bite-Sized Fall Treats
Introduction
As the leaves change colors and the air grows crisp, our taste buds crave the warm, comforting flavors of fall. Among the many delights of the season, pumpkin pie stands out as a classic favorite, evoking memories of family gatherings and cozy afternoons. However, traditional pumpkin pies can be daunting to make and often yield more servings than desired. This is where the Mini Pumpkin Pie Crescents come in – a creative twist on the classic, offering bite-sized treats that are as easy to make as they are delicious. Using everyday ingredients and requiring minimal effort, these crescents are perfect for fall parties, gift exchanges, or simply as a sweet treat to enjoy with a cup of coffee or tea.
Why This Works
- Flavor balance and ingredient accessibility: The combination of pumpkin puree, spices, and cream cheese provides a balanced and rich flavor profile, while the use of common pantry staples makes this recipe highly accessible.
- Ease of preparation: The crescent shape is achieved using pre-made crescent roll dough, significantly simplifying the preparation process and making it possible for bakers of all skill levels to achieve impressive results.
- Impressive results with minimal effort: Despite the simplicity of the recipe, the Mini Pumpkin Pie Crescents are visually appealing and sure to impress guests, making them an ideal choice for gatherings and events.
Ingredients
- 1 can of pumpkin puree (15 oz)
- 1 package of crescent roll dough (8-10 rolls)
- 1/2 cup of cream cheese, softened
- 1/4 cup of granulated sugar
- 1/2 teaspoon of cinnamon
- 1/4 teaspoon of nutmeg
- 1/4 teaspoon of salt
- 1 egg, beaten (for egg wash)
- Confectioners’ sugar (for dusting)
Instructions
- Step 1: Preheat your oven to 375°F (190°C). Line a baking sheet with parchment paper to ensure easy cleanup and prevent the crescents from sticking.
- Step 2: In a medium bowl, mix together the pumpkin puree, cream cheese, granulated sugar, cinnamon, nutmeg, and salt until well combined and smooth. This filling is the heart of your Mini Pumpkin Pie Crescents, so take a moment to ensure it’s evenly mixed.
- Step 3: Roll out the crescent roll dough on a lightly floured surface to a thickness that’s easy to work with. Separate the dough into the individual triangles as indicated on the packaging. Place a tablespoon or two of the pumpkin filling at the base of each triangle, leaving a small border at the bottom without filling to facilitate sealing.
- Step 4: Roll each triangle into a crescent shape, starting from the wide end and moving towards the pointed end. Curve the dough into a crescent as you roll, and press the edges together to seal the filling inside. Place the crescents on the prepared baking sheet, leaving about an inch of space between each one to allow for even baking.
- Step 5: Brush the tops of the crescents with the beaten egg for a golden glaze. This step adds a beautiful sheen to the finished pastries and helps them brown in the oven.
- Step 6: Bake the crescents for 12-15 minutes, or until they are golden brown. Keep an eye on them, as the baking time may vary depending on your oven and the size of your crescents.
- Step 7: Remove the crescents from the oven and let them cool on a wire rack for a few minutes. Dust with confectioners’ sugar before serving. This final touch adds a sweet and elegant finish to your Mini Pumpkin Pie Crescents.
Handy Tips
- Make sure to seal the edges of the crescents well to prevent the filling from escaping during baking. A little bit of water on your finger can help press the dough together if it’s not sticking.
- Don’t overfill the crescents, as this can make them difficult to seal and may result in filling leaking out during baking.
- Experiment with different spices in the filling to create unique flavor variations. For example, adding a pinch of ground ginger or cardamom can give your crescents an extra layer of depth.
Heat Control
For this recipe, maintaining the correct oven temperature is crucial. Ensure your oven is preheated to 375°F (190°C) before baking the crescents. The ideal baking time is between 12-15 minutes, but this can vary. Look for the crescents to be golden brown, and avoid overbaking, which can make them dry and less flavorful.
Crunch Factor
The Mini Pumpkin Pie Crescents should have a flaky, tender crust with a soft and creamy filling. To achieve this texture, make sure not to overwork the dough when rolling out the crescents, and don’t overbake them. The egg wash will also contribute to a golden, slightly crispy top, contrasting nicely with the soft interior.
Pro Kitchen Tricks
- For an extra flaky crust, chill the crescent roll dough in the refrigerator for about 30 minutes before rolling it out. This will help the butter in the dough to firm up, leading to a better texture in the finished pastries.
- Consider making the pumpkin filling ahead of time and refrigerating it overnight. This will allow the flavors to meld together, resulting in a more complex and satisfying taste experience.
- To speed up the cooling process and prevent the crescents from becoming soggy, cool them on a wire rack instead of a flat surface. This allows air to circulate under the pastries, helping them to cool more evenly and quickly.
Storage Tips
- The Mini Pumpkin Pie Crescents are best served fresh, but they can be stored in an airtight container at room temperature for up to 2 days. For longer storage, consider freezing them. Place the cooled crescents in a single layer in a freezer-safe bag or container and store in the freezer for up to 2 months. To reheat, simply thaw at room temperature or reheat in the microwave.
- When storing, it’s a good idea to place a sheet of parchment paper between layers of crescents to prevent them from sticking together.
- Reheating can be done in the oven at a lower temperature (around 300°F or 150°C) for a few minutes, or in the microwave for a few seconds. Be careful not to overheat, as this can dry out the pastries.
Gift Packaging Ideas
These Mini Pumpkin Pie Crescents make wonderful gifts, especially during the fall season. Consider packaging them in decorative tins, mason jars, or paper bags tied with twine and a fall-themed ribbon. You could also include a packet of hot cider mix or a few coffee beans to complement the pastry. For a more rustic look, wrap the crescents individually in parchment paper and place them in a wicker basket lined with a checkered cloth.
Flavor Variations
- Different spices: Try adding a pinch of ground cloves, allspice, or ginger to the pumpkin filling for unique flavor profiles.
- Creative toppings: Dust the crescents with cinnamon or nutmeg before baking, or drizzle with a glaze made from powdered sugar and maple syrup after they’ve cooled.
- Ingredient swaps: For a vegan version, replace the cream cheese with a vegan alternative and use a non-dairy milk to make the egg wash. You could also experiment with different types of sugar or spices to change the flavor dynamic.
Troubleshooting
- Texture problems: If your crescents turn out too dense, it might be due to overworking the dough. Try to handle the dough gently and minimize rolling and stretching. If they’re too dry, check your oven temperature and baking time, and consider covering them with foil during the last few minutes of baking to prevent overbrowning.
- Ingredient replacements: If you’re missing a specific spice, feel free to substitute with similar spices. For example, if you don’t have nutmeg, a combination of cinnamon and ginger can provide a similar warmth to the filling.
- Over/undercooking signs: Keep an eye on your crescents while they’re baking. They should be golden brown and firm to the touch. If they’re undercooked, they might feel soft or squishy, while overcooked crescents will be dry and possibly too dark.
FAQs
- Can I freeze it? Yes, the Mini Pumpkin Pie Crescents can be frozen for up to 2 months. Freeze them after they’ve cooled completely, and thaw or reheat as needed.
- Is it gluten-free? The traditional recipe uses crescent roll dough that contains gluten. However, you can find gluten-free alternatives or make your own gluten-free dough to accommodate dietary restrictions.
- Can I double the recipe? Absolutely! Simply double all the ingredients and proceed with the instructions as usual. Keep in mind that you might need to adjust the baking time slightly if you’re making a larger batch.
Conclusion
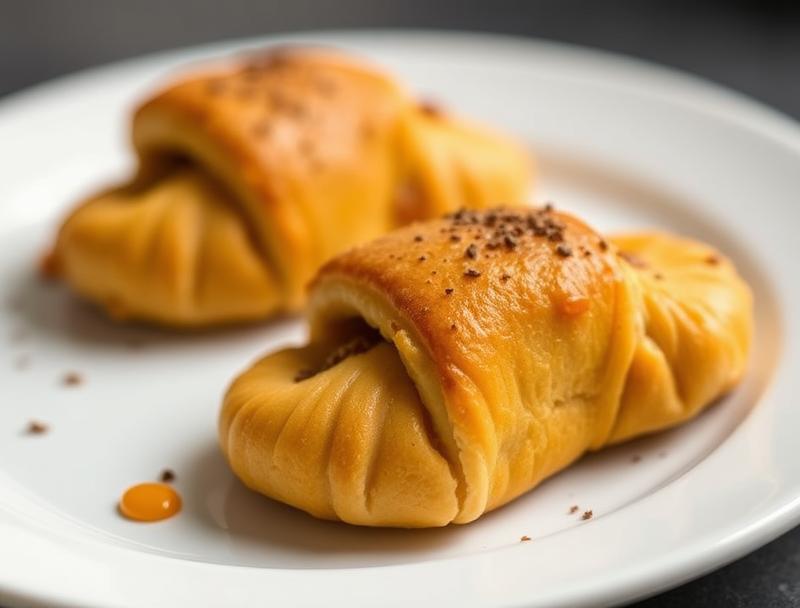
With their perfect blend of pumpkin spice and creamy filling, enclosed in a flaky, golden crust, the Mini Pumpkin Pie Crescents are sure to become a new fall favorite. They’re easy to make, beautiful to look at, and delicious to eat – the perfect combination for any baker. Whether you’re a seasoned pro or just starting out, these bite-sized treats are a great way to welcome the fall season. So go ahead, get creative with the recipe, and enjoy the process of making something truly special for yourself and those around you.
Mini Pumpkin Pie Crescents: Bite-Sized Fall Treats
A creative twist on the classic pumpkin pie, offering bite-sized treats that are as easy to make as they are delicious.
🥘 Ingredients
👩🍳 Instructions
-
1Preheat oven to 375°F (190°C).
-
2Mix the pumpkin filling ingredients until well combined.
-
3Roll out the crescent roll dough and separate into triangles.
-
4Place a tablespoon or two of the pumpkin filling at the base of each triangle and roll into a crescent shape.
-
5Brush the tops with the beaten egg for a golden glaze.
-
6Bake for 12-15 minutes, or until golden brown.
-
7Cool on a wire rack and dust with confectioners' sugar before serving.