Oreo Dirt Cake: Easy No-Bake Dessert with Chocolate Pudding
Introduction
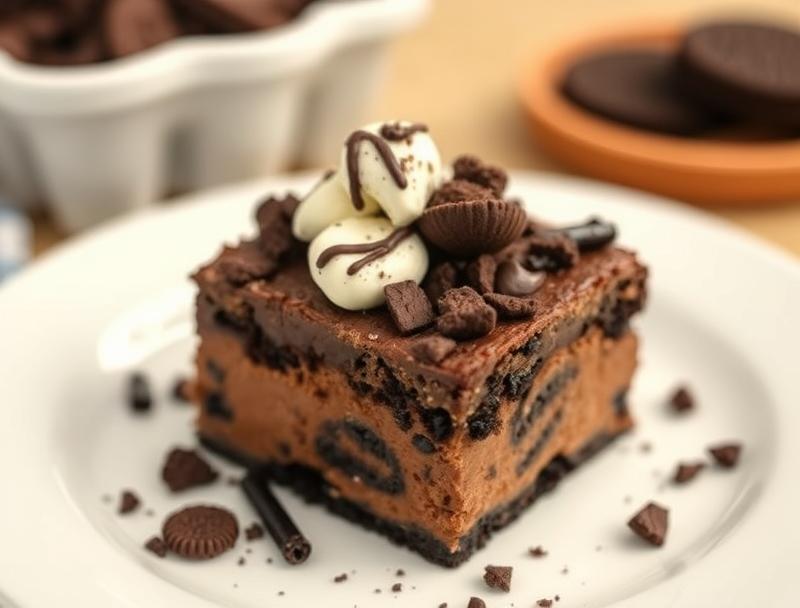
The Oreo Dirt Cake is a creative and delicious dessert that combines the richness of chocolate pudding with the crunch of Oreos, all without requiring any baking. This easy-to-make treat is perfect for warm weather, potlucks, or anytime you need a quick dessert that’s sure to impress. With its layers of chocolatey goodness and crushed Oreos resembling dirt, this dessert is not only tasty but also visually appealing. It’s a great way to get creative in the kitchen using everyday ingredients, making it an ideal project for both beginners and seasoned bakers looking for a no-fuss dessert.
Why This Works
- Flavor balance and ingredient accessibility: The combination of chocolate pudding, cream, and Oreos provides a well-balanced flavor profile that is both rich and refreshing. All the ingredients are easily accessible in most supermarkets, making this dessert convenient to prepare.
- Ease of preparation: The no-bake aspect of this dessert makes it incredibly easy to prepare. There’s no need to worry about baking times, temperatures, or the risk of overcooking, which can be a significant advantage for those who are new to dessert making or prefer simpler recipes.
- Impressive results with minimal effort: Despite its simplicity, the Oreo Dirt Cake presents beautifully, especially when garnished with additional Oreos or edible flowers. The layers and textures create a visually appealing dessert that looks like it required much more effort than it actually did, making it perfect for special occasions or gatherings.
Ingredients
- 1 package of Oreo cookies (for crushing and decoration)
- 1 package of chocolate pudding mix
- 1 cup of milk
- 1/2 cup of heavy cream
- 1/4 cup of powdered sugar
- 1/2 teaspoon of vanilla extract
- 1/4 teaspoon of salt
- 8 ounces of cream cheese, softened (optional for a creamier version)
- Gummy worms or other small candies for decoration (optional)
Instructions
- Step 1: Begin by preparing your ingredients. Crush 3/4 of the Oreo package in a blender or place them in a plastic bag and crush them with a rolling pin to create the “dirt” for your cake. Set aside.
- Step 2: In a large bowl, mix together the chocolate pudding mix, milk, heavy cream, powdered sugar, vanilla extract, and salt until well combined. If using cream cheese, beat it separately until smooth and then fold it into the pudding mixture to add extra creaminess.
- Step 3: In a large serving dish or individual cups, create the first layer by pouring half of the pudding mixture into the dish(es). Top with half of the crushed Oreos. Repeat this process, starting with the remaining pudding mixture, followed by the rest of the crushed Oreos.
- Step 4: Decorate the top of your Oreo Dirt Cake with whole Oreos, gummy worms, or other small candies to resemble plants or creatures coming out of the “dirt”. Refrigerate for at least 30 minutes to allow the flavors to meld together before serving.
Handy Tips
- For a lighter version, you can use less heavy cream or substitute it with more milk. However, keep in mind that using less cream may affect the richness and texture of the dessert.
- Experiment with different types of pudding mixes, like vanilla or caramel, for a unique twist on the classic recipe.
- Consider using a food processor to crush the Oreos for a finer texture that resembles dirt more closely.
Heat Control
Since this is a no-bake dessert, heat control is not a concern. However, it’s essential to refrigerate the dessert for at least 30 minutes to allow the flavors to meld together and the textures to set properly.
Crunch Factor
The crunch factor in this dessert comes from the crushed Oreos. To achieve the right crunch, make sure not to over-process the Oreos, as this can make them too fine and powdery. A mix of fine and slightly larger cookie pieces will provide a nice textural contrast to the smooth pudding.
Pro Kitchen Tricks
- To ensure that your dessert sets properly, make sure all the ingredients are well chilled before assembling the cake.
- For a more stable dessert, especially if you’re using individual cups, consider layering the ingredients in a way that each layer is slightly smaller than the last, creating a slight indentation in the center. This can help prevent the top layer from sliding off.
Storage Tips
- Store the Oreo Dirt Cake in the refrigerator, covered with plastic wrap or aluminum foil, for up to 3 days.
- Freezing is not recommended as it can affect the texture of the pudding and the crunch of the Oreos.
- When transporting the dessert, keep it chilled and consider using a cooler with ice packs to maintain the temperature and prevent the pudding from becoming too soft.
Gift Packaging Ideas
The Oreo Dirt Cake can be a fun and unique gift, especially for kids or anyone with a sweet tooth. Consider packaging individual servings in small mason jars or plastic cups, topped with a layer of crushed Oreos and decorated with a gummy worm or a small plant pick. You can wrap the jars in decorative paper or ribbons and add a gift tag with a personal message.
Flavor Variations
- Different spices: Add a pinch of cinnamon, nutmeg, or cocoa powder to the pudding mix for a unique flavor twist.
- Creative toppings: Use different types of cookies, like Chips Ahoy or peanut butter cookies, for the “dirt” layer. You can also top the dessert with whipped cream, chocolate shavings, or chopped nuts.
- Ingredient swaps: Substitute the chocolate pudding with another flavor, like vanilla or butterscotch, for a completely different dessert experience.
Troubleshooting
- Texture problems: If the pudding is too runny, refrigerate it for a longer period. If it’s too thick, you can thin it out with a little more milk.
- Ingredient replacements: If you don’t have heavy cream, you can use half-and-half or a non-dairy milk alternative as a substitute.
- Over/undercooking signs: Since this is a no-bake dessert, there’s no risk of overcooking. However, make sure to refrigerate the dessert long enough for the flavors to meld together and the textures to set properly.
FAQs
- Can I freeze it? It’s not recommended to freeze the Oreo Dirt Cake as it can affect the texture of the pudding and the crunch of the Oreos.
- Is it gluten-free? This depends on the ingredients used. If you use gluten-free Oreos and ensure that the pudding mix and any other ingredients are gluten-free, then the dessert can be gluten-free.
- Can I double the recipe? Yes, you can easily double or triple the recipe if you’re serving a larger crowd. Just remember to adjust the refrigeration time slightly if you’re making a much larger batch.
Conclusion
The Oreo Dirt Cake is a fun, easy, and delicious dessert that’s perfect for any occasion. With its simple ingredients and no-bake instructions, it’s a great project for families, beginners, or anyone looking for a quick dessert solution. Feel free to experiment with different flavors and toppings to make the recipe your own, and don’t hesitate to share your creations with friends and family. Happy baking, or should we say, happy no-baking!
Oreo Dirt Cake: Easy No-Bake Dessert with Chocolate Pudding
A no-bake dessert combining chocolate pudding with crushed Oreos, perfect for warm weather or anytime you need a quick, impressive treat.
🥘 Ingredients
👩🍳 Instructions
-
1Crush 3/4 of the Oreo package for the 'dirt' layer.
-
2Mix together the chocolate pudding mix, milk, heavy cream, powdered sugar, vanilla extract, and salt.
-
3Layer the pudding mixture and crushed Oreos in a serving dish or individual cups.
-
4Refrigerate for at least 30 minutes before serving.