Protein-Packed Yogurt Cookies Recipe
Introduction
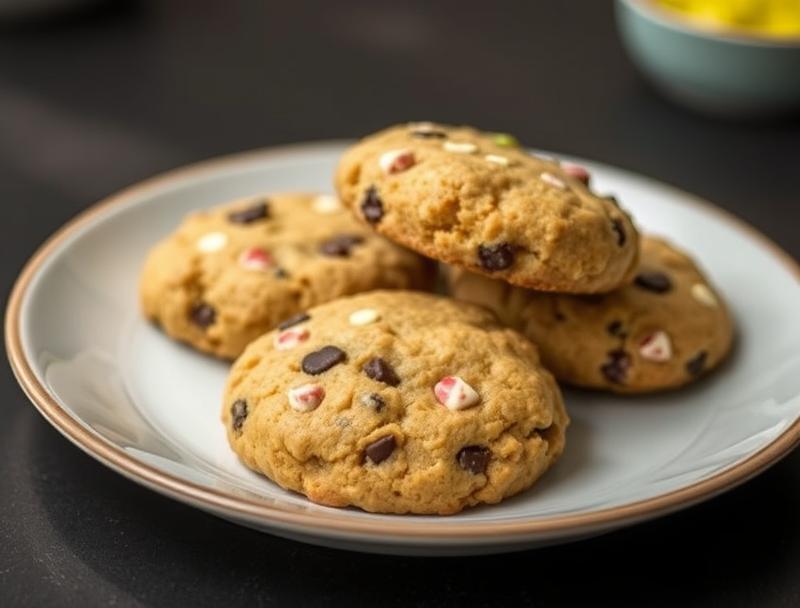
Imagine sinking your teeth into a soft, chewy cookie that not only tantalizes your taste buds but also provides a boost of protein to keep you going throughout the day. The Protein-Packed Yogurt Cookies Recipe is a game-changer for anyone looking to combine delicious flavor with nutritional value. Using everyday ingredients and requiring minimal effort, this recipe is perfect for a quick snack or as a post-workout treat. The best part? It’s incredibly easy to make and allows for a lot of creativity, so feel free to experiment with different flavors and ingredients to make it your own.
Why This Works
- The balance of flavors in these cookies, combined with the accessibility of the ingredients, makes them a hit with both kids and adults. The use of yogurt adds a tangy flavor and extra moisture, while the protein powder ensures you’re getting a dose of protein in each bite.
- The ease of preparation is another significant advantage. With just a few simple steps, you can have a batch of these delicious cookies ready to go. Whether you’re a seasoned baker or a beginner in the kitchen, this recipe is straightforward and hard to mess up.
- Despite the simplicity of the recipe, the results are impressive. The cookies turn out soft, flavorful, and packed with protein, making them perfect for a variety of occasions. Whether you’re looking for a healthy snack, a post-workout treat, or a fun baking project to do with the kids, these cookies are sure to please.
Ingredients
- 1 cup rolled oats
- 1/2 cup protein powder of your choice
- !/2 cup plain Greek yogurt
- 1/4 cup honey or maple syrup
- 1 large egg
- 1/2 teaspoon vanilla extract
- 1/4 teaspoon baking soda
- 1/4 teaspoon salt
- Optional: nuts, chocolate chips, or dried fruit for added flavor and texture
Instructions
- Step 1: Preheat and Prep – Preheat your oven to 375°F (190°C). Line a baking sheet with parchment paper or a silicone mat. In a large bowl, whisk together the oats, protein powder, baking soda, and salt.
- Step 2: Mix the Wet Ingredients – In a separate bowl, whisk together the yogurt, honey or maple syrup, egg, and vanilla extract until smooth.
- Step 3: Combine Wet and Dry Ingredients – Add the wet ingredients to the dry ingredients and stir until a dough forms. If using, add in your choice of nuts, chocolate chips, or dried fruit and fold them into the dough.
- Step 4: Scoop and Bake – Scoop tablespoon-sized balls of dough onto the prepared baking sheet, leaving about 2 inches of space between each cookie. Bake for 10-12 minutes or until the edges are lightly golden.
Handy Tips
- Make sure to not overmix the dough, as this can lead to tough cookies. Stop mixing as soon as the ingredients come together in a cohesive ball.
- If you find the dough too sticky, you can refrigerate it for about 30 minutes to firm it up before scooping the cookies.
- For an extra crispy exterior and chewy interior, bake the cookies for 8 minutes, then broil for an additional 1-2 minutes, watching carefully to avoid burning.
Heat Control
When baking these cookies, it’s essential to keep an eye on them, especially if you’re using a convection oven or an oven that runs hot. The ideal temperature is 375°F (190°C), and the cookies are done when the edges are lightly golden. If you prefer a softer cookie, bake for 8-10 minutes. For a crisper cookie, bake for 12-14 minutes.
Crunch Factor
The texture of these cookies can vary based on your preferences and the add-ins you choose. For a crunchier cookie, consider adding nuts or seeds. For a chewier cookie, bake for the minimum recommended time and avoid overbaking. The yogurt helps keep the cookies moist, but overbaking can still result in a dry cookie.
Pro Kitchen Tricks
- For easier cleanup, line your baking sheet with parchment paper or a silicone mat. This will prevent the cookies from sticking and make removing them a breeze.
- Experiment with different flavors of protein powder or add a teaspoon of your favorite extract (like almond or coconut) to the dough for unique flavor profiles.
- Consider using a cookie scoop to portion out the dough. This will give your cookies a uniform size and make the baking process more efficient.
Storage Tips
- These cookies are best stored in an airtight container at room temperature for up to 5 days. You can also freeze them for up to 2 months and thaw as needed.
- For freezing, place the cookies in a single layer in a freezer-safe bag or container to prevent them from sticking together. When you’re ready for a cookie, simply thaw at room temperature or refrigerate overnight.
- Reheating is not necessary, but if you prefer your cookies warm, you can microwave one for 10-15 seconds or bake in a preheated oven at 350°F (180°C) for a few minutes.
Gift Packaging Ideas
If you’re looking to give these cookies as a gift, consider packaging them in decorative jars or tins. You can add a ribbon around the lid and include a gift tag with the ingredients used, in case of any dietary restrictions. Another idea is to place the cookies in cellophane bags and tie the top with a twist tie or a piece of ribbon. This is a thoughtful and healthy gift option for friends, family, or coworkers.
Flavor Variations
- Different spices: Try adding a pinch of cinnamon, nutmeg, or cardamom to the dough for a unique twist.
- Creative toppings: Press a few chocolate chips, nuts, or dried cranberries into the top of each cookie before baking for added flavor and texture.
- Ingredient swaps: Replace the honey with maple syrup for a different flavor profile, or use almond yogurt instead of Greek yogurt for a non-dairy option.
Troubleshooting
- Texture problems: If your cookies turn out too dry, they may have been overbaked. Try reducing the baking time. If they’re too moist, you can bake them for a minute or two longer.
- Ingredient replacements: If you don’t have a specific ingredient, look for substitutions in the recipe notes or online. Common replacements include using different types of milk or yogurt and swapping one type of sugar for another.
- Over/undercooking signs: Keep an eye on your cookies while they’re baking. They’re done when the edges are lightly golden. If you prefer a chewier cookie, take them out when they’re lightly set and still slightly soft to the touch.
FAQs
- Can I freeze it? Yes, these cookies freeze well. Simply place them in a freezer-safe bag or container and thaw as needed.
- Is it gluten-free? Depending on the type of protein powder and oats used, these cookies can be gluten-free. Always check the ingredient labels to ensure they meet your dietary needs.
- Can I double the recipe? Yes, you can easily double or triple this recipe if you need to make a larger batch. Just keep an eye on the cookies while they’re baking, as the baking time might be slightly longer for a larger batch.
Conclusion
With the Protein-Packed Yogurt Cookies Recipe, you have a versatile and delicious treat that combines the best of flavor and nutrition. Whether you’re a fitness enthusiast looking for a post-workout snack, a parent seeking healthy options for your kids, or simply someone who loves baking, this recipe is sure to become a favorite. Don’t hesitate to experiment with different ingredients and flavors to make it your own, and enjoy the process of creating something truly special. Happy baking!
Protein-Packed Yogurt Cookies Recipe
A delicious and healthy cookie recipe packed with protein, using yogurt and protein powder, perfect for a snack or post-workout treat.
🥘 Ingredients
👩🍳 Instructions
-
1Preheat the oven to 375°F (190°C).
-
2Whisk together the dry ingredients in a large bowl.
-
3Mix the wet ingredients in a separate bowl until smooth.
-
4Combine the wet and dry ingredients and stir until a dough forms.
-
5Scoop tablespoon-sized balls of dough onto a prepared baking sheet and bake for 10-12 minutes.