Decadent Brownie Ice Cream Cake Delight
Introduction
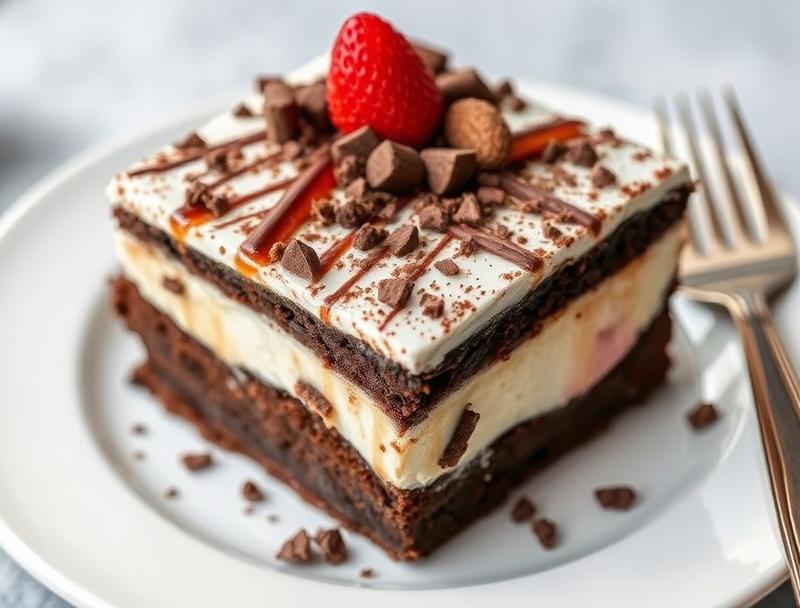
Imagine a rich, velvety ice cream nestled between layers of gooey, chocolatey brownie, all coming together in a delightful cake that’s as easy to make as it is impressive to serve. The Decadent Brownie Ice Cream Cake Delight is a masterpiece of flavors and textures, perfect for special occasions or simply satisfying your sweet tooth. Using everyday ingredients and requiring minimal effort, this cake is a testament to the magic that happens when creativity meets simplicity in the kitchen. Whether you’re a seasoned baker or a beginner looking to wow your family and friends, this recipe is sure to become a favorite.
Why This Works
- Flavor balance and ingredient accessibility: The combination of deep, dark chocolate brownies and creamy ice cream creates a perfect harmony of flavors, while the use of common ingredients makes it accessible to anyone.
- Ease of preparation: Despite its decadent appearance, this cake is surprisingly easy to prepare, with straightforward steps that guide you through the process.
- Impressive results with minimal effort: The layering of brownie and ice cream creates a visually stunning dessert that’s sure to impress, all without requiring extensive culinary skills.
Ingredients
- 1 and 1/2 sticks of unsalted butter, plus more for greasing the pan
- 2 cups of sugar
- 4 large eggs
- 1/2 cup of unsweetened cocoa powder
- 1 teaspoon of vanilla extract
- 1 and 1/4 cups of all-purpose flour
- 1 teaspoon of salt
- 1 cup of semi-sweet chocolate chips
- 1 and 1/2 quarts of your favorite ice cream (we recommend a neutral flavor like vanilla to balance the richness of the brownie)
- Whipped cream and chocolate shavings for garnish, optional
Instructions
- Step 1: Preheat your oven to 350°F (180°C). Grease a 9×13-inch baking pan and line it with parchment paper, leaving some overhang for easy removal.
- Step 2: In a medium bowl, whisk together the flour and salt. Set aside. In a large bowl, use an electric mixer to beat together the butter and sugar until light and fluffy. Beat in the eggs one at a time, followed by the cocoa powder and vanilla extract.
- Step 3: Gradually mix in the flour mixture until just combined, being careful not to overmix. Stir in the chocolate chips. Pour the batter into the prepared baking pan and smooth the top.
- Step 4: Bake for 25-30 minutes or until a toothpick inserted into the center comes out with a few moist crumbs attached. Let the brownie cool completely in the pan.
- Step 5: Once the brownie is cool, use the overhanging parchment paper to lift it out of the pan and transfer it to a large serving plate or cake stand. Scoop your ice cream on top of the brownie, spreading it evenly to cover the entire surface.
- Step 6: Place the cake in the freezer for at least 30 minutes to set the ice cream. Just before serving, garnish with whipped cream and chocolate shavings if desired.
Handy Tips
- For a cleaner cut, dip your knife in hot water and wipe it dry before slicing the cake. This will help prevent the brownie and ice cream from tearing.
- Consider using high-quality chocolate for the best flavor. If you’re looking for a lighter version, you can reduce the amount of sugar in the brownie recipe.
- Don’t overbake the brownie, as it can become dry. A slightly underbaked texture will be perfect once it’s cooled and paired with the ice cream.
Heat Control
The ideal temperature for baking the brownie is 350°F (180°C), and the baking time should be between 25-30 minutes. Keep an eye on the brownie after 20 minutes, as oven times can vary. It’s done when a toothpick inserted into the center comes out with a few moist crumbs attached, indicating it’s cooked through but still retains its moisture.
Crunch Factor
The crunch factor in this dessert comes from the edges of the brownie, which should be slightly firmer than the center. If you prefer a crunchier brownie throughout, you can bake it for an additional 2-3 minutes, but be cautious not to overcook. The contrast between the crunchy brownie edges and the smooth ice cream is part of what makes this dessert so delightful.
Pro Kitchen Tricks
- Use room temperature ingredients for the best results in your brownie. This ensures that the butter and eggs mix smoothly and evenly, contributing to a better texture.
- Don’t overmix the batter, as this can lead to a dense brownie. Stop mixing as soon as the ingredients come together in a cohesive mass.
- For an extra-decadent treat, consider adding nuts, caramel sauce, or even candy pieces to your brownie batter for added texture and flavor.
Storage Tips
- The brownie can be baked ahead of time and stored at room temperature for up to 2 days or frozen for up to 2 months. Once assembled with ice cream, the cake is best served immediately but can be stored in the freezer for up to 3 days.
- When storing, make sure the cake is tightly covered with plastic wrap or aluminum foil to prevent freezer burn and other flavors from affecting the taste.
- For reheating or serving, remove the cake from the freezer and let it sit at room temperature for about 10-15 minutes to soften slightly, making it easier to slice and serve.
Gift Packaging Ideas
If you’re considering gifting this delightful cake, you might want to package it in a decorative tin or a sturdy cardboard box lined with parchment paper to keep it fresh and protected. Wrap the box in colorful paper or a gift bag, and don’t forget to include a personalized note or card. For a more rustic look, you could also wrap the cake itself in wax paper or brown paper, tied with a ribbon or twine, adding a charming, homemade touch to your gift.
Flavor Variations
- Different spices: Consider adding a pinch of salt or a teaspoon of espresso powder to the brownie batter for a deeper flavor profile.
- Creative toppings: Instead of whipped cream and chocolate shavings, try topping your cake with fresh fruits, caramel sauce, or even a sprinkle of cinnamon or cocoa powder.
- Ingredient swaps: For a gluten-free version, replace the all-purpose flour with a gluten-free flour blend. You can also experiment with different types of ice cream or add-ins like nuts or candy pieces to the brownie batter.
Troubleshooting
- Texture problems: If your brownie turns out too dense, it might be due to overmixing the batter. If it’s too dry, it could be overbaked. Adjust your mixing and baking times accordingly in future attempts.
- Ingredient replacements: If you’re out of a particular ingredient, look for substitutes. For example, you can use coconut sugar instead of granulated sugar or almond extract instead of vanilla.
- Over/undercooking signs: Keep an eye on your brownie while it’s baking. If the edges start to pull away from the pan and the center is set, it’s done. If you notice it’s browning too quickly, cover the top with foil to prevent overcooking.
FAQs
- Can I freeze it? Yes, you can freeze the brownie on its own for up to 2 months or the assembled cake for up to 3 days.
- Is it gluten-free? Not in its original form, but you can make it gluten-free by substituting the all-purpose flour with a gluten-free flour blend.
- Can I double the recipe? Yes, you can double the recipe to make a larger cake. Just keep in mind that you’ll need to adjust the baking time accordingly, likely adding an extra 10-15 minutes.
Conclusion
The Decadent Brownie Ice Cream Cake Delight is a true showstopper, offering a delightful combination of rich, chocolatey brownie and creamy ice cream that’s sure to impress anyone. With its straightforward preparation and use of accessible ingredients, this cake is perfect for both beginners and experienced bakers looking to create something special. Feel free to experiment with different flavors and toppings to make it your own, and don’t hesitate to share your creations with friends and family. Happy baking, and enjoy the delightful experience of indulging in this decadent treat!
Decadent Brownie Ice Cream Cake Delight
A rich, velvety ice cream nestled between layers of gooey, chocolatey brownie, perfect for special occasions or satisfying your sweet tooth.
🥘 Ingredients
👩🍳 Instructions
-
1Preheat oven to 350°F (180°C). Grease a 9x13-inch baking pan and line it with parchment paper.
-
2Whisk together flour and salt. Set aside.
-
3Beat together butter and sugar until light and fluffy. Beat in eggs one at a time, followed by cocoa powder and vanilla extract.
-
4Gradually mix in flour mixture until just combined. Stir in chocolate chips.
-
5Pour batter into prepared baking pan and smooth top. Bake for 25-30 minutes or until a toothpick inserted into the center comes out with a few moist crumbs attached.
-
6Let brownie cool completely in pan. Once cool, lift out of pan and transfer to a large serving plate or cake stand.
-
7Scoop ice cream on top of the brownie, spreading evenly to cover the entire surface. Place in freezer for at least 30 minutes to set the ice cream.
-
8Just before serving, garnish with whipped cream and chocolate shavings if desired.