Easy No-Bake Chocolate Mousse Cake Recipe
Introduction
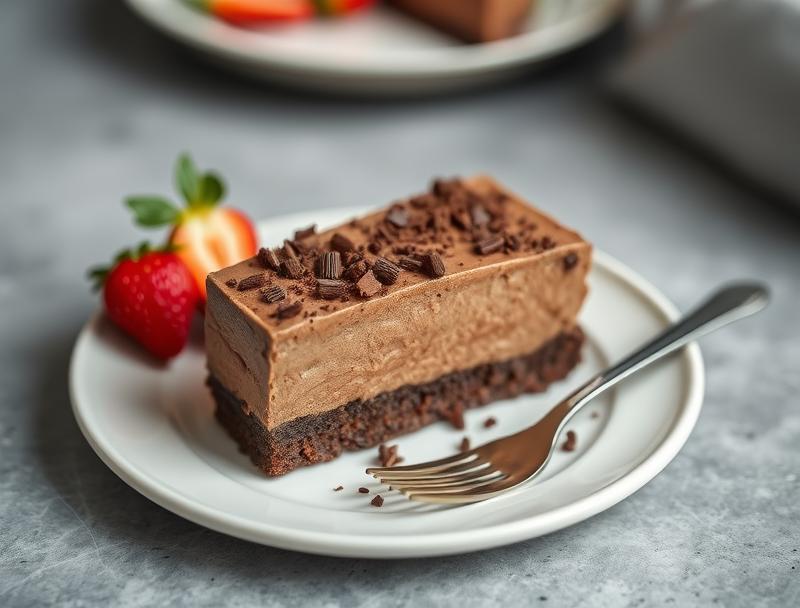
Indulge in the rich flavors of chocolate without the hassle of baking with our Easy No-Bake Chocolate Mousse Cake Recipe. This decadent dessert is perfect for anyone looking to satisfy their sweet tooth without spending hours in the kitchen. Using everyday ingredients, you can create a masterpiece that’s both impressive and delicious. The best part? It’s incredibly easy to make, requiring no baking skills whatsoever. Whether you’re a chocolate lover, a busy parent, or an aspiring baker, this no-bake chocolate mousse cake is sure to become a favorite. So, let’s dive into the world of chocolatey goodness and explore how to make this heavenly dessert.
Why This Works
- The balance of flavors in this recipe, combining the richness of chocolate with the lightness of whipped cream, creates a truly indulgent taste experience that’s hard to resist.
- The ease of preparation is a significant advantage, as it requires minimal cooking skills and can be made in advance, perfect for busy schedules or special occasions.
- The impressive results with minimal effort make this recipe a standout. The layers of chocolate mousse, the smooth texture, and the elegant presentation will make you look like a professional pastry chef without the need for extensive training or equipment.
Ingredients
- 1 1/2 cups of heavy cream
- 1/2 cup of granulated sugar
- 8 ounces of high-quality dark chocolate (at least 70% cocoa), broken into small pieces
- 1/2 cup of unsalted butter, softened
- 2 large eggs
- 1 teaspoon of vanilla extract
- 1 1/2 cups of chocolate sandwich cookies (e.g., Oreos), crushed
- Fresh berries or chocolate shavings for garnish (optional)
Instructions
- Step 1: Prepare the Crust – In a medium bowl, mix together the crushed cookies and melted butter until well combined. Press the mixture into the bottom of a 9-inch springform pan. Refrigerate for at least 30 minutes to set.
- Step 2: Make the Chocolate Mousse – In a double boiler or a heatproof bowl set over a pot of simmering water, melt the chocolate, stirring occasionally. In a separate bowl, whip the heavy cream until stiff peaks form. Set aside. In another bowl, whisk together the egg yolks, sugar, and vanilla extract. Once the chocolate has melted, let it cool slightly, then whisk it into the egg yolk mixture. Fold the whipped cream into the chocolate mixture until no white streaks remain.
- Step 3: Assemble the Cake – Pour the chocolate mousse over the prepared crust. Smooth the top with a spatula. Refrigerate for at least 4 hours or overnight to allow the mousse to set.
- Step 4: Final Touches – Once set, remove the cake from the refrigerator about 30 minutes before serving. Release the springform pan sides and transfer the cake to a serving plate. Garnish with fresh berries or chocolate shavings, if desired. Slice and serve.
Handy Tips
- For a lighter texture, make sure not to overmix the chocolate mousse. Fold the whipped cream into the chocolate mixture gently until just combined.
- To ensure the cake sets properly, refrigerate it for at least 4 hours. This step is crucial for the mousse to firm up and hold its shape when sliced.
- Experiment with different types of chocolate for varying flavor profiles. Milk chocolate will give a sweeter taste, while white chocolate can add a creamy and vanilla-flavored dimension to your cake.
Heat Control
Since this is a no-bake recipe, heat control is minimal. However, when melting the chocolate, ensure the water in the double boiler doesn’t boil vigorously, as this can cause the chocolate to seize. A low, simmering heat is ideal for melting chocolate smoothly and evenly.
Crunch Factor
The crunch in this dessert comes from the cookie crust. To achieve a nice crunch, press the cookie mixture firmly into the pan and refrigerate until set. This will provide a satisfying textural contrast to the smooth chocolate mousse.
Pro Kitchen Tricks
- To prevent the chocolate from seizing when melting, avoid introducing any moisture. Ensure all utensils and the bowl are completely dry before starting.
- For a professional finish, smooth the top of the mousse with a hot spatula before refrigerating. Dip the spatula in hot water, wipe it dry with a towel, and then smooth the mousse for a flawless surface.
Storage Tips
- Store the cake in the refrigerator, covered with plastic wrap or aluminum foil, for up to 3 days.
- Freezing is not recommended for this cake, as the texture of the mousse may become icy. However, if you must freeze it, wrap the cake tightly in plastic wrap and then in aluminum foil. Freeze for up to 2 months and thaw overnight in the refrigerator before serving.
Gift Packaging Ideas
This cake makes a wonderful gift, especially for chocolate lovers. Consider packaging it in a decorative cake box or wrapping it in cellophane and tying with a ribbon. You could also add a personal touch with a handwritten note or a small bag of gourmet chocolates on the side.
Flavor Variations
- Try adding a teaspoon of espresso powder to the chocolate mousse for a mocha flavor.
- Use different types of cookies for the crust, like peanut butter cookies for a peanut butter and chocolate combination.
- Experiment with liqueurs like Grand Marnier or Cointreau for an adult-only twist, adding a couple of tablespoons to the melted chocolate for extra depth of flavor.
Troubleshooting
- If the chocolate seizes when melting, it’s likely due to moisture. Start over with dry utensils and a clean, dry bowl.
- If the mousse doesn’t set, it might be due to overmixing or not refrigerating it long enough. Try refrigerating it for a few more hours or making a fresh batch with gentler folding techniques.
FAQs
- Can I freeze it? – While not recommended due to potential texture changes, you can freeze the cake for up to 2 months. Thaw overnight in the refrigerator before serving.
- Is it gluten-free? – Depending on the type of cookies used for the crust, this cake can be gluten-free. Choose gluten-free cookies to accommodate dietary restrictions.
- Can I double the recipe? – Yes, you can double the recipe, but be sure to use a larger pan to accommodate the increased volume of the mousse and crust.
Conclusion
Making an Easy No-Bake Chocolate Mousse Cake is a delightful adventure that combines the simplicity of no-bake desserts with the sophistication of a chocolate mousse cake. With its rich, velvety texture and deep chocolate flavor, this cake is sure to impress both family and friends. Don’t be afraid to experiment with different flavors and toppings to make it your own. Whether you’re a seasoned baker or a beginner in the kitchen, this recipe is a must-try for anyone with a sweet tooth and a love for chocolate. So, go ahead, indulge in the chocolatey goodness, and enjoy the process of creating something truly special.
Easy No-Bake Chocolate Mousse Cake Recipe
A rich and decadent no-bake chocolate mousse cake made with dark chocolate, heavy cream, and a crunchy cookie crust.
🥘 Ingredients
👩🍳 Instructions
-
1Prepare the crust by mixing crushed cookies and melted butter, then press into a 9-inch springform pan.
-
2Melt the chocolate in a double boiler, then whip the heavy cream until stiff peaks form.
-
3Fold the whipped cream into the melted chocolate, then pour over the prepared crust.
-
4Refrigerate for at least 4 hours or overnight to allow the mousse to set.