Heartfelt Slice and Bake Cookies Recipe
Introduction
Imagine walking into a cozy kitchen filled with the warm, comforting aroma of freshly baked cookies, made with love and care, using everyday ingredients that are easily accessible. The Heartfelt Slice and Bake Cookies Recipe is more than just a recipe; it’s an experience that combines ease, flavor, and creativity, allowing you to express your love and care through the simple act of baking. With this recipe, you’ll discover how to create delicious, chewy cookies that are perfect for any occasion, from family gatherings to gift-giving, using a straightforward method that requires minimal effort but yields impressive results.
Why This Works
- Flavor balance and ingredient accessibility: This recipe strikes a perfect balance between sweet and savory, using common ingredients like butter, sugar, eggs, and flour, making it easy to whip up a batch whenever the mood strikes.
- Ease of preparation: The slice and bake method simplifies the cookie-making process, eliminating the need to scoop individual balls of dough, thus saving time and reducing mess.
- Impressive results with minimal effort: Despite its simplicity, this recipe produces cookies that are not only delicious but also visually appealing, with a perfect balance of crunch and chew, making them a hit with both kids and adults.
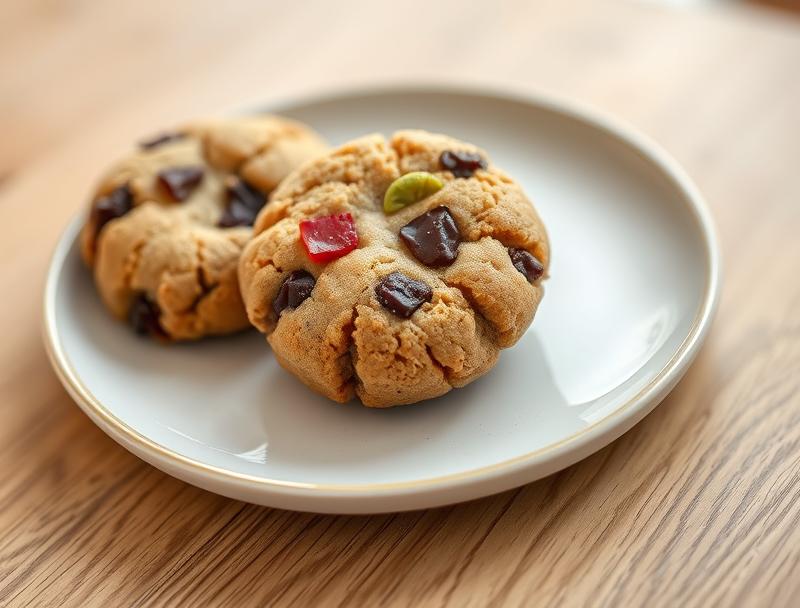
Ingredients
- 2 1/4 cups all-purpose flour
- 1 tsp baking soda
- 1 tsp salt
- 1 cup unsalted butter, softened
- 3/4 cup white granulated sugar
- 1 cup brown sugar
- 2 large eggs
- 2 teaspoons pure vanilla extract
- Optional: chocolate chips, nuts, or dried fruits for added flavor and texture
Instructions
- Step 1: Preparation – Begin by preheating your oven to 375°F (190°C). Line a baking sheet with parchment paper or a silicone mat. In a medium bowl, whisk together the flour, baking soda, and salt. Set aside.
- Step 2: Mixing the Dough – In a large bowl, use an electric mixer to cream together the butter and sugars until light and fluffy, about 2-3 minutes. Beat in the eggs one at a time, followed by the vanilla extract.
- Step 3: Combining Wet and Dry Ingredients – Gradually mix in the dry ingredients (flour mixture) until just combined, being careful not to overmix. If using, add your choice of chocolate chips, nuts, or dried fruits and fold them into the dough.
- Step 4: Forming the Log – Turn the dough out onto a lightly floured surface and knead it a few times until it comes together. Form the dough into a log, about 2 inches in diameter. Wrap the log in plastic wrap or parchment paper and refrigerate for at least 30 minutes or up to 2 days.
- Step 5: Slicing and Baking – Remove the dough log from the refrigerator and let it sit at room temperature for 10-15 minutes. Slice the log into 1/2-inch thick rounds. Place the slices onto the prepared baking sheet, leaving about 2 inches of space between each cookie. Bake for 12-15 minutes or until the edges are lightly golden.
- Step 6: Cooling – Remove the cookies from the oven and let them cool on the baking sheet for 5 minutes before transferring them to a wire rack to cool completely.
Handy Tips
- For a crisper cookie, bake for 15-18 minutes. For a chewier cookie, bake for 10-12 minutes.
- Consider using a variety of mix-ins like peanut butter chips, oats, or candy pieces to create different flavor combinations.
- To ensure the cookies retain their shape, chill the dough log thoroughly before slicing and baking.
Heat Control
Maintaining the right oven temperature is crucial for achieving the perfect texture. Ideally, your oven should be at 375°F (190°C). Keep an eye on the cookies after 10 minutes of baking, as the baking time may vary depending on your oven and the thickness of the slices. Look for lightly golden edges and a set center as signs of doneness.
Crunch Factor
The crunch factor in these cookies comes from the edges, which should be lightly golden and crisp, while the centers remain chewy. To achieve this, ensure you don’t overbake the cookies. If you prefer a crunchier cookie throughout, you can bake them for an additional 2-3 minutes, but be cautious not to overdo it.
Pro Kitchen Tricks
- Use room temperature ingredients for better dough consistency and easier mixing.
- Don’t overmix the dough, as this can lead to tough cookies.
- For uniform cookies, try to make slices of equal thickness.
Storage Tips
- Cookies can be stored in an airtight container at room temperature for up to 5 days.
- For longer storage, consider freezing the baked cookies in airtight containers or freezer bags for up to 2 months. Simply thaw at room temperature when you’re ready to enjoy them.
- The dough log can also be frozen for up to 2 months. Thaw overnight in the refrigerator before slicing and baking.
Gift Packaging Ideas
These cookies make wonderful gifts, especially when packaged in decorative jars, tins, or bags. Consider adding a personal touch with a handwritten note or a ribbon. For a more festive look, you can arrange the cookies in a pattern on a platter or tray, perfect for holiday gatherings or potlucks.
Flavor Variations
- Different spices: Try adding a pinch of cinnamon, nutmeg, or cardamom to the dough for unique flavor profiles.
- Creative toppings: Before baking, top the cookie slices with a sprinkle of sea salt, chopped nuts, or shredded coconut for added texture and flavor.
- Ingredient swaps: Substitute some of the all-purpose flour with oat flour or almond flour for a different nutritional profile and flavor.
Troubleshooting
- Texture problems: If your cookies turn out too hard, they may have been overbaked. If they’re too soft, they might have been underbaked.
- Ingredient replacements: If you’re out of a particular ingredient, consider what you can substitute it with. For example, brown sugar can be replaced with a mixture of white sugar and molasses.
- Over/undercooking signs: Keep an eye on your cookies while they’re baking. They’re done when the edges are lightly golden and the centers are set.
FAQs
- Can I freeze the dough? Yes, you can freeze the dough log for up to 2 months. Simply thaw it in the refrigerator overnight before slicing and baking.
- Is this recipe gluten-free? No, this recipe uses all-purpose flour and is not gluten-free. However, you can experiment with gluten-free flours as substitutes, though the texture may vary.
- Can I double the recipe? Yes, you can easily double or triple this recipe if you’re baking for a large crowd. Just be sure to adjust the baking time slightly, as more cookies on the baking sheet can affect how they bake.
Conclusion
The Heartfelt Slice and Bake Cookies Recipe is a versatile and delicious addition to any baker’s repertoire. With its ease of preparation, impressive results, and the joy of sharing freshly baked goods with loved ones, this recipe is sure to become a favorite. Feel free to experiment with different flavors and ingredients to make it your own, and don’t hesitate to share your creations with friends and family. Happy baking!
Heartfelt Slice and Bake Cookies Recipe
A delicious and easy slice and bake cookie recipe perfect for any occasion, with a balance of crunch and chew.
🥘 Ingredients
👩🍳 Instructions
-
1Preheat oven to 375°F (190°C).
-
2Prepare the dough by mixing the wet and dry ingredients separately and then combining them.
-
3Form the dough into a log and chill for at least 30 minutes.
-
4Slice the log into 1/2-inch thick rounds and bake for 12-15 minutes or until lightly golden.
-
5Cool the cookies on the baking sheet for 5 minutes before transferring them to a wire rack to cool completely.