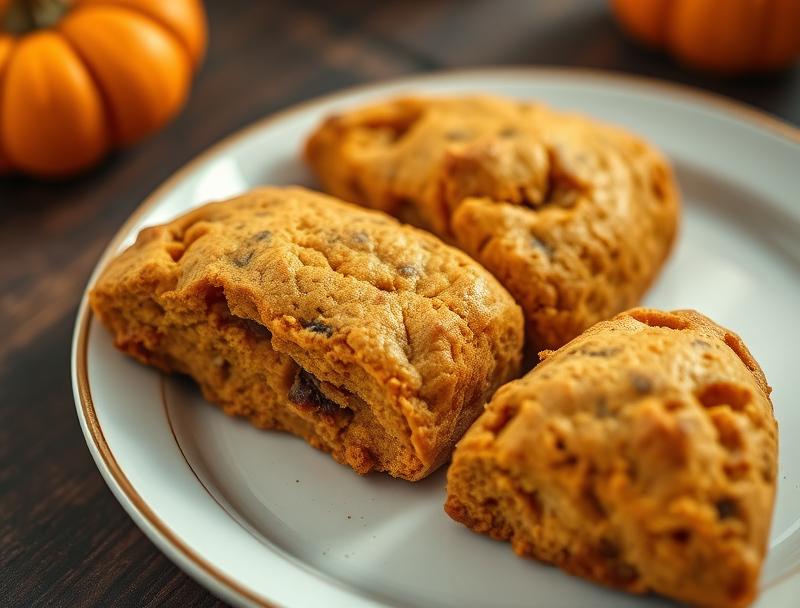
Fall in Love with Irresistible Pumpkin Scones
Introduction
As the autumn leaves start to fall and the air fills with the warm scent of pumpkin spice, our hearts and stomachs crave something cozy and delicious. That’s where these irresistible pumpkin scones come in – a perfect blend of fall flavors, ease of preparation, and creativity that will make your taste buds dance with joy. Made with everyday ingredients, these scones are a masterpiece of comfort food that can be enjoyed on a chilly morning with a warm cup of coffee or as a sweet treat any time of the day. Whether you’re a seasoned baker or a beginner in the kitchen, this recipe is designed to guide you through the process with simplicity and flair, ensuring that your pumpkin scones turn out light, fluffy, and irresistibly delicious.
Why This Works
- Flavor balance and ingredient accessibility: The combination of pumpkin puree, cinnamon, nutmeg, and a hint of ginger creates a flavor profile that is quintessentially autumnal, while using ingredients that are easily found in most supermarkets.
- Ease of preparation: The recipe is straightforward and requires minimal specialized equipment, making it accessible to bakers of all skill levels.
- Impressive results with minimal effort: Despite the simplicity of the recipe, the end result is a batch of scones that look and taste like they were baked in a professional bakery, perfect for impressing friends and family.
Ingredients
- 2 cups all-purpose flour
- 1/2 cup granulated sugar
- 1/2 cup cold unsalted butter, cut into small pieces
- 3/4 cup pumpkin puree
- 1/2 teaspoon salt
- 1/2 teaspoon baking powder
- 1/2 teaspoon ground cinnamon
- 1/4 teaspoon ground nutmeg
- 1/4 teaspoon ground ginger
- 3/4 cup heavy cream, plus more for brushing
- 1 large egg, beaten (for egg wash)
- Confectioners’ sugar, for dusting (optional)
Instructions
- Step 1: Preheat your oven to 400°F (200°C). Line a baking sheet with parchment paper.
- Step 2: In a large bowl, whisk together the flour, sugar, salt, baking powder, cinnamon, nutmeg, and ginger. Add the cold butter and use a pastry blender or your fingers to work it into the dry ingredients until the mixture resembles coarse crumbs.
- Step 3: In a separate bowl, whisk together the pumpkin puree and heavy cream until well combined. Pour the wet ingredients into the dry ingredients and stir until the dough comes together in a shaggy mass.
- Step 4: Turn the dough out onto a floured surface and gently knead it a few times until it comes together. Pat the dough into a circle that is about 1 inch thick. Use a biscuit cutter or the rim of a glass to cut out scones. Gather the scraps, re-form the dough, and cut out additional scones.
- Step 5: Place the scones on the prepared baking sheet, leaving about 1 inch of space between each scone. Brush the tops with a little extra heavy cream and use a sharp knife to make a couple of slight cuts on the top of each scone.
- Step 6: Bake the scones for 18-20 minutes, or until they are golden brown. Remove them from the oven and let them cool on a wire rack for 10-15 minutes before serving. Brush with beaten egg for a glaze, if desired, and dust with confectioners’ sugar.
Handy Tips
- Make sure your ingredients, especially the butter and cream, are cold, as this will help the scones to rise and give them a flaky texture.
- Don’t overmix the dough, as this can lead to tough scones. Stop mixing as soon as the ingredients come together in a shaggy mass.
- Use fresh spices for the best flavor. If you’re using ground spices that have been sitting in your pantry for a while, consider refreshing them with new ones for optimal taste.
Heat Control
The ideal temperature for baking these scones is 400°F (200°C). It’s crucial to preheat your oven to this temperature to ensure that the scones bake evenly and rise properly. The baking time is approximately 18-20 minutes, or until the scones are golden brown. Keep an eye on them after 15 minutes, as oven temperatures can vary. The scones are done when they are firm to the touch and golden brown on top.
Crunch Factor
These pumpkin scones are designed to be light and fluffy on the inside with a slightly crispy exterior. To achieve this texture, make sure not to overbake them. The crust should be golden and firm to the touch, but still yield to pressure. If you prefer a crunchier top, you can brush the scones with a little extra cream and sprinkle with granulated sugar before baking.
Pro Kitchen Tricks
- For an extra-flaky texture, try folding the dough over on itself a couple of times after you’ve mixed the wet and dry ingredients together. This technique, known as “folding,” helps to create layers in the dough.
- To ensure that your scones bake evenly, rotate the baking sheet halfway through the baking time.
- Consider using a pastry blender to work the butter into the flour mixture. This tool helps to break down the butter into small pieces quickly and evenly, which is essential for creating a flaky texture.
Storage Tips
- These scones are best served fresh, but they can be stored in an airtight container at room temperature for up to 2 days.
- For longer storage, consider freezing the scones. Place them on a baking sheet lined with parchment paper and put it in the freezer until they are frozen solid. Then, transfer the frozen scones to a freezer-safe bag or container for up to 2 months. To reheat, simply bake frozen scones in a preheated oven at 350°F (180°C) for about 10-12 minutes, or until warmed through.
- When reheating scones, you can also wrap them in foil and heat them in the oven at 300°F (150°C) for a few minutes. This method helps retain moisture and warmth without drying out the scones.
Gift Packaging Ideas
These pumpkin scones make a wonderful gift, especially during the fall season. Consider packaging them in a decorative tin or a paper bag tied with twine and a fall-themed tag. You could also wrap individual scones in plastic wrap or aluminum foil and place them in a gift basket filled with other autumnal treats, such as apple cider, maple syrup, or a selection of teas. For a more rustic look, wrap the scones in a piece of parchment paper and tie with a ribbon. Don’t forget to include a handwritten note with the recipe or a few suggestions for how to enjoy the scones, such as with a pat of butter and a drizzle of honey.
Flavor Variations
- Different spices: Try adding a pinch of ground cloves or cardamom to the dough for a unique twist on the traditional pumpkin spice blend.
- Creative toppings: Instead of dusting the scones with confectioners’ sugar, try topping them with a cream cheese frosting, a drizzle of caramel sauce, or a sprinkle of chopped nuts.
- Ingredient swaps: For a gluten-free version, substitute the all-purpose flour with a gluten-free flour blend. You can also use different types of milk or cream, such as almond milk or coconut cream, to create a dairy-free or vegan version of the scones.
Troubleshooting
- Texture problems: If your scones turn out too dense, it may be because the dough was overmixed. Try to mix the ingredients just until they come together, and avoid overworking the dough.
- Ingredient replacements: If you don’t have pumpkin puree, you can try using mashed sweet potatoes or butternut squash as a substitute.
- Over/undercooking signs: Keep an eye on your scones while they’re baking, and remove them from the oven when they’re golden brown. If they’re undercooked, they may be soft or squishy to the touch. If they’re overcooked, they may be dry or hard.
FAQs
- Can I freeze the dough instead of the baked scones? Yes, you can freeze the dough. Simply wrap it tightly in plastic wrap or aluminum foil and place it in a freezer-safe bag. Frozen dough will keep for up to 2 months. When you’re ready to bake, thaw the dough overnight in the refrigerator, then proceed with the recipe as instructed.
- Is this recipe gluten-free? No, this recipe uses all-purpose flour and is not gluten-free. However, you can try substituting the flour with a gluten-free flour blend to create a gluten-free version of the scones.
- Can I double the recipe? Yes, you can easily double the recipe to make a larger batch of scones. Just keep in mind that you may need to adjust the baking time slightly, as the scones may take a few minutes longer to cook through.
Conclusion
With these irresistible pumpkin scones, you’ll be embracing the warmth and coziness of the fall season in no time. Whether you’re a fan of pumpkin spice, a lover of comfort food, or just looking for a delicious treat to brighten up your day, this recipe has something for everyone. So go ahead, get baking, and share the joy of these scrumptious scones with your friends and family. Don’t be afraid to experiment with different flavors and ingredients, and most importantly, have fun and enjoy the process of creating something truly special. Happy baking, and let the aroma of freshly baked pumpkin scones fill your home with love and warmth!
Fall in Love with Irresistible Pumpkin Scones
A recipe for delicious pumpkin scones that are perfect for the fall season, made with everyday ingredients and requiring minimal effort for impressive results.
🥘 Ingredients
👩🍳 Instructions
-
1Preheat the oven to 400°F (200°C). Line a baking sheet with parchment paper.
-
2In a large bowl, whisk together the flour, sugar, salt, baking powder, cinnamon, nutmeg, and ginger. Add the cold butter and use a pastry blender or your fingers to work it into the dry ingredients until the mixture resembles coarse crumbs.
-
3In a separate bowl, whisk together the pumpkin puree and heavy cream until well combined. Pour the wet ingredients into the dry ingredients and stir until the dough comes together in a shaggy mass.
-
4Turn the dough out onto a floured surface and gently knead it a few times until it comes together. Pat the dough into a circle that is about 1 inch thick. Use a biscuit cutter or the rim of a glass to cut out scones. Gather the scraps, re-form the dough, and cut out additional scones.
-
5Place the scones on the prepared baking sheet, leaving about 1 inch of space between each scone. Brush the tops with a little extra heavy cream and use a sharp knife to make a couple of slight cuts on the top of each scone.
-
6Bake the scones for 18-20 minutes, or until they are golden brown. Remove them from the oven and let them cool on a wire rack for 10-15 minutes before serving. Brush with beaten egg for a glaze, if desired, and dust with confectioners' sugar.
-
7Serve warm and enjoy!