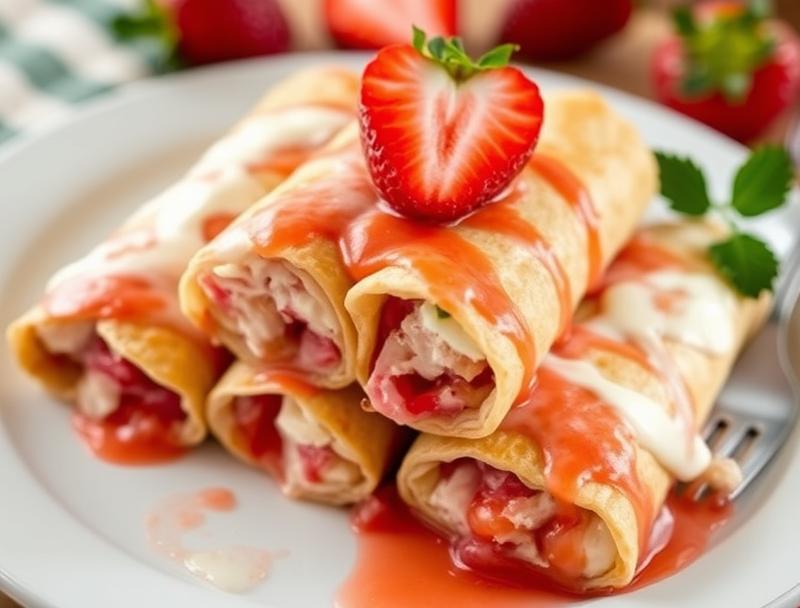
Strawberry Cheesecake Chimichangas (Crazy Easy & SO Good!)
Introduction
Imagine a dessert that combines the sweetness of strawberries, the richness of cheesecake, and the crunch of a chimichanga, all in one delightful package. Strawberry Cheesecake Chimichangas are not just a creative twist on traditional desserts; they’re also incredibly easy to make, requiring minimal effort for a show-stopping result. By using everyday ingredients in a new and exciting way, you can impress your family and friends with a dish that’s as much fun to eat as it is to make. The best part? It’s accessible to anyone, regardless of their baking skills, making it perfect for both beginners and seasoned bakers looking to try something new.
Why This Works
- The balance of flavors between the sweetness of the strawberries and the tanginess of the cheesecake filling creates a delightful taste experience that’s hard to resist.
- The accessibility of the ingredients means you can make this dessert without having to search for exotic or hard-to-find components, making it perfect for spontaneous baking sessions.
- The ease of preparation, combined with the impressive presentation of chimichangas, makes this dessert ideal for gatherings or special occasions where you want to make a good impression without spending hours in the kitchen.
Ingredients
- 1 package of large tortillas (for the chimichangas)
- 1 cup of strawberry jam or preserves
- 1 cup of cheesecake filling (store-bought or homemade)
- 1 cup of sliced strawberries
- 1/4 cup of granulated sugar
- 1/4 cup of melted butter
- 1 teaspoon of vanilla extract
- 1/2 teaspoon of cinnamon powder
- Whipped cream or powdered sugar (for garnish)
Instructions
- Step 1: Begin by preparing your filling. Mix the cheesecake filling with the granulated sugar, vanilla extract, and cinnamon powder until well combined.
- Step 2: Lay a tortilla flat and spread a layer of strawberry jam down the center of the tortilla, leaving a small border at the top. Add a spoonful of the cheesecake mixture on top of the jam, followed by a few slices of strawberry.
- Step 3: Fold the bottom edge of the tortilla up over the filling, then fold in the sides and roll the chimichanga up tightly. Repeat with the remaining tortillas and filling.
- Step 4: Heat about 1/2 inch of melted butter in a large skillet over medium heat. When the butter is hot, add a couple of the chimichangas to the skillet (do not overcrowd) and cook until they’re golden brown on all sides, about 2-3 minutes per side. Repeat with the remaining chimichangas.
- Step 5: Serve the chimichangas warm, dust with powdered sugar, or top with whipped cream and additional sliced strawberries if desired.
Handy Tips
- Make sure to not overfill the chimichangas, as this can make them difficult to seal and cook evenly.
- If using homemade cheesecake filling, ensure it’s chilled before using to make handling easier.
- For an extra crispy exterior, you can chill the assembled chimichangas in the refrigerator for about 30 minutes before frying.
Heat Control
When frying the chimichangas, it’s crucial to maintain a medium heat. If the heat is too high, the exterior will burn before the inside is heated through. Ideally, you want to reach a golden brown color on all sides, which should take about 2-3 minutes per side, depending on the heat and the size of your chimichangas. Always keep an eye on them to avoid burning.
Crunch Factor
The crunch factor in these chimichangas comes from the fried tortilla exterior, which provides a nice contrast to the soft cheesecake and strawberry filling. To achieve the perfect crunch, ensure the butter is hot before adding the chimichangas, and don’t overcrowd the skillet, as this can lower the oil temperature, resulting in a soggy exterior.
Pro Kitchen Tricks
- For a quicker method, you can bake the chimichangas in a preheated oven at 375°F (190°C) for about 15-20 minutes, or until crispy and golden, turning them halfway through the cooking time.
- Experiment with different types of jam or preserves, like raspberry or blueberry, for a unique flavor twist.
- Consider using leftover cheesecake or making a cheesecake specifically for this recipe to ensure the freshest flavor.
Storage Tips
- After frying, place the chimichangas on a paper towel-lined plate to drain any excess butter.
- These are best served fresh, but you can store them in an airtight container in the refrigerator for up to a day. Reheat in the oven or microwave until warmed through.
- For longer storage, consider freezing the assembled but unfried chimichangas. When you’re ready, thaw and fry as instructed.
Gift Packaging Ideas
If you’re considering gifting these delightful treats, packaging them in decorative boxes or bags with a personal touch can make them even more special. Consider adding a ribbon around the box, including a handwritten note with the recipe, or packaging them in Mason jars for a rustic, homemade feel.
Flavor Variations
- Try adding different spices to the cheesecake filling, like nutmeg or cardamom, for a unique twist.
- Experiment with various types of fruit, such as blueberries, raspberries, or even caramelized bananas, for different flavor profiles.
- For a chocolate version, drizzle melted chocolate over the chimichangas before serving or add cocoa powder to the cheesecake filling.
Troubleshooting
- If your chimichangas are not sealing properly, ensure the tortillas are fresh and pliable. You can also brush the edges with a little water to help them stick together better.
- If the filling is too runny, refrigerate it for a few hours to firm up before assembling the chimichangas.
- Overcooking can make the chimichangas too dark and crispy. Keep an eye on them and adjust the cooking time as needed.
FAQs
- Can I freeze the chimichangas before frying? Yes, you can freeze them. Simply assemble the chimichangas, place them on a baking sheet lined with parchment paper, and put the sheet in the freezer until they’re frozen solid. Then, transfer them to a freezer-safe bag or container for storage. Fry them frozen, adding a minute or two to the cooking time.
- Is this recipe gluten-free? Depending on the type of tortillas used, this recipe can be gluten-free. Look for tortillas that are labeled as gluten-free to accommodate dietary restrictions.
- Can I double the recipe? Absolutely. Simply multiply all the ingredients by two. You might need to cook the chimichangas in batches to avoid overcrowding the skillet.
Conclusion
Making Strawberry Cheesecake Chimichangas is a fun and rewarding baking experience that yields a unique and delicious dessert perfect for any occasion. With its balance of flavors, ease of preparation, and impressive presentation, this recipe is sure to become a favorite. Don’t be afraid to experiment with different fillings and toppings to make it your own, and enjoy the process of creating something truly special for yourself and those you care about.
Strawberry Cheesecake Chimichangas (Crazy Easy & SO Good!)
A creative dessert combining strawberries, cheesecake, and chimichangas for a sweet and crunchy treat.
🥘 Ingredients
👩🍳 Instructions
-
1Prepare the cheesecake filling by mixing with sugar, vanilla, and cinnamon.
-
2Assemble the chimichangas by spreading jam, adding cheesecake mixture, and topping with strawberries.
-
3Fold and roll the chimichangas, then fry in melted butter until golden brown.
-
4Serve warm, dust with powdered sugar, or top with whipped cream and additional strawberries.