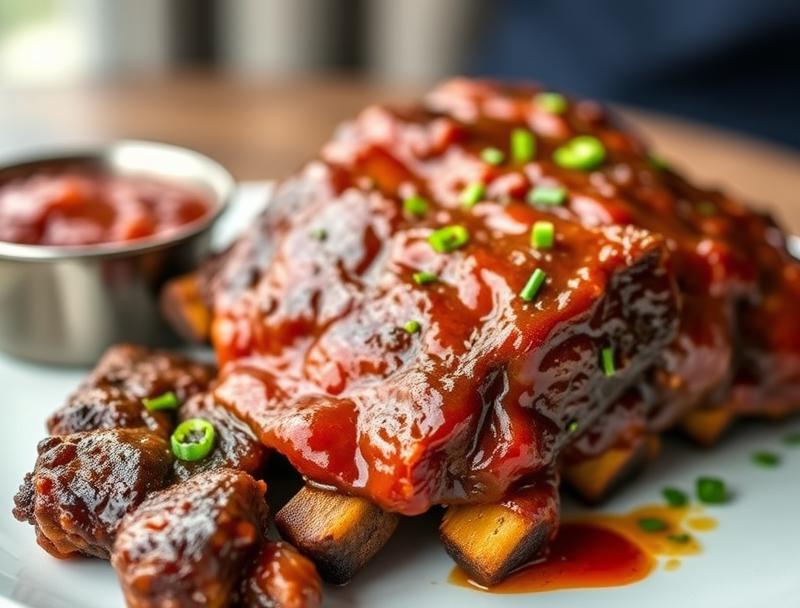
Finger-Licking Good Ultimate Barbecue Ribs
Introduction
Get ready for the most mouth-watering, finger-licking good barbecue ribs you’ve ever tasted! These ultimate barbecue ribs are not only incredibly delicious, but they’re also surprisingly easy to make using everyday ingredients. With a perfect balance of sweet, tangy, and smoky flavors, these ribs are sure to become a summer staple at your backyard barbecues and gatherings. The best part? You don’t need to be a grill master to achieve fall-off-the-bone tenderness and a flavor that will leave everyone begging for more. So, let’s dive into the world of barbecue ribs and explore what makes this recipe truly special.
Why This Works
- Flavor balance and ingredient accessibility: The combination of common ingredients like brown sugar, smoked paprika, and apple cider vinegar creates a depth of flavor that’s hard to resist. Plus, you can find all the ingredients at your local grocery store.
- Ease of preparation: The prep work is minimal, and the ribs can be cooked low and slow, allowing you to focus on other aspects of your gathering while the ribs do their magic.
- Impressive results with minimal effort: The end result is a rack of ribs that’s not only visually appealing but also packed with flavor, making it perfect for impressing your friends and family with minimal fuss.
Ingredients
- 2 racks of pork ribs (about 4 pounds each)
- 1/4 cup brown sugar
- 2 tablespoons smoked paprika
- 1 tablespoon chili powder
- 1 tablespoon ground cumin
- 1 tablespoon garlic powder
- 1 tablespoon onion powder
- 1 teaspoon salt
- 1/2 teaspoon black pepper
- 1/4 cup apple cider vinegar
- 1/4 cup barbecue sauce
- 2 tablespoons olive oil
- Wood chips or chunks for smoking (optional)
Instructions
- Step 1: Prepare the Ribs – Begin by removing the membrane from the back of the ribs. This will help the rub penetrate the meat and create a more tender final product. Trim any excess fat and cut the racks into manageable sections if needed.
- Step 2: Apply the Dry Rub – In a small bowl, mix together the brown sugar, smoked paprika, chili powder, cumin, garlic powder, onion powder, salt, and pepper. Apply the dry rub evenly to both racks of ribs, making sure to coat all surfaces.
- Step 3: Cook the Ribs – Preheat your grill to 275°F (135°C), using wood chips or chunks if you prefer a smokier flavor. Place the ribs on the grill, bone side down, and close the lid. Cook for 4-5 hours, or until the ribs reach an internal temperature of 160°F (71°C).
- Step 4: Glaze the Ribs – After 4 hours of cooking, brush the ribs with the apple cider vinegar and barbecue sauce mixture. Return the ribs to the grill for an additional 10-15 minutes, or until the glaze is caramelized and sticky.
Handy Tips
- To enhance the smoky flavor, use a water pan with wood chips or chunks in your grill. This will add a rich, depth of flavor to the ribs.
- For a spicier rib, increase the amount of chili powder in the dry rub or add a few dashes of hot sauce to the glaze.
- To ensure tender ribs, make sure to cook them low and slow. This will break down the connective tissues and create a fall-off-the-bone texture.
Heat Control
Maintaining a consistent temperature is crucial when cooking barbecue ribs. Aim for a temperature range of 275°F (135°C) to 300°F (150°C) throughout the cooking process. This will ensure that the ribs cook evenly and prevent them from becoming overcooked or burnt. Use a thermometer to monitor the temperature, and adjust the grill vents as needed to maintain a consistent heat.
Crunch Factor
The crunch factor is all about achieving a perfectly caramelized crust on the ribs. To achieve this, make sure to cook the ribs for the full 4-5 hours, and then brush them with the glaze during the last 10-15 minutes of cooking. The glaze will caramelize and create a sticky, crunchy crust that’s simply irresistible.
Pro Kitchen Tricks
- To add an extra layer of flavor, sprinkle a few tablespoons of brown sugar on the ribs during the last 30 minutes of cooking. This will create a rich, caramelized crust that’s sure to impress.
- For a more intense smoky flavor, use a combination of wood chips and chunks in your grill. This will add a deeper, more complex flavor to the ribs.
- To make cleanup easier, line the grill grates with aluminum foil before cooking the ribs. This will prevent the glaze from sticking to the grates and make cleanup a breeze.
Storage Tips
- Leftover ribs can be stored in an airtight container in the refrigerator for up to 3 days. Reheat them in the oven or on the grill until warmed through.
- To freeze the ribs, wrap them tightly in plastic wrap or aluminum foil and place them in a freezer-safe bag. Frozen ribs will keep for up to 2 months. Reheat them in the oven or on the grill until warmed through.
- The best containers for storing ribs are airtight containers with a tight-fitting lid. This will prevent moisture from entering the container and keep the ribs fresh for a longer period.
Gift Packaging Ideas
If you’re looking to give the gift of delicious barbecue ribs, consider packaging them in a decorative tin or container. You can add a few extra touches, such as a side of coleslaw or baked beans, to make the gift even more special. Simply wrap the ribs in plastic wrap or aluminum foil and place them in the container. Add a few garnishes, such as fresh herbs or a sprinkle of paprika, to make the gift look more appealing.
Flavor Variations
- Different spices: Try adding a few dashes of hot sauce or a sprinkle of cayenne pepper to the dry rub for an extra kick of heat.
- Creative toppings: Top the ribs with a variety of creative toppings, such as diced onions, chopped fresh herbs, or a sprinkle of crumbled blue cheese.
- Ingredient swaps: Swap out the brown sugar for honey or maple syrup, or use a different type of vinegar, such as balsamic or white wine vinegar, to create a unique flavor profile.
Troubleshooting
- Texture problems: If the ribs are too tough, try cooking them for a longer period of time. If they’re too tender, try reducing the cooking time.
- Ingredient replacements: If you don’t have a particular ingredient, try substituting it with a similar ingredient. For example, you can use honey instead of brown sugar or apple cider vinegar instead of barbecue sauce.
- Over/undercooking signs: If the ribs are overcooked, they’ll be dry and tough. If they’re undercooked, they’ll be raw and pink. Use a thermometer to ensure the ribs reach a safe internal temperature of 160°F (71°C).
FAQs
- Can I freeze the ribs? Yes, you can freeze the ribs for up to 2 months. Simply wrap them tightly in plastic wrap or aluminum foil and place them in a freezer-safe bag.
- Is this recipe gluten-free? Yes, this recipe is gluten-free, making it perfect for those with gluten intolerance or sensitivity.
- Can I double the recipe? Yes, you can double the recipe to feed a larger crowd. Simply multiply the ingredients and cooking time as needed.
Conclusion
And there you have it – the ultimate barbecue ribs recipe that’s sure to become a summer staple. With its perfect balance of sweet, tangy, and smoky flavors, these ribs are sure to impress your friends and family. So go ahead, give this recipe a try, and get ready for a finger-licking good time! Don’t forget to share your creations with us on social media and tag us in your posts. We’d love to see how your ribs turn out and hear about any variations or substitutions you make to the recipe. Happy grilling!
Finger-Licking Good Ultimate Barbecue Ribs
A recipe for delicious barbecue ribs with a perfect balance of sweet, tangy, and smoky flavors.
🥘 Ingredients
👩🍳 Instructions
-
1Prepare the ribs by removing the membrane and trimming excess fat.
-
2Apply the dry rub to the ribs, making sure to coat all surfaces.
-
3Cook the ribs on the grill at 275°F (135°C) for 4-5 hours, or until they reach an internal temperature of 160°F (71°C).
-
4Glaze the ribs with the apple cider vinegar and barbecue sauce mixture during the last 10-15 minutes of cooking.